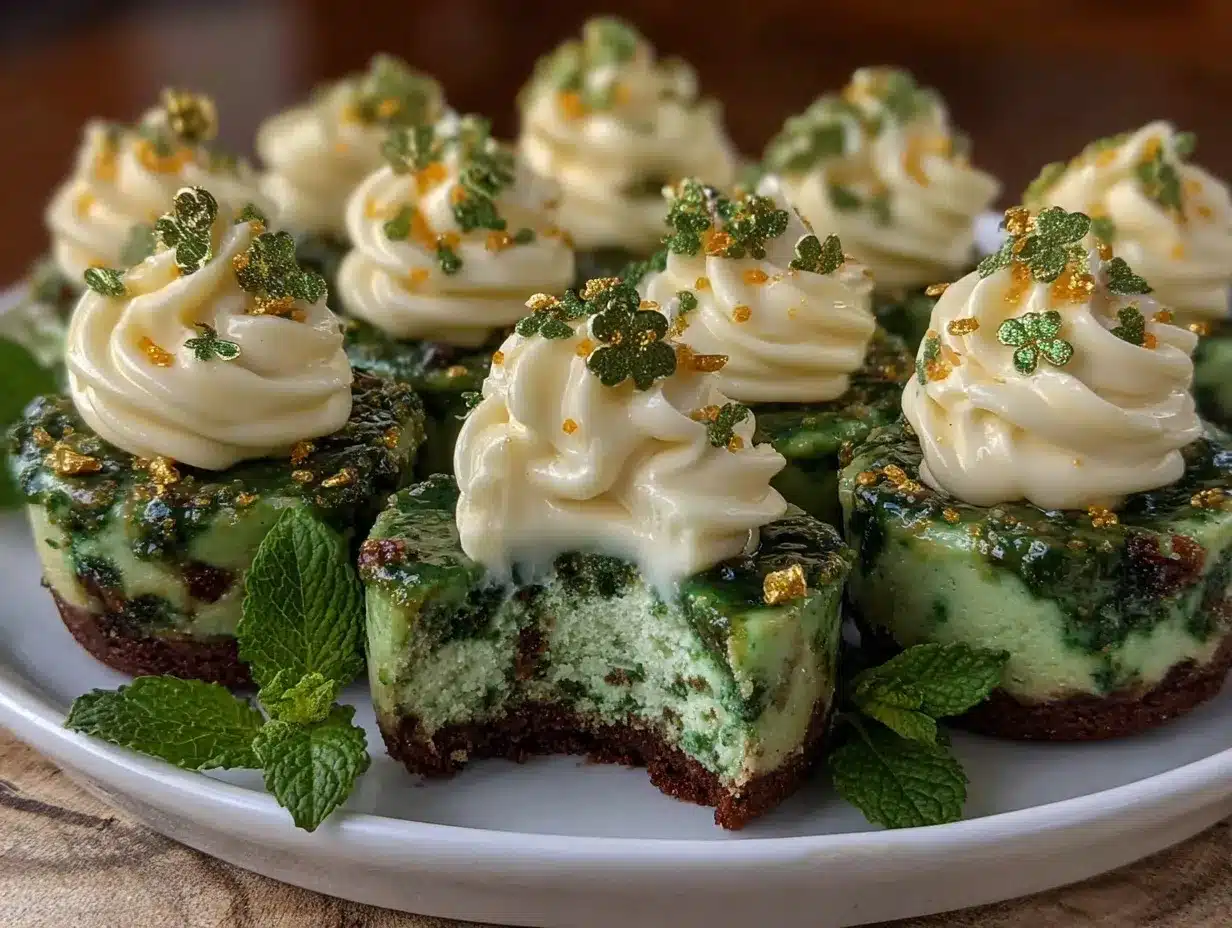
Picture this: the scent of sweet vanilla, cocoa, and creamy cheesecake swirling together in your kitchen, with a pop of vibrant green that feels like pure springtime magic. The first time I slid a tray of these Green Velvet Cheesecake Bites into my oven, I practically held my breath—could something this eye-catching really taste as dreamy as it looked? The answer, my friends, is a resounding yes. That first bite was a revelation: a buttery, cocoa-kissed velvet base topped with a luscious, tangy cheesecake layer, all wrapped up in a festive hue that made me grin from ear to ear.
Years ago, when I was knee-high to a grasshopper, my grandma used to whip up red velvet cakes for every special occasion. But it wasn’t until a rainy March weekend—when the world felt gray and I was craving a little color—that I decided to give her classic recipe a playful St. Patrick’s Day twist. I swapped in a splash of green food coloring, shrunk the cakes down to bite-sized treats, and added a cheesecake swirl that’s honestly dangerous. You know what? I wish I’d thought of this years earlier.
My family couldn’t stop sneaking these off the cooling rack (and I’ll admit, I kept a secret stash for myself with a cup of afternoon coffee). The color alone gets people talking, but it’s the rich flavor and creamy texture that really seal the deal. These Green Velvet Cheesecake Bites are perfect for potlucks, school parties, or just brightening up your Pinterest cookie board. I’ve tested them more times than I care to admit—in the name of research, of course—and they’ve become a staple for St. Patrick’s Day gatherings, gifting, and, let’s face it, late-night snacking. They feel like a warm hug with a wink of mischief, and you’re going to want to bookmark this one.
Why You’ll Love This Recipe
As someone who’s rolled out dozens of holiday treats for family, friends, and the occasional bake sale showdown, I can promise you: these Green Velvet Cheesecake Bites are a keeper. From chef-tested tweaks to countless taste tests, I’ve made sure this recipe hits the sweet spot every time. Here’s why you’ll find yourself making these again and again:
- Quick & Easy: Comes together in under an hour—no fussy techniques or chilling marathons required. Perfect for those “oops, I forgot the class party” moments or when St. Paddy’s Day sneaks up on you.
- Simple Ingredients: Nothing fancy here. Most of the ingredients are pantry staples you probably have on hand (think flour, sugar, cocoa, eggs, and cream cheese).
- Perfect for Celebrations: These bites are made for sharing—great for St. Patrick’s Day, birthday parties, or anytime you’re feeling festive. They’ll steal the show on any dessert table.
- Crowd-Pleaser: Kids love the color, grown-ups love the flavor, and everyone will ask you for the recipe. I’ve never brought home leftovers from a party (which is both a blessing and a curse).
- Unbelievably Delicious: The combo of soft, cocoa-rich velvet cake and smooth cheesecake is pure comfort food. They’re creamy, tangy, and just sweet enough—no one can eat just one.
What sets this Green Velvet Cheesecake Bites recipe apart? It’s all about the details: a touch more cocoa for depth, a swirl of cheesecake that bakes up soft (not rubbery), and just the right amount of food coloring for a cheerful green without that artificial aftertaste. I blend the cheesecake layer until silky—no lumps, no fuss. If you’ve tried other versions and found them dry or bland, you’re in for a treat here.
Honestly, these bites are more than just dessert—they’re a little moment of joy. The kind of thing that makes people stop, smile, and maybe sneak another when they think you’re not looking. Whether you’re impressing guests, surprising your kids, or just treating yourself, you’ll love how easy, reliable, and downright fun these are. It’s comfort food, but with a playful twist that keeps everyone coming back for more.
What Ingredients You Will Need
This recipe uses simple, wholesome ingredients to deliver bold flavor and that signature green velvet look—no complicated shopping list required! You’ll probably find most of these items in your pantry or fridge. Here’s what you’ll need for the perfect Green Velvet Cheesecake Bites:
- For the Green Velvet Base:
- 1 cup (125g) all-purpose flour (sifted for best texture)
- 2 tablespoons (15g) unsweetened cocoa powder (I like Hershey’s for a deep color)
- 3/4 cup (150g) granulated sugar
- 1/2 teaspoon baking powder
- 1/4 teaspoon baking soda
- 1/4 teaspoon salt
- 1/2 cup (120ml) vegetable oil (or melted coconut oil for a subtle twist)
- 1 large egg (room temperature for easier mixing)
- 1/2 cup (120ml) buttermilk (or 1/2 cup milk + 1/2 tablespoon vinegar)
- 1 teaspoon vanilla extract (pure is best, but use what you have)
- 1 tablespoon (15ml) green food coloring (gel works best for vivid color)
- 1 teaspoon white vinegar (helps activate the baking soda for a tender crumb)
- For the Cheesecake Layer:
- 8 oz (225g) cream cheese (softened to room temperature, full-fat for best results)
- 1/4 cup (50g) granulated sugar
- 1 large egg
- 1 teaspoon vanilla extract
- 1 tablespoon (8g) all-purpose flour (helps set the cheesecake layer)
- Pinch of salt
- Optional Garnishes:
- Sprinkles (gold or green for extra sparkle)
- White chocolate chips (press a few on top before baking)
- Powdered sugar (for dusting after baking)
Ingredient Notes & Substitutions:
- If you need gluten-free, swap the flour for a 1:1 gluten-free blend (I like King Arthur’s).
- Dairy-free? Use vegan cream cheese and coconut milk in place of buttermilk.
- No buttermilk? Mix regular milk with a splash of vinegar and let it sit for 5 minutes—it works perfectly.
- Gel food coloring gives the brightest green, but liquid works in a pinch (just add a bit more if needed).
- Can’t find cream cheese? Mascarpone makes a rich substitute, though it’s a touch sweeter.
Trust me, you don’t need anything wild or expensive—just a few strategic swaps if you’re working with allergies or special diets. These ingredients come together for a treat that’s as pretty as it is delicious.
Equipment Needed
You don’t need a fancy bakery setup to make Green Velvet Cheesecake Bites—just a few basic kitchen tools. Here’s what I use (and some handy alternatives if you’re short on gadgets):
- 12-cup muffin tin or mini muffin tin: I use a standard nonstick pan, but silicone works too (just place it on a baking sheet for stability).
- Paper liners: Grease the tin well if you’re skipping liners, but they make cleanup a breeze.
- Mixing bowls: At least two—one for the velvet base, one for the cheesecake layer. Glass or stainless steel is fine.
- Electric hand mixer or stand mixer: You can mix by hand, but a mixer gives a smoother cheesecake layer (and saves tired arms!).
- Measuring cups and spoons: For accuracy, especially with cocoa and food coloring.
- Rubber spatula: For scraping every last bit of batter and cheesecake goodness.
- Sifter: Optional, but sifting flour and cocoa gives a lighter base. I’ve used a mesh strainer in a pinch.
If you’re on a budget, basic hand tools get the job done. My first few batches were made with thrift store bowls and a wooden spoon—no shame in that! Just wash your muffin tin thoroughly after using food coloring (it can leave a tinge if left too long). For easy release, a little nonstick spray under the liners works wonders, and if you’re using silicone pans, rinse them with hot water right after baking to keep them in good shape.
Preparation Method
- Preheat and Prep: Preheat your oven to 350°F (175°C). Line a 12-cup muffin tin with paper liners (or grease well if you don’t have liners). This keeps the bites from sticking and makes cleanup a breeze.
- Mix the Green Velvet Base:
- In a medium bowl, sift together 1 cup (125g) flour, 2 tablespoons (15g) cocoa powder, 3/4 cup (150g) sugar, 1/2 teaspoon baking powder, 1/4 teaspoon baking soda, and 1/4 teaspoon salt.
- In a separate large bowl, whisk together 1/2 cup (120ml) oil, 1 egg, 1/2 cup (120ml) buttermilk, 1 teaspoon vanilla, 1 tablespoon (15ml) green food coloring, and 1 teaspoon vinegar. The batter should be a vibrant emerald green—add more coloring if needed.
- Gradually add the dry ingredients to the wet, mixing until just combined. Don’t overmix or your bites might get tough. The batter will be slightly thick, almost like a brownie mixture.
- Prepare the Cheesecake Layer:
- In a clean bowl, beat 8 oz (225g) cream cheese with 1/4 cup (50g) sugar until smooth and creamy—no lumps! (A hand mixer works best here.)
- Add 1 egg, 1 teaspoon vanilla, 1 tablespoon (8g) flour, and a pinch of salt. Beat until just combined and silky. Scrape down the bowl to make sure everything is mixed in.
- Assemble the Bites:
- Scoop about 1 tablespoon of green velvet batter into each muffin cup, spreading gently to cover the bottom. (If you want a dramatic swirl, reserve a teaspoon of batter for swirling on top.)
- Drop about 1 tablespoon of cheesecake mixture on top of each green velvet base. Tap the pan on the counter to settle the layers.
- If desired, dollop a small amount of remaining green batter on top and swirl gently with a toothpick or skewer for a marbled effect.
- Add Toppings (Optional): Sprinkle with green or gold sprinkles, a few white chocolate chips, or leave plain for a classic look.
- Bake: Bake in the preheated oven for 18-20 minutes (standard muffin size) or 12-14 minutes (mini muffin size). The cheesecake should be set around the edges but slightly jiggly in the center—it will firm up as it cools.
- Cool: Let the bites cool in the pan for 10 minutes, then transfer to a wire rack. They’ll set up fully as they cool. Don’t rush this step—the cheesecake layer is delicate straight from the oven.
- Chill (Optional): For the best texture, pop the bites in the fridge for 30 minutes to an hour before serving. They’ll slice cleaner and taste even creamier cold.
Troubleshooting Tips:
- If the cheesecake layer cracks, it’s probably overbaked—pull them out when the center is still just a touch wobbly.
- If the green color looks dull, try a gel coloring next time for a bolder pop.
- Cheesecake lumpy? Make sure your cream cheese is fully softened before mixing.
- Batter too thick? A splash of buttermilk loosens it up nicely.
Honestly, these Green Velvet Cheesecake Bites are forgiving—just follow the sensory cues (vivid green, creamy cheesecake, gentle jiggle) and you’re golden. I like to work assembly-line style: batter first, cheesecake next, swirl and bake. It’s quick, fun, and the results are always impressive.
Cooking Tips & Techniques
Let’s be real—sometimes little things make a huge difference in baking. Here are my top tips for Green Velvet Cheesecake Bites that look and taste bakery-worthy every time:
- Room Temperature Ingredients: Always use room temp eggs, cream cheese, and buttermilk. Cold dairy can give you lumpy cheesecake and uneven baking.
- Sift Flour and Cocoa: Sifting isn’t just for show—it prevents dry pockets and gives your velvet base that signature softness. When I skipped this step once, my bites turned out dense (not the good kind).
- Don’t Overmix: Once you add the dry ingredients, mix just until combined. Too much mixing means tough, rubbery bites (I learned this the hard way after a batch turned into hockey pucks).
- Check for Doneness: Cheesecake should be slightly wobbly in the middle when you pull them from the oven. They’ll firm up as they cool. Overbaking leads to cracks and dryness.
- Use Gel Food Coloring: For the most vivid green, gel is your friend. Liquid coloring can work, but you may need to use more, which can thin the batter.
- Swirl Gently: If you want a pretty marbled look on top, use a toothpick and go slow. Too much swirling blends the layers and muddies the color.
- Chill Before Serving: Cheesecake tastes best—and slices cleanest—when cold. Even 30 minutes in the fridge can make a world of difference.
- Batch Baking: Doubling the recipe? Bake in batches for even results. Crowding the oven sometimes leads to uneven baking (been there, done that).
Personal Lessons: I once left out the vinegar and wondered why my bites were flat and dense—don’t skip it! It reacts with the baking soda for that fluffy velvet crumb. Oh, and if you’re going for wow-factor color, don’t be shy with the food coloring. Better a bold green than a sad, washed-out shade.
Get your ingredients prepped and measured before starting (it keeps you calm, trust me). And don’t stress—if your swirls aren’t perfect, they’ll still taste amazing. That’s the fun of home baking!
Variations & Adaptations
One of the best things about these Green Velvet Cheesecake Bites is how easy they are to customize for different tastes, seasons, or dietary needs. Here are a few of my favorite twists:
- Gluten-Free: Swap the all-purpose flour for your favorite 1:1 gluten-free flour blend. I’ve had great results with King Arthur and Bob’s Red Mill—you won’t even notice the difference.
- Dairy-Free: Use vegan cream cheese (like Kite Hill or Tofutti) and coconut milk instead of buttermilk. The texture stays creamy and the flavor is still spot-on.
- Different Holidays: Change up the food coloring for any occasion—red for Valentine’s Day, orange for Halloween, or pastel shades for spring brunches.
- Flavor Boosts: Add a teaspoon of peppermint extract to the cheesecake layer for a minty twist, or swap vanilla for almond extract if you like a nuttier flavor.
- Fruit Swirl: Dollop a spoonful of raspberry or strawberry jam on top of the cheesecake layer before baking, then swirl gently for a fruity touch (so good in summer!).
- Nut-Free Option: This recipe is naturally nut-free, but always check your food colorings and garnishes if you’re avoiding allergens.
Personally, I love making a batch with mini chocolate chips sprinkled over the cheesecake layer—my kids call these “leprechaun bites.” For a grown-up version, a dash of instant espresso powder in the velvet base adds a mocha depth that’s irresistible with coffee.
If you want to use a different pan (like an 8-inch square), just adjust the baking time—about 25-28 minutes should do it. No matter how you riff, these Green Velvet Cheesecake Bites always turn out fun, festive, and totally snackable.
Serving & Storage Suggestions
Green Velvet Cheesecake Bites are best served chilled or at cool room temperature, which lets the cheesecake set perfectly and the flavors shine. For a party, I like to arrange them on a platter with a few gold coins or shamrock picks—kids love the extra touch!
- Serving Ideas:
- Pair with a cup of Irish coffee, hot cocoa, or a frosty glass of milk.
- Add a sprinkle of powdered sugar or a drizzle of white chocolate for extra flair right before serving.
- For a dessert board, mix these with other bite-sized treats for a colorful spread.
- Storage:
- Keep leftovers in an airtight container in the fridge—they’ll stay fresh for up to 5 days (if they last that long!).
- For longer storage, freeze the bites in a single layer on a baking sheet, then transfer to a freezer bag. Thaw in the fridge overnight before serving.
- To reheat, let them sit at room temperature for 15-20 minutes or zap in the microwave for 10 seconds—just enough to take the chill off, but not melt the cheesecake.
- Flavor Note: Like most cheesecake treats, these bites taste even better on day two—the flavors meld and the texture gets extra creamy. If you’re prepping for a party, baking ahead is actually a bonus.
Honestly, I’ve never had a batch last longer than a weekend, but knowing you can freeze them makes these a fantastic make-ahead treat for busy holidays.
Nutritional Information & Benefits
Each Green Velvet Cheesecake Bite (based on a batch of 12) has approximately:
- Calories: 180
- Fat: 10g
- Carbohydrates: 20g
- Protein: 3g
- Sugar: 14g
Key ingredients like cream cheese and eggs provide a bit of protein and calcium, while cocoa powder adds a touch of antioxidants. If you use low-fat cream cheese or a sugar substitute, you can lighten things up without sacrificing flavor. The recipe is naturally nut-free and can be easily adapted for gluten-free or dairy-free diets. Main allergens include eggs, dairy, and wheat, so always double-check your swaps if you’re baking for sensitive folks.
From a wellness perspective, these bites are a sometimes treat—a fun way to celebrate without going overboard. Honestly, I find that making homemade goodies lets me control the ingredients (and sneak in a little extra love) every time.
Conclusion
In the world of festive finger foods, these Green Velvet Cheesecake Bites are a true winner. They’re colorful, creamy, and so easy to whip up that you’ll want to make them for every holiday—or just because. The simple ingredient list, forgiving technique, and irresistible flavor make this recipe a keeper for bakers of all levels.
Don’t be afraid to customize: swap colors, add flavors, or try a new garnish to make them your own. Honestly, that’s half the fun! Personally, I love how these little bites bring people together—there’s just something about sharing a cheerful, homemade treat that puts a smile on everyone’s face.
If you try this Green Velvet Cheesecake Bites recipe, let me know in the comments or tag your creations on social media—I love seeing your twists and stories! Here’s wishing you a sweet, shamrock-bright St. Patrick’s Day (or any day you need a little luck and a lot of dessert).
Frequently Asked Questions
Can I make Green Velvet Cheesecake Bites ahead of time?
Absolutely! These bites actually taste better the next day. Just store them in an airtight container in the fridge for up to 5 days.
Can I freeze Green Velvet Cheesecake Bites?
Yes, you can! Place cooled bites in a single layer on a baking sheet, freeze until solid, then transfer to a freezer bag. Thaw overnight in the fridge for best texture.
What if I don’t have buttermilk?
No worries! Mix 1/2 cup milk with 1/2 tablespoon vinegar or lemon juice, let sit for 5 minutes, and use as a substitute.
How do I keep the cheesecake layer from cracking?
Don’t overbake. Pull the bites when the center is still a little jiggly—they’ll set as they cool. Chilling in the fridge also helps prevent cracks.
Can I use a different color for other holidays?
Definitely! Swap in red, pink, or orange food coloring for other celebrations. The recipe is super flexible—let your creativity shine!
Pin This Recipe!
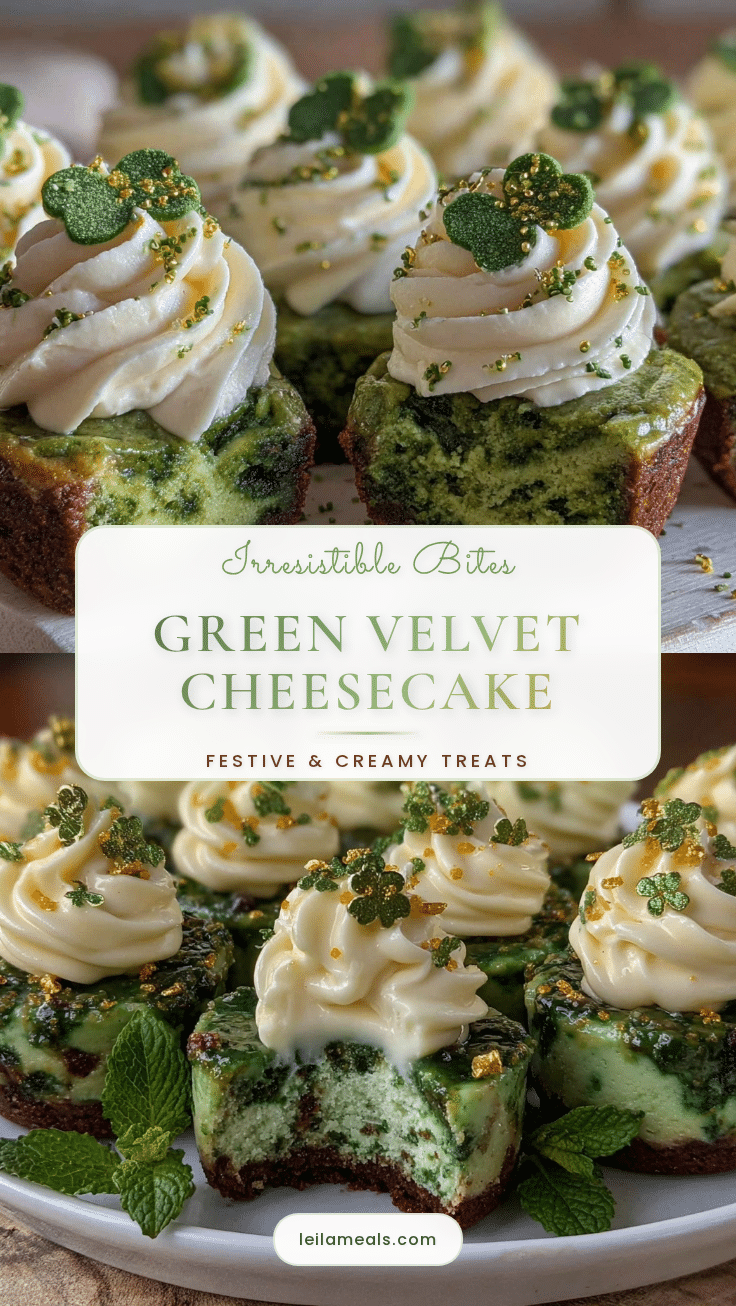
Green Velvet Cheesecake Bites

These Green Velvet Cheesecake Bites feature a cocoa-rich velvet base topped with a creamy cheesecake layer, all in a festive green hue. Perfect for St. Patrick’s Day, parties, or anytime you want a colorful, crowd-pleasing treat.
- Prep Time: 20 minutes
- Cook Time: 20 minutes
- Total Time: 40 minutes
- Yield: 12 bites 1x
- Category: Dessert
- Cuisine: American
Ingredients
- 1 cup all-purpose flour (sifted for best texture)
- 2 tablespoons unsweetened cocoa powder
- 3/4 cup granulated sugar
- 1/2 teaspoon baking powder
- 1/4 teaspoon baking soda
- 1/4 teaspoon salt
- 1/2 cup vegetable oil (or melted coconut oil)
- 1 large egg (room temperature)
- 1/2 cup buttermilk (or 1/2 cup milk + 1/2 tablespoon vinegar)
- 1 teaspoon vanilla extract
- 1 tablespoon green food coloring (gel preferred)
- 1 teaspoon white vinegar
- 8 oz cream cheese (softened, full-fat preferred)
- 1/4 cup granulated sugar
- 1 large egg
- 1 teaspoon vanilla extract
- 1 tablespoon all-purpose flour
- Pinch of salt
- Optional: Sprinkles (gold or green), white chocolate chips, powdered sugar for garnish
Instructions
- Preheat oven to 350°F (175°C). Line a 12-cup muffin tin with paper liners or grease well.
- In a medium bowl, sift together flour, cocoa powder, sugar, baking powder, baking soda, and salt.
- In a large bowl, whisk together oil, egg, buttermilk, vanilla, green food coloring, and vinegar until well combined.
- Gradually add dry ingredients to wet ingredients, mixing until just combined. Do not overmix.
- In a separate bowl, beat cream cheese and sugar until smooth and creamy.
- Add egg, vanilla, flour, and a pinch of salt to the cream cheese mixture. Beat until just combined and silky.
- Scoop about 1 tablespoon of green velvet batter into each muffin cup, spreading to cover the bottom. Reserve a teaspoon of batter for swirling, if desired.
- Drop about 1 tablespoon of cheesecake mixture on top of each green velvet base. Tap the pan to settle layers.
- If desired, dollop a small amount of remaining green batter on top and swirl gently with a toothpick for a marbled effect.
- Add optional toppings: sprinkles, white chocolate chips, or leave plain.
- Bake for 18-20 minutes (standard muffin size) or 12-14 minutes (mini muffin size), until cheesecake is set around the edges but slightly jiggly in the center.
- Cool in the pan for 10 minutes, then transfer to a wire rack to cool completely.
- For best texture, chill in the fridge for 30-60 minutes before serving.
Notes
Use room temperature ingredients for best results. Sift flour and cocoa for a lighter base. Don’t overmix the batter. For vivid color, use gel food coloring. Cheesecake layer should be slightly wobbly when removed from the oven. Chill before serving for best texture. Easily adapted for gluten-free or dairy-free diets.
Nutrition
- Serving Size: 1 bite (1/12 of reci
- Calories: 180
- Sugar: 14
- Sodium: 120
- Fat: 10
- Saturated Fat: 3
- Carbohydrates: 20
- Fiber: 1
- Protein: 3
Keywords: green velvet, cheesecake bites, St. Patrick's Day, easy dessert, party treat, velvet cake, cream cheese, festive baking