Let me set the scene for you: the aroma of rich, melted white chocolate swirling with the zing of fresh raspberries fills the kitchen, making you practically float toward the counter. That’s exactly what happens every time I make these creamy White Chocolate Raspberry Fudge Squares—especially around Valentine’s Day (when pink-tinted treats feel extra magical). The first time I whipped up this recipe, I was chasing that perfect blend of creamy, sweet, and a little tangy. You know, the kind of flavor combo that makes you pause, close your eyes, and smile because you’ve landed on something special.
These fudge squares have a history in my family. Years ago, when I was knee-high to a grasshopper, my grandma used to make a “mystery fudge” for Valentine’s, and I’d sneak pieces from the fridge, hoping she wouldn’t notice. Fast forward to today, and I’ve put my own spin on things—using real raspberries and velvety white chocolate to create a treat that’s pure, nostalgic comfort. Honestly, I wish I’d discovered this way of making fudge sooner. It’s dangerously easy, and let’s face it, the results speak for themselves.
When I first tested this batch, my kids kept sneaking pieces off the cooling rack (can you blame them?), and my partner declared it “the best fudge I’ve ever tasted.” These squares have since become a staple for family gatherings and Valentine’s parties—plus, they’re perfect for gifting. I’ve made them more times than I care to admit, all in the name of research, of course. Whether you’re looking to brighten up your Pinterest dessert board, surprise your sweetheart, or just treat yourself to something special, these Creamy White Chocolate Raspberry Fudge Squares are going to be your new go-to. It’s the kind of recipe that feels like a warm hug—bookmark this one, because you’ll want it again and again.
Why You’ll Love These Creamy White Chocolate Raspberry Fudge Squares
Let’s get honest—after testing dozens of fudge recipes, this one truly stands out. From my kitchen to yours, here are all the reasons you’ll be hooked:
- Quick & Easy: These fudge squares come together in under 30 minutes (plus chill time)—perfect for those last-minute Valentine’s cravings or when you need a fast dessert for a party.
- Simple Ingredients: Everything you need is probably already in your pantry. No fancy chocolate or hard-to-find berries—just the basics, done right.
- Perfect for Valentine’s Day: The pretty pink swirls and creamy texture make these squares a star on any holiday dessert table. They’re ideal for sharing, gifting, or setting out at brunch.
- Crowd-Pleaser: Kids, adults, and even the picky eaters in my family can’t resist these fudge squares. They disappear at lightning speed.
- Unbelievably Delicious: The combo of creamy white chocolate and tart raspberry is pure comfort—each bite has that melt-in-your-mouth magic with a fruity zing.
What sets this recipe apart? For starters, I blend fresh raspberries into a silky puree, which gets swirled right into the fudge for bursts of flavor and a gorgeous marbled look. No artificial flavors—just real fruit and luscious chocolate. If you’re a texture lover, the fudge is extra smooth thanks to a touch of condensed milk (trust me, it makes all the difference!). I’ve tried other versions, but this one nails the balance: not too sweet, not too tart, and absolutely perfect for a homemade Valentine’s treat.
Honestly, this recipe is more than just good—it’s the kind that makes you close your eyes after the first bite. Whether you’re baking for loved ones or just treating yourself, it brings that soul-soothing, nostalgic satisfaction we all crave. It’s also so easy, you can impress guests without breaking a sweat. If you want to turn an ordinary day into something memorable, these fudge squares will do it. That’s why I keep coming back to this recipe—time after time.
What Ingredients You Will Need
This recipe uses simple, wholesome ingredients to deliver bold flavor and a silky-smooth texture—without any fuss. Most of these are pantry staples, and a few are easy to swap if you have dietary needs or want something seasonal.
- For the fudge base:
- 2 ½ cups (425 g) high-quality white chocolate chips (I love Ghirardelli for melting smoothly)
- 1 can (14 oz / 396 g) sweetened condensed milk (adds richness and helps with that creamy texture)
- ¼ cup (56 g) unsalted butter (softened—makes the fudge extra velvety)
- Pinch of salt (balances out the sweetness)
- 1 tsp pure vanilla extract (go for real vanilla—trust me, it’s worth it)
- For the raspberry swirl:
- ¾ cup (90 g) fresh raspberries (frozen works too—just thaw and pat dry)
- 2 tbsp granulated sugar (helps create a smooth puree)
- 1 tsp lemon juice (optional, but brightens the raspberry flavor)
- Optional toppings:
- Extra whole raspberries for garnish
- White chocolate shavings (for a little extra flair)
- Edible gold flakes (if you’re feeling fancy)
Ingredient tips:
- If you need a gluten-free option, make sure your chocolate chips are certified GF—some brands sneak in wheat.
- You can swap dairy-free condensed milk and vegan white chocolate chips for a plant-based version.
- In summer, try swapping in blackberries or strawberries for a different twist—just puree and strain out seeds if you want a smooth swirl.
- If raspberries aren’t available, good-quality raspberry jam works (use about ¼ cup, swirl in just before chilling).
- For a lower sugar version, use unsweetened condensed milk and add a bit more vanilla.
I tested a few brands of white chocolate chips—Ghirardelli and Callebaut both melt beautifully and taste rich. If you only have bars, chop them up fine for even melting. When it comes to raspberries, fresher is always better, but frozen berries (thawed and drained) work just as well for the swirl. This recipe is super forgiving—just stick to the basics, and you’ll get that dreamy texture every time.
Equipment Needed
- 8×8-inch (20×20 cm) square baking pan: For perfect fudge squares (if you only have a 9×9 pan, fudge will be a little thinner—but still delicious!)
- Parchment paper: Makes removing and slicing fudge a breeze—trust me, don’t skip it.
- Medium saucepan: For melting the chocolate, butter, and condensed milk together.
- Mixing bowls: One for the raspberry puree, one for the fudge base.
- Small blender or food processor: Purees the raspberries smooth (if you don’t have one, mash berries with a fork and strain through a sieve for a rustic swirl).
- Rubber spatula: Essential for scraping every last bit of fudge mixture out of the pan.
- Toothpick or skewer: For swirling the raspberry puree into the fudge for that pretty marbled look.
If you’re on a budget, you don’t need fancy tools—a basic saucepan and a fork work in a pinch. Over the years, I’ve used everything from a hand-cranked food mill (messy, but it works) to a cheap mini blender for the raspberry swirl. One tip: parchment paper is worth its weight in gold for easy cleanup and perfect fudge edges. If you’re using non-stick pans, check for scratches—old pans can affect flavor. And, keep your spatula clean between swirls for the prettiest results!
Preparation Method
- Prep your pan: Line an 8×8-inch (20×20 cm) pan with parchment paper, leaving a slight overhang for easy lifting. Lightly grease if needed.
- Make the raspberry swirl:
- Combine ¾ cup (90 g) raspberries, 2 tbsp sugar, and 1 tsp lemon juice in a small blender or food processor. Blend until smooth.
- If you want a seedless swirl, pour the puree through a fine mesh sieve into a bowl, pressing gently to extract the juice. Discard seeds.
- Set aside.
- Melt the fudge base:
- In a medium saucepan over low heat, add 2 ½ cups (425 g) white chocolate chips, 1 can (396 g) sweetened condensed milk, ¼ cup (56 g) unsalted butter, and a pinch of salt.
- Stir constantly for 5-7 minutes, until everything is melted and combined. The mixture should be smooth, glossy, and thick.
- Remove from heat, then stir in 1 tsp vanilla extract.
- If the mixture separates or gets grainy, add 1-2 tbsp of milk and stir continuously until smooth again (don’t panic—it happens!).
- Pour and swirl:
- Pour the fudge mixture into your prepared pan. Smooth the top with a spatula.
- Dollop raspberry puree over the surface (about 1 tbsp at a time, spaced out).
- Use a toothpick or skewer to gently swirl the puree into the fudge, creating marbled patterns. Don’t overmix—leave pretty streaks!
- Chill the fudge:
- Cover pan loosely with foil or plastic wrap. Refrigerate for at least 3 hours, or until firm. Overnight is even better for easy slicing.
- Slice and serve:
- Lift fudge out using parchment tabs. Cut into 16 squares with a sharp knife, wiping the blade between cuts for neat edges.
- Garnish with extra raspberries or white chocolate shavings if you like.
Prep notes:
- If your fudge is too soft to slice, chill a bit longer or pop in the freezer for 15 minutes.
- For extra clean swirls, swirl the raspberry puree just before chilling—don’t wait.
- Stir fudge base gently; overheating can cause chocolate to seize.
- Always taste your raspberry puree before swirling—if it’s too tart, add a pinch more sugar.
Personal tip: I like to let my kids help with the swirling—sometimes the patterns aren’t perfect, but the memories sure are. If you’re in a rush, you can speed up chilling in the freezer, but don’t forget about it (fudge freezes fast!).
Cooking Tips & Techniques
Making fudge isn’t rocket science, but a few tricks can help you avoid the classic pitfalls. Here’s what I’ve learned over years (and a few sticky messes):
- Low and slow melting: Always melt the chocolate on low heat. High heat scorches chocolate fast—trust me, I’ve ruined more than one batch by rushing.
- Don’t overmix the swirl: It’s tempting to go wild with the toothpick, but gentle swirling gives you those gorgeous marbled patterns. Overmixing just blends the colors and flavors too much.
- Use fresh ingredients: Fresh raspberries give the brightest flavor and color, but frozen work if you thaw and drain well.
- Chill thoroughly: Fudge sets better the longer it chills. If you try to slice it too soon, it’ll be sticky and messy (I’ve made that mistake more than once!).
- Multitasking: While your fudge chills, prep your toppings or get your serving platter ready—it makes the final presentation a snap.
- Consistency check: If the fudge base seems too thick, add a splash of milk; too thin, melt in a few more chocolate chips.
Common mistakes to avoid:
- Using old or cheap chocolate chips can lead to a grainy texture—splurge on the good stuff if you can.
- Skipping the parchment paper means you’ll be prying fudge out by the chunk—learned that the hard way!
- Not tasting the raspberry puree before swirling (sometimes berries are extra tart and need a little sweetening).
One more tip: If you’re making fudge for a party, slice squares ahead of time and arrange them on a platter with fresh berries for a Pinterest-worthy look. You’ll get rave reviews every time!
Variations & Adaptations
Want to make these fudge squares your own? Here are some of my favorite ways to switch things up:
- Gluten-free version: Use certified gluten-free white chocolate chips and double-check all ingredients.
- Vegan/plant-based: Swap in dairy-free condensed milk and vegan white chocolate chips. Coconut oil can replace butter for a subtle tropical note.
- Berry swap: Try strawberries, blackberries, or blueberries for a seasonal twist. The method stays the same—just blend and swirl.
- Nutty crunch: Sprinkle chopped pistachios or sliced almonds over the top before chilling for added texture.
- Extra chocolate swirl: Melt a little dark chocolate and swirl it in with the raspberry puree for a three-tone marble effect.
- Jam swirl: If you’re short on time, swirl in raspberry or strawberry jam instead of fresh puree.
Cooking method adjustments:
- If you don’t have a stovetop, you can melt the fudge base in the microwave—heat in 30-second bursts, stirring well each time.
- For bite-sized treats, pour fudge into lined mini muffin tins instead of a square pan.
Personal favorite: I once added a hint of orange zest to the raspberry puree, and it brought a whole new brightness to the fudge. Don’t be afraid to experiment—this recipe is forgiving and fun to play with!
Serving & Storage Suggestions
These fudge squares taste best served chilled or at cool room temperature. I like to arrange them on a pretty platter with extra raspberries and a dusting of white chocolate shavings (makes them look Pinterest-perfect!). For a Valentine’s brunch, pair with champagne, coffee, or a fruity tea. They’re also adorable packed into gift boxes for friends and family.
To store:
- Keep squares in an airtight container in the fridge for up to 1 week.
- For longer storage, freeze in a single layer (or with parchment between layers) for up to 2 months. Thaw in the fridge overnight before serving.
Reheating isn’t necessary—these are meant to be enjoyed cold, but if you want a gooey treat, microwave a square for 10 seconds. Over time, the flavors meld together and the fudge gets even creamier (if you can wait that long!). Honestly, they never last long in my house, but if you manage to stash a few away, you’ll be rewarded with that same dreamy texture every time.
Nutritional Information & Benefits
Each White Chocolate Raspberry Fudge Square has an estimated:
- Calories: 160
- Fat: 7g
- Carbohydrates: 22g
- Sugar: 19g
- Protein: 2g
Health benefits:
- Raspberries are rich in antioxidants and Vitamin C (great for a winter immune boost).
- White chocolate provides calcium and energy.
- No gluten in the base if you use certified gluten-free chips.
Dietary notes: Contains dairy and may contain soy (check your chocolate brand). If you have nut allergies, skip nut toppings. I love that this recipe is easy to adapt for plant-based diets or lower sugar needs. In moderation, these fudge squares are a sweet way to celebrate and enjoy real ingredients.
Conclusion
So, why should you make these Creamy White Chocolate Raspberry Fudge Squares? Because they’re the kind of dessert that brings a smile to anyone’s face—whether it’s Valentine’s Day or just a regular Tuesday. You get bold flavor, dreamy texture, and a treat that looks as good as it tastes. Honestly, these fudge squares are a labor of love, and every batch reminds me of family, simple joy, and the magic of homemade sweets.
Feel free to tweak the recipe to fit your style—swap berries, use vegan ingredients, or add a crunchy topping. That’s the beauty of homemade fudge: it’s yours to make and enjoy however you like. If you try these squares, I’d love to hear about your version! Drop a comment, share your photos, or let me know if you come up with a new twist. These fudge squares are a warm hug in dessert form—so go ahead, treat yourself and spread a little joy.
Frequently Asked Questions
Can I use frozen raspberries for the fudge swirl?
Yes! Just thaw and pat them dry before blending. They work great and still give that bright flavor and color.
How do I keep the fudge from sticking to the pan?
Line your pan with parchment paper and leave a little overhang. This makes it super easy to lift out and slice the fudge neatly.
Can I make these fudge squares ahead of time?
Absolutely. They’re actually better the next day as the flavors meld. Store in the fridge until you’re ready to serve.
What’s the best way to get clean, even squares?
Use a sharp knife and wipe it between cuts. Chilling the fudge well before slicing helps too!
Can I use other berries for the swirl?
Definitely. Strawberries, blackberries, or blueberries work just as well. Just blend, strain, and swirl like you would with raspberries.
Pin This Recipe!

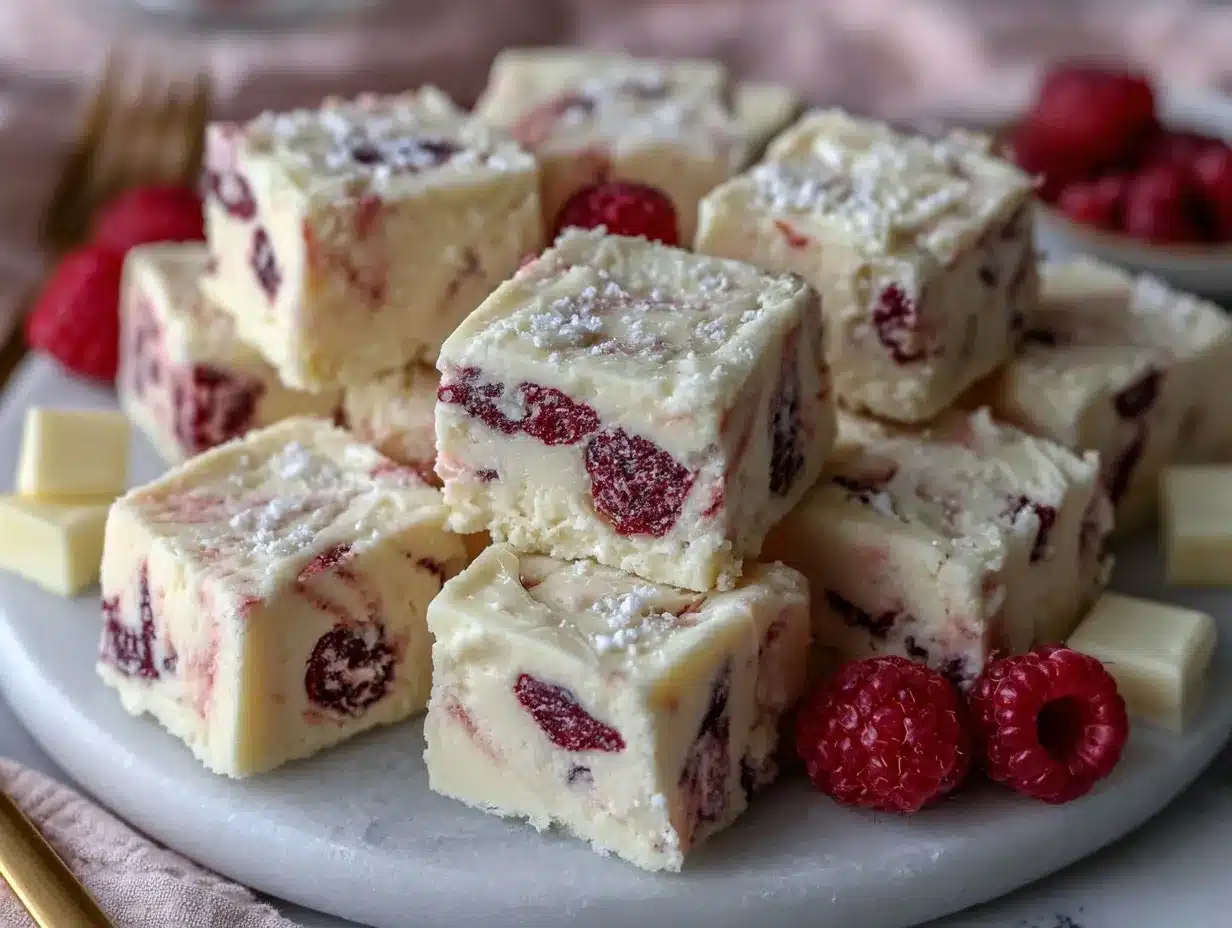
Creamy White Chocolate Raspberry Fudge Squares
These creamy White Chocolate Raspberry Fudge Squares combine velvety white chocolate with a tangy raspberry swirl for a dreamy, melt-in-your-mouth treat. Perfect for Valentine’s Day, gifting, or any time you crave a quick, crowd-pleasing dessert.
- Prep Time: 15 minutes
- Cook Time: 10 minutes
- Total Time: 3 hours 25 minutes (includes chilling)
- Yield: 16 squares 1x
- Category: Dessert
- Cuisine: American
Ingredients
- 2 1/2 cups (425 g) high-quality white chocolate chips
- 1 can (14 oz / 396 g) sweetened condensed milk
- 1/4 cup (56 g) unsalted butter, softened
- Pinch of salt
- 1 tsp pure vanilla extract
- 3/4 cup (90 g) fresh raspberries (or frozen, thawed and patted dry)
- 2 tbsp granulated sugar
- 1 tsp lemon juice (optional)
- Extra whole raspberries for garnish (optional)
- White chocolate shavings for garnish (optional)
- Edible gold flakes for garnish (optional)
Instructions
- Line an 8×8-inch (20×20 cm) pan with parchment paper, leaving an overhang for easy lifting. Lightly grease if needed.
- Combine raspberries, sugar, and lemon juice in a small blender or food processor. Blend until smooth. For a seedless swirl, strain through a fine mesh sieve. Set aside.
- In a medium saucepan over low heat, add white chocolate chips, sweetened condensed milk, butter, and a pinch of salt. Stir constantly for 5-7 minutes until melted and smooth. Remove from heat and stir in vanilla extract. If mixture separates, add 1-2 tbsp milk and stir until smooth.
- Pour fudge mixture into prepared pan and smooth the top. Dollop raspberry puree over the surface (about 1 tbsp at a time). Use a toothpick or skewer to gently swirl the puree into the fudge, creating marbled patterns.
- Cover pan loosely and refrigerate for at least 3 hours, or until firm. Overnight is best for easy slicing.
- Lift fudge out using parchment tabs. Cut into 16 squares with a sharp knife, wiping the blade between cuts. Garnish with extra raspberries or white chocolate shavings if desired.
Notes
For best results, use high-quality white chocolate chips. If using frozen raspberries, thaw and pat dry before blending. Chill fudge thoroughly before slicing for clean edges. For a vegan version, use dairy-free condensed milk and vegan white chocolate chips. Fudge can be stored in the fridge for up to 1 week or frozen for up to 2 months.
Nutrition
- Serving Size: 1 square (1/16 of re
- Calories: 160
- Sugar: 19
- Sodium: 30
- Fat: 7
- Saturated Fat: 4
- Carbohydrates: 22
- Fiber: 1
- Protein: 2
Keywords: white chocolate fudge, raspberry fudge, Valentine’s dessert, easy fudge, homemade candy, no bake dessert, creamy fudge, marbled fudge, party treats, edible gifts