Imagine the kitchen bustling with the giggles of little ones, the smell of melty cheese, and the sight of swirling, vibrant colors dancing across a crispy tortilla. That’s exactly what happens every time I whip up these Whimsical Dr. Seuss Swirly Cheese Quesadillas for Kids! The first time I made these, a rainy Saturday afternoon needed some serious cheering up. The minute those quesadillas hit the skillet, with their magical swirls of bright cheese, I swear the clouds parted—at least in my living room.
I was instantly hooked—not just by the fun, but by the pure, nostalgic comfort. These quesadillas aren’t just food; they’re edible art, a playful nod to childhood classics. When I was knee-high to a grasshopper, my grandma used to make simple cheese quesadillas as an after-school treat. Years later, inspired by a Dr. Seuss-themed bake sale (and a wild Pinterest scroll session), I decided to swirl in some color for extra whimsy. Honestly, I wish I’d thought of this years ago—it’s the kind of moment where you pause, take a deep breath, and just smile because you know you’re onto something truly special.
My kids couldn’t stop sneaking bites off the cooling rack (and I can’t really blame them). Even my husband, who usually claims he’s “not into kid food,” ended up requesting seconds. These Dr. Seuss Swirly Cheese Quesadillas have become a staple for family gatherings, lunch box surprises, and even gifting to neighbors. They’re dangerously easy to make and provide pure, nostalgic comfort—plus, they brighten up any Pinterest board with their playful look. If you love easy fun lunch ideas, you’re going to want to bookmark this one. I’ve tested this recipe more times than I can count—in the name of research, of course—and every time, it feels like a warm hug. Let’s face it, you know what’s good when everyone asks for the recipe!
Why You’ll Love This Recipe
When it comes to easy fun lunch ideas, these Dr. Seuss Swirly Cheese Quesadillas for Kids are a total game-changer. I’ve made them for birthday parties, lazy weekends, and even as a last-minute dinner when the fridge looked a little sad. Here’s why you’ll love whipping these up:
- Quick & Easy: Comes together in under 15 minutes—perfect for busy parents or hungry kids who just can’t wait!
- Simple Ingredients: No fancy grocery trips needed. If you’ve got tortillas, cheese, and a few pantry staples, you’re basically there.
- Perfect for Parties: These are a hit at Dr. Seuss-themed birthday parties, school lunches, or even just a colorful weekend treat.
- Crowd-Pleaser: Kids go wild for the swirly colors, and adults can’t resist the cheesy goodness.
- Unbelievably Delicious: The combo of crispy tortilla and gooey cheese with playful swirls is next-level comfort food.
What sets this quesadilla recipe apart isn’t just the look—it’s the technique. By blending shredded cheeses with natural food colors, you get vibrant swirls without any weird taste. I use a gentle folding method to keep the colors distinct, resulting in a picture-perfect snack (and honestly, it’s a blast for kids to help with the swirling part).
It’s not just another cheese quesadilla. This is my best version—fun, fast, and totally customizable. Whether you want to sneak in some veggies or use gluten-free tortillas, it works. And you know that feeling when you take a bite and just close your eyes for a second? That’s what these bring to the table. They’re comfort food reimagined—healthier, faster, but with the same soul-soothing satisfaction. You’ll impress guests with zero stress, and turn a simple lunch into a memorable, magical moment. Trust me, these whimsical quesadillas make everyone smile.
What Ingredients You Will Need
This easy fun lunch idea uses simple, wholesome ingredients to deliver bold flavor and eye-catching swirls. Most of these are pantry staples, and you can swap things in and out based on what you’ve got. Here’s what you’ll need for Dr. Seuss Swirly Cheese Quesadillas for Kids:
- Flour Tortillas – 4 large (about 10-inch/25cm each), or use gluten-free tortillas if preferred. Soft and fresh is best for easy folding.
- Shredded Cheese – 2 cups (200g) total, divided. Choose a mix for flavor and color! I prefer:
- Cheddar (sharp, for orange swirls)
- Mozzarella (for white swirls and stretchiness)
- Colby Jack or Monterey Jack (mild and creamy)
- Optional: Pepper Jack for a tiny kick (kids love the color but don’t worry, it’s not too spicy)
- Cream Cheese – 2 tablespoons (30g), softened. This helps the swirls stick together and adds a little richness.
- Natural Food Coloring – A few drops each of red, blue, and yellow. Gel colors work best for bold swirls. If you want all-natural, try beet juice (red), turmeric (yellow), or spirulina (blue-green).
- Butter or Olive Oil – 1 tablespoon (15g) for frying. Butter gives a golden crust—olive oil works for a lighter finish.
- Salt and Pepper – Just a pinch, to taste. I use sea salt for a little crunch.
- Optional Extras:
- Finely chopped spinach or bell peppers (sneak in some veggies!)
- Chopped ham or turkey for extra protein
- Guacamole, salsa, or Greek yogurt for dipping
Ingredient Tips: I always choose Tillamook for cheddar (it melts beautifully) and Organic Valley for mozzarella. If you’re going for gluten-free, Mission brand tortillas hold up well. For food coloring, Wilton gel colors are bright and easy to blend.
If you don’t have cream cheese, a little sour cream or Greek yogurt will do the trick. For a dairy-free version, use vegan cheese shreds and a plant-based tortilla. In summer, swap in fresh herbs or diced tomatoes for a garden-fresh twist. Honestly, these quesadillas are as flexible as you need—just use what you’ve got!
Equipment Needed
You don’t need a fancy setup for Dr. Seuss Swirly Cheese Quesadillas for Kids—just a few kitchen basics will do. Here’s what I use each time:
- Nonstick Skillet – 10-12 inch (25-30cm) is perfect. Cast iron works, but nonstick makes cleanup easier and keeps those swirls intact.
- Spatula – Wide and sturdy is best for flipping without tearing. I’ve used both silicone and metal; silicone is gentler on nonstick pans.
- Mixing Bowls – At least three, for separating cheese and coloring each batch.
- Small Spoons or Chopsticks – For swirling the cheese mixtures. Kids love helping with this part!
- Sharp Knife or Pizza Cutter – For slicing the cooked quesadillas into fun shapes or wedges.
If you don’t have a nonstick skillet, use a regular frying pan and just watch the heat—cheese can stick if you rush it. For mixing bowls, old yogurt containers work in a pinch (done that more than once). If you want picture-perfect swirls, chopsticks are surprisingly effective. Maintenance tip: wash pans with warm, soapy water and a soft sponge so they last much longer. Budget-wise, you can snag most tools at any grocery store—no need to break the bank!
Preparation Method
- Prep the Cheese (5 minutes)
Split your shredded cheese into three bowls (about 2/3 cup or 65g each). Add a few drops of natural food coloring to each bowl—red, blue, and yellow. Use a spoon or chopsticks to gently mix until the color is evenly distributed, but don’t overmix (you want streaks and swirls!). If using veggie-based colors, add a teaspoon at a time until you reach your desired hue. - Combine With Cream Cheese (2 minutes)
Add about 2 teaspoons (10g) of softened cream cheese to each bowl. Mix just enough to create sticky, swirly cheese blobs. This helps the swirls stay together when melted. If cheese looks too dry, add a splash of milk. - Assemble the Quesadillas (3 minutes)
Lay out your tortillas. Spoon blobs of each colored cheese onto half of each tortilla, alternating colors for a true Dr. Seuss look. Don’t go all the way to the edge—leave about 1/2 inch (1cm) border so the cheese doesn’t ooze out. Sprinkle a pinch of salt and pepper, and add optional veggies or ham if you like. - Fold and Press (1 minute)
Fold each tortilla in half, pressing gently to flatten without squishing the swirls. If you want extra crispy edges, brush lightly with melted butter or olive oil. - Cook the Quesadillas (5 minutes)
Heat skillet over medium (not high, or cheese burns). Add butter or oil. Place folded quesadillas in the pan and cook for 2-3 minutes per side, until golden brown and cheese is melty. If the cheese isn’t melting, lower the heat and cover for another minute. Flip carefully with a spatula—watch for escaping swirls! - Slice and Serve (2 minutes)
Transfer to a cutting board. Let cool for 1-2 minutes (so cheese sets a bit), then slice into wedges or fun shapes—stars, hearts, whatever your little ones fancy. Serve with dipping sauces or just enjoy as is!
Troubleshooting: If your cheese leaks, try pressing the edges with a fork before cooking. If swirls fade, use less mixing and brighter colors next time. For crispier tortillas, use a dry pan and finish with a quick broil in the oven.
Prep Notes: Don’t overcrowd the pan—work in batches if needed. Smell for that toasty, buttery aroma; that’s your cue it’s done right. These quesadillas should be golden, gooey, and bursting with swirly fun. My personal tip: let the kids help with the swirling and folding—it makes lunchtime a mini art project!
Cooking Tips & Techniques
After making these Dr. Seuss Swirly Cheese Quesadillas for Kids more times than I can count, I’ve picked up a few tricks. Let me share what works (and what doesn’t):
- Color Swirling: Use gel food colors for vivid swirls. Don’t overmix—gentle folding keeps the streaks bright. If you go wild with mixing, you’ll end up with muddy colors (learned that the hard way… more than once).
- Low and Slow: Keep the heat medium, never high. Cheese melts gradually, giving those swirls time to set. Rushing leads to burnt edges and unmelted cheese centers.
- Tortilla Choice: Fresh flour tortillas fold without cracking. Corn tortillas work, but tend to break—microwave for 10 seconds if needed to soften.
- Perfect Flip: Use a wide spatula and flip slowly. If you’re nervous, press the edges with a fork before cooking. I’ve torn more than a few quesadillas in my day by flipping too fast!
- Multitasking: Prep all cheese mixes before you start cooking. Set up a little assembly line so kids can help. It’s more fun, and you get lunch done faster.
- Consistency Counts: If you want every quesadilla to look Pinterest-worthy, measure your cheese blobs and place them in the same pattern each time. Otherwise, embrace the chaos—every swirl is unique!
Common mistakes include overfilling (cheese everywhere), using old tortillas (tears, sad faces), and forgetting to let quesadillas cool a bit before slicing (molten cheese burns!). My biggest lesson? Don’t stress about perfection. The joy is in the colors, the fun, and the crispy, cheesy bites. The kids will love them, no matter what!
Variations & Adaptations
One thing I love about Dr. Seuss Swirly Cheese Quesadillas for Kids is how flexible they are. Here are some favorite twists:
- Dietary Swaps: Use gluten-free tortillas and dairy-free cheese if needed. I’ve made these with Daiya shreds—still melty and colorful!
- Seasonal Additions: In summer, add chopped fresh tomatoes and basil for a “green eggs and ham” vibe. In winter, toss in roasted sweet potato for extra color.
- Flavor Boosts: Sprinkle taco seasoning or smoked paprika into your cheese mix for a savory kick. For adventurous eaters, a dash of hot sauce works wonders.
- Cooking Methods: Bake in the oven at 375°F (190°C) for 10 minutes for hands-off cooking. Air fryer works too—400°F (200°C) for 3-4 minutes per side.
- Allergen Adaptations: Swap regular cheese for nut-free or soy-based versions. Use wraps made from chickpea flour or cassava for grain-free diets.
My personal favorite? Adding diced avocado and a sprinkle of cilantro after cooking. It’s a fresh twist that my family asks for on repeat. Honestly, these quesadillas are just as fun to customize as they are to eat!
Serving & Storage Suggestions
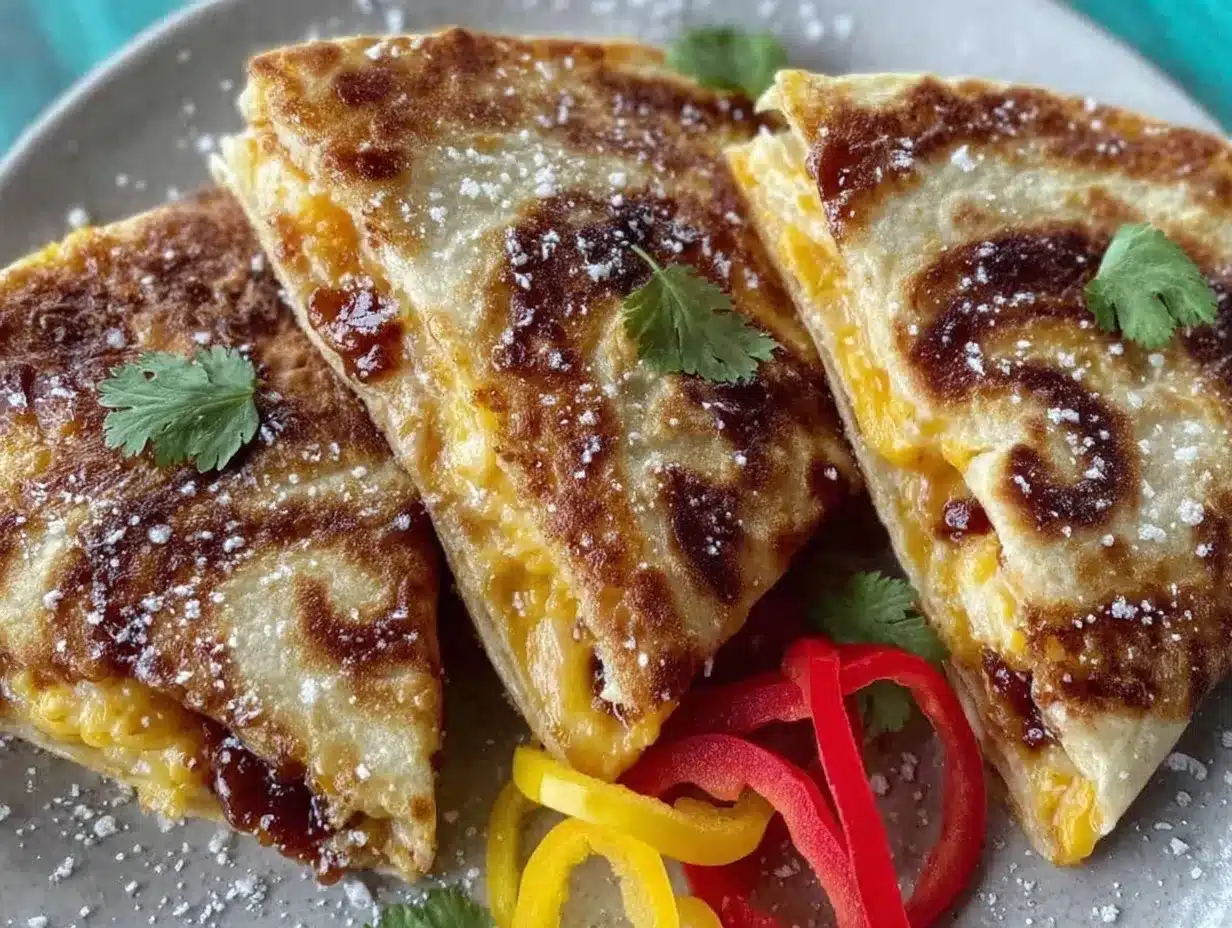
For best results, serve your Dr. Seuss Swirly Cheese Quesadillas for Kids hot and fresh—right off the skillet, when the cheese is still gooey and the colors are bright. Arrange them on a platter with whimsical shapes (stars, hearts, triangles) for an extra Seussical touch. Pair with guacamole, salsa, or a yogurt-based dip for added flavor.
If you’re prepping ahead, let quesadillas cool, then store in an airtight container in the fridge for up to 3 days. They freeze surprisingly well—just layer with parchment between each piece and freeze for up to 1 month. Reheat in a toaster oven or skillet for 2-3 minutes until crispy. The colors might soften after a day, but the flavor gets richer as the cheese melds with the tortilla.
These quesadillas are a hit at parties, potlucks, and even as a quick snack after school. Serve alongside fruit kabobs or a simple salad for a balanced meal. And trust me, they disappear fast!
Nutritional Information & Benefits
Each Dr. Seuss Swirly Cheese Quesadilla (half a large tortilla) provides roughly 210 calories, 10g protein, 10g fat, and 20g carbs. The cheese offers calcium and protein essential for growing kids, while colorful veggie add-ins boost fiber and vitamins. Using whole wheat or gluten-free tortillas increases fiber content.
This easy fun lunch idea is nut-free and can be made gluten-free or dairy-free with simple swaps. Main allergens are wheat and dairy, so check your cheese and tortilla labels if needed. From a wellness perspective, I love that you can sneak in veggies and control sodium—plus, it’s way more satisfying than a plain sandwich!
Conclusion
If you’re searching for a lunch that’s easy, fun, and guaranteed to make kids smile, these Dr. Seuss Swirly Cheese Quesadillas for Kids are the answer. They’re fast, colorful, and endlessly customizable for every taste or dietary need. Honestly, I make these every month—and they never get old!
Try your own twists—add favorite veggies, swap in different cheeses, or make a rainbow swirl. That’s the real magic: you get to play with your food! I love this recipe because it brings together creativity, comfort, and pure joy in every bite.
If you give these a try, let me know how they turn out in the comments. Share your own swirly creations, or tag me if you post them on Pinterest—I’d love to see! Here’s to more playful lunches and happy memories around the kitchen table.
FAQs
Can I use corn tortillas instead of flour?
Yes! Corn tortillas work, but they’re a bit more delicate. Warm them first (microwave for 10 seconds) so they fold without cracking.
How do I get bright swirly colors without artificial dyes?
Try natural colors: beet juice for red, turmeric for yellow, and spirulina for blue-green. They’re safe and add fun color without any weird taste.
What cheeses melt best for swirly quesadillas?
Cheddar, mozzarella, and Colby Jack all melt smoothly and hold color well. Avoid low-fat cheese—it tends to get rubbery.
Can I make these ahead for school lunches?
Absolutely! Let them cool, slice, and pack in containers. They taste great cold, or you can reheat for 30 seconds in the microwave.
Are these suitable for gluten-free or dairy-free diets?
Yes, just use gluten-free tortillas and dairy-free cheese. I’ve had good results with Daiya and Mission gluten-free wraps.
Pin This Recipe!
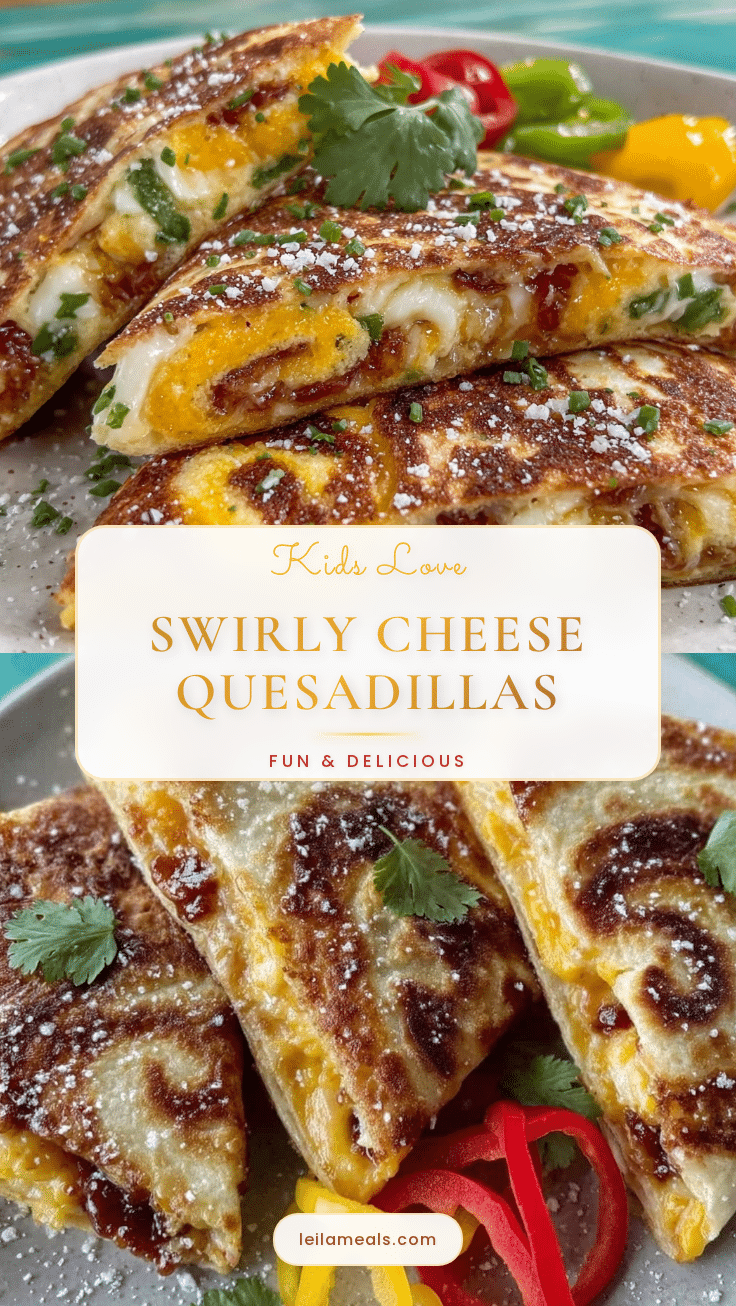
Dr. Seuss Swirly Cheese Quesadillas for Kids

These whimsical, colorful cheese quesadillas are a fun and easy lunch idea for kids, inspired by Dr. Seuss. With swirled, melty cheese and crispy tortillas, they’re a playful, customizable treat that brings smiles to any table.
- Prep Time: 10 minutes
- Cook Time: 6 minutes
- Total Time: 16 minutes
- Yield: 4 servings 1x
- Category: Lunch
- Cuisine: American
Ingredients
- 4 large (10-inch) flour tortillas (or gluten-free tortillas)
- 2 cups shredded cheese (cheddar, mozzarella, Colby Jack, Monterey Jack, or Pepper Jack)
- 2 tablespoons cream cheese, softened
- Natural food coloring (red, blue, yellow) or beet juice, turmeric, spirulina
- 1 tablespoon butter or olive oil for frying
- Salt and pepper, to taste
- Optional: finely chopped spinach or bell peppers
- Optional: chopped ham or turkey
- Optional: guacamole, salsa, or Greek yogurt for dipping
Instructions
- Prep the Cheese (5 minutes): Split shredded cheese into three bowls (about 2/3 cup each). Add a few drops of food coloring to each bowl—red, blue, and yellow. Gently mix until color is distributed, leaving streaks and swirls.
- Combine With Cream Cheese (2 minutes): Add about 2 teaspoons of softened cream cheese to each bowl. Mix just enough to create sticky, swirly cheese blobs. Add a splash of milk if cheese looks dry.
- Assemble the Quesadillas (3 minutes): Lay out tortillas. Spoon blobs of each colored cheese onto half of each tortilla, alternating colors. Leave a 1/2-inch border. Sprinkle with salt, pepper, and optional veggies or ham.
- Fold and Press (1 minute): Fold each tortilla in half and press gently to flatten. Brush with melted butter or olive oil for extra crispiness.
- Cook the Quesadillas (5 minutes): Heat skillet over medium. Add butter or oil. Cook folded quesadillas for 2-3 minutes per side until golden brown and cheese is melted. Flip carefully.
- Slice and Serve (2 minutes): Let cool for 1-2 minutes, then slice into wedges or fun shapes. Serve with dipping sauces or enjoy as is.
Notes
For best swirls, use gel food coloring and don’t overmix the cheese. Fresh tortillas fold best. Let kids help with swirling for extra fun. For gluten-free or dairy-free, use suitable tortillas and cheese. Quesadillas can be made ahead and reheated. Add veggies or protein for variety.
Nutrition
- Serving Size: 1/2 large quesadilla
- Calories: 210
- Sugar: 1
- Sodium: 350
- Fat: 10
- Saturated Fat: 6
- Carbohydrates: 20
- Fiber: 1
- Protein: 10
Keywords: kids lunch, cheese quesadilla, Dr. Seuss, fun lunch, colorful quesadilla, easy lunch, party food, gluten-free option, dairy-free option