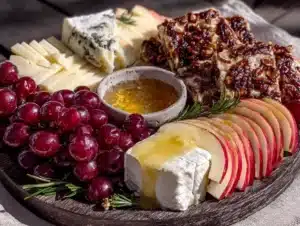
I was standing in the produce aisle last October, honestly just trying to grab a few things for the week, when this scent hit me. It sounds ridiculous, but it was the smell of a Honeycrisp apple—that sharp, sweet, almost floral note when you crack one open. And just like that, I was seven years old, sitting on a splintery wooden bench at my aunt Margaret’s farm stand.
She wasn’t really my aunt, you know. She was just this older woman who ran the little stand down the road from my grandma’s house, and she always let me pick out one apple for free. I’d sit there with her for an hour, eating it while she told me about the deer that ate her petunias or the way her husband refused to use a leaf blower. That bench is gone now, and so is the farm stand, and I honestly can’t remember the last time I thought about her. But that smell—that specific, crisp apple smell—brought the whole memory back in a flash.
I bought a bag of Honeycrisps that day, maybe three pounds, with no real plan. I just knew I wanted to do something with them that felt like that memory. Something warm, something shared, something that made you want to sit down and stay awhile. And that’s how this cozy fall charcuterie board with Honeycrisp apples was born. It’s not fancy. It’s not complicated. But every time I put it together, I think of that bench, and I hope it makes you feel something good too.
Why You’ll Love This Recipe
Let me be honest with you—I’ve made a lot of charcuterie boards in my time. Some were hits, some were… well, let’s just say the cheese-to-cracker ratio was off. But this cozy fall charcuterie board with Honeycrisp apples is the one I keep coming back to. It’s the one I make for book club, for Thanksgiving appetizers, for those random Thursday nights when I just need something pretty to snack on.
- Quick & Easy: This board comes together in about 20 minutes. No cooking, no stress, just arranging and snacking. Perfect for when you have people showing up soon or when you just want a nice dinner for one.
- Simple Ingredients: Everything on this board is easy to find at any grocery store. No specialty shops, no obscure cheeses, no hunting down imported crackers. You probably already have some of these things in your fridge.
- Perfect for Fall Gatherings: Whether it’s a Halloween party, a Friendsgiving, or just a cozy night in with a movie, this board fits. It’s the kind of spread that makes people linger around the kitchen island.
- Crowd-Pleaser: I’ve served this to kids, adults, picky eaters, and foodie friends. Everyone finds something they love. The sweet and salty combo is basically irresistible.
- Unbelievably Delicious: The combination of creamy brie, sharp cheddar, spicy salami, and crisp Honeycrisp apples is next-level comfort food. And the honey drizzle? Close your eyes after that first bite. I mean it.
What makes this board different is the apple. Most charcuterie boards use grapes or dried fruit, but Honeycrisps bring this incredible crunch and juiciness that cuts through the richness of the cheese. Plus, they’re sturdy enough to hold up for hours without getting mushy. It’s not just another board—it’s the best version of a fall board, tested and approved by everyone who’s tried it.
What Ingredients You Will Need
This recipe uses simple, seasonal ingredients to create a board that feels special without being fussy. Most of these are pantry staples or easy fall finds, and I’ve included notes to help you pick the best options.
For the Cheese
- Brie cheese (8 oz wheel) – Go for a double or triple cream brie for maximum creaminess. I like the brand President for consistent quality.
- Aged sharp cheddar (6 oz) – Look for a block you can cut into slices or cubes. The sharper the better—it balances the sweet apples.
- Goat cheese log (4 oz) – The tangy, crumbly texture adds a nice contrast. Chavrie is my go-to, but any fresh goat cheese works.
- Manchego (4 oz) – A firm, nutty Spanish cheese that pairs beautifully with honey and apples. You can sub with aged gouda if needed.
For the Meats
- Prosciutto (4 oz, thinly sliced) – Look for slices that aren’t too wet or torn. I prefer Boar’s Head or Dietz & Watson.
- Genoa salami (4 oz) – Get it sliced thick or thin, your call. I like it thick for a chewier bite.
- Soppressata (4 oz) – This spicy, dry-cured Italian salami adds a nice kick. Regular salami works too if you can’t find it.
For the Fruit & Produce
- Honeycrisp apples (2 large) – The star of the show! Pick firm apples without soft spots. You’ll slice one and leave one whole for visual interest.
- Dried figs (1/2 cup) – Chewy and sweet. Mission figs are great, but any dried fig works.
- Red grapes (1 cup) – Small clusters add color and a pop of sweetness. Wash and dry them well so they don’t make the board soggy.
- Fresh rosemary sprigs (2-3) – Not just for garnish! The aroma adds a subtle woodsy note.
For the Crunch & Spread
- Artisan crackers (about 20-25) – I like a mix of water crackers and rosemary olive oil crackers. Raincoast Crisps are my favorite for fall boards.
- Baguette (1 small) – Slice it thin and toast lightly, or leave it soft. Both work.
- Honey (for drizzling) – Local honey is best, but any good quality honey works. I love Savannah Bee Company for their wildflower honey.
- Fig jam or apple butter (1/4 cup) – Adds a sweet, spreadable element. I use Bonne Maman Fig Preserves.
For the Garnish
- Toasted walnuts (1/2 cup) – Toast them in a dry pan for 3-4 minutes until fragrant. They get so much better this way!
- Pumpkin seeds (1/4 cup) – Optional, but adds a nice fall touch.
- Fresh thyme sprigs (a few) – For color and a little herby scent.
Equipment Needed
You don’t need much for this board, and I’ve included some easy swaps if you’re missing something.
- Large wooden board or serving platter – A 12×18 inch board is ideal. I use an acacia wood board I found at HomeGoods for $15. A large cutting board or even a baking sheet lined with parchment works too.
- Cheese knives – At least two: one for soft cheese (like brie) and one for hard cheese (like cheddar). If you don’t have cheese knives, small butter knives work fine.
- Small bowls or ramekins – For the honey, fig jam, and nuts. I like using mismatched vintage ramekins for a rustic look.
- Sharp knife and cutting board – For slicing apples, cheese, and bread. A serrated knife works best for baguettes.
- Paring knife – For making decorative cuts on apples if you’re feeling fancy.
- Kitchen shears – For snipping rosemary and thyme sprigs. Clean scissors work too.
- Tongs or small spoons – For serving. Not strictly necessary, but nice for guests.
Pro tip: If your board is new, rub it with a little mineral oil to keep it from drying out. And if you’re using a baking sheet, cover it with a cloth napkin or some parchment for a more polished look.
Preparation Method
Here’s how to put this board together. It’s more about arranging than cooking, but a little planning goes a long way.
- Prep the cheese (5 minutes): Take the brie out of the fridge 20 minutes before serving so it softens. Cut the cheddar into thin slices or small cubes. Slice the manchego into thin triangles. Leave the goat cheese whole or slice it into rounds—your call.
- Prep the apples (5 minutes): Wash and dry the Honeycrisp apples. Slice one apple into thin wedges, about 8-10 slices. Leave the core and seeds—they look pretty and keep the slices from browning too fast. Leave the second apple whole as a centerpiece. Toss the sliced apples in a little lemon juice if you want to prevent browning, but honestly, they’ll be eaten too fast for it to matter.
- Toast the nuts (3 minutes): In a dry skillet over medium heat, toast the walnuts for 3-4 minutes, shaking the pan often. You’ll know they’re done when they smell warm and nutty. Let them cool completely.
- Arrange the cheese (3 minutes): Place the brie wheel on the left side of the board, the goat cheese log on the right, and the cheddar and manchego in the middle. Space them out so they’re easy to reach. I like to put the soft cheeses on opposite ends so people have to walk around the board—it encourages mingling.
- Add the meats (2 minutes): Fold the prosciutto slices into loose ribbons and place them near the brie. Fan out the salami and soppressata slices near the cheddar. Don’t stack them too neatly; a little messy looks more inviting.
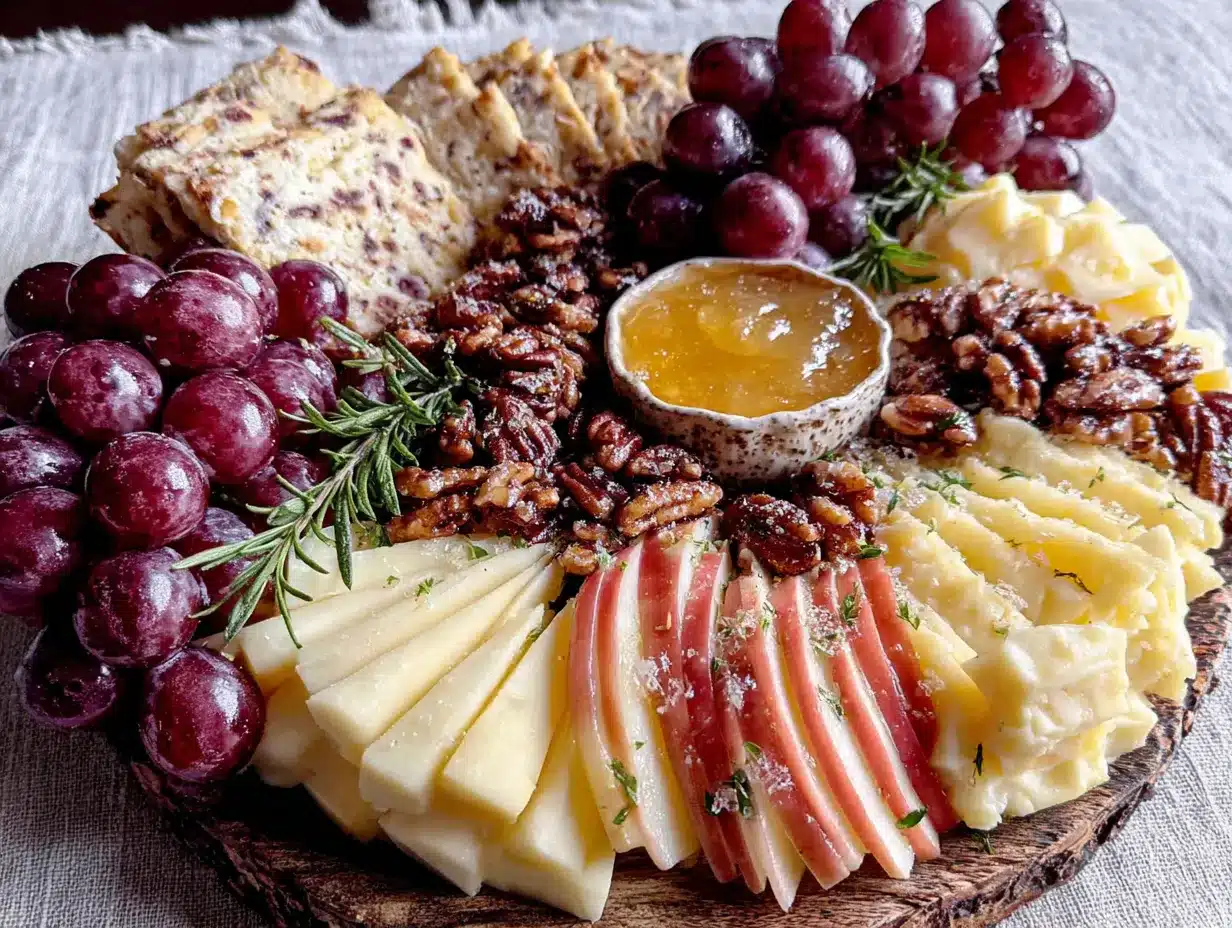
- Place the fruit (3 minutes): Put the whole Honeycrisp apple in the center of the board as a focal point. Arrange the sliced apple wedges in a fan pattern near the manchego. Tuck the dried figs and grape clusters into the gaps—they add color and fill empty spaces.
- Add the crunch (2 minutes): Pile the crackers and baguette slices in two or three spots around the board. I like to put some near each cheese so people don’t have to reach too far. Break a few crackers in half for texture variety.
- Fill the bowls (2 minutes): Spoon the fig jam into one small ramekin and the honey into another. Place them near the brie and goat cheese. Put the toasted walnuts and pumpkin seeds in a third bowl or just scatter them around.
- Garnish (1 minute): Tuck fresh rosemary and thyme sprigs around the board. They add color and a lovely fall scent. Drizzle a little honey over the brie and goat cheese—just a light zigzag, not a pool.
- Final check (1 minute): Step back and look at your board. Fill any obvious gaps with extra crackers or apple slices. Make sure everything is reachable. Add a few extra walnuts or figs if it looks sparse.
Sensory cue: Your board should look like a fall harvest—warm colors, varied textures, and a little bit of abundance. You should smell the honey, the apples, and the rosemary all mingling together.
Cooking Tips & Techniques
I’ve made this board probably twenty times now, and I’ve learned a few things the hard way. Here are my best tips.
Don’t overthink the arrangement. I used to stress about making everything perfect, but honestly, a little chaos looks more appealing. Start with the big items (cheese, whole apple) and fill in around them. You can always add more crackers.
Let the cheese breathe. This is the number one mistake people make. Cold cheese tastes like nothing. Take everything out of the fridge at least 20 minutes before serving. Brie needs closer to 30 minutes to get that gooey texture.
Slice apples at the last minute. If you slice them too early, they’ll brown. I slice mine right before I start arranging, and I don’t bother with lemon juice. They’re gone within an hour anyway. If you’re prepping ahead, keep the apple whole and slice it just before serving.
Balance the flavors. Every bite should have a mix of sweet, salty, creamy, and crunchy. If you have a lot of rich cheese, balance it with something acidic like apple slices or grapes. If you have salty meat, pair it with honey or fig jam.
Use a big enough board. I once tried to squeeze everything onto a small cutting board, and it was a disaster. Everything fell off. Go bigger than you think you need—empty space is better than overcrowding.
Toast your nuts. This is a tiny step that makes a huge difference. Raw walnuts are fine, but toasted walnuts are incredible. The heat brings out their natural oils and makes them taste almost buttery. Don’t skip this.
Prep in stages. I like to set out all my ingredients first, then arrange. It helps me see what I’m working with and avoid forgetting something. Plus, it’s less stressful than running back and forth to the fridge.
Variations & Adaptations
One of the best things about this board is how easy it is to change up. Here are some of my favorite variations.
Vegetarian Version
Skip the meats and double up on the cheese and fruit. Add some marinated artichoke hearts, roasted red peppers, and olives for extra savory flavor. I’ve done this for my vegetarian friends and they always clean the board.
Dairy-Free Version
Use dairy-free cheese alternatives—there are some great cashew-based brie options now. Or skip the cheese entirely and focus on meats, nuts, fruit, and crackers. Add hummus or a dairy-free pesto for spreadable options.
Sweet & Savory Fall Version
Add some dark chocolate squares (70% cacao or higher) and dried cranberries. Swap the cheddar for a blue cheese like gorgonzola. The combination of chocolate, blue cheese, and apple is surprisingly amazing.
Spicy Version
Add some pickled jalapeños or a spicy honey drizzle. Use pepper jack cheese instead of cheddar. The heat pairs beautifully with the sweet apples and creamy brie.
Breakfast Board
Serve this in the morning with some fresh croissants, yogurt, and a little bowl of granola. The Honeycrisp apples are perfect with a smear of brie and a drizzle of honey. I’ve done this for Christmas morning and it was a hit.
Personal variation: I once made this board with a handful of candied pecans instead of walnuts, and it was incredible. The sweet, crunchy coating added this extra layer of fall flavor. I still do it sometimes when I’m feeling fancy.
Serving & Storage Suggestions
This board is best served at room temperature, so let everything sit out for about 20 minutes before digging in. I like to set it out about 15 minutes before guests arrive so it’s ready when they are.
What to serve with it: This board is a meal on its own, but it pairs beautifully with a glass of crisp white wine like Sauvignon Blanc or a dry cider. For a non-alcoholic option, a sparkling apple cider is perfect. If you’re serving it as an appetizer, follow it with a warm soup or a hearty salad.
Storage: If you have leftovers (unlikely, but possible), separate the components. Store cheese in wax paper or cheese paper, not plastic wrap—it needs to breathe. Apples will keep in the fridge for a few days. Meat should be wrapped tightly and eaten within 2-3 days. Crackers and nuts can be stored in airtight containers at room temperature.
Reheating: You don’t really reheat a charcuterie board, but if you want to soften the brie again, pop it in the microwave for 10-15 seconds or in a 300°F oven for 5 minutes. The honey can be gently warmed if it crystallizes.
How flavors develop: Honestly, this board is best the day you make it. The apples stay crisp, the cheese is at its peak, and everything looks fresh. But if you have leftovers, the flavors actually meld together nicely overnight—just don’t expect the crackers to stay crunchy.
Nutritional Information & Benefits
I’m not a nutritionist, but I can tell you that this board has some surprising health benefits hidden in all that deliciousness.
| Nutrient | Approximate Value (per serving) |
|---|---|
| Calories | 450-550 |
| Protein | 18-22g |
| Fat | 30-35g |
| Carbohydrates | 30-35g |
| Fiber | 4-6g |
| Sugar | 15-20g |
Health benefits: Honeycrisp apples are packed with fiber and vitamin C. The cheese provides calcium and protein. Walnuts are full of omega-3 fatty acids, which are great for heart health. And honey has antioxidants and antibacterial properties. So yes, this is a treat, but it’s a treat with some redeeming qualities.
Dietary considerations: This board is naturally gluten-free if you skip the crackers and baguette (or use gluten-free alternatives). It’s also low-carb if you focus on the meat, cheese, and nuts. Watch out for the honey and fig jam if you’re watching sugar intake.
Allergens: This board contains dairy (cheese), tree nuts (walnuts), and gluten (crackers, baguette). If you’re serving a crowd with allergies, label the components or set out separate options.
Personal note: I love that this board lets me feel indulgent while still eating real, whole foods. It’s not a diet food, but it’s not junk food either. It’s just good, honest ingredients arranged beautifully.
Conclusion
This cozy fall charcuterie board with Honeycrisp apples has become a tradition in my house. I make it for the first cool day of autumn, for Thanksgiving, for any excuse to gather people around a table. It’s simple, it’s beautiful, and it tastes like everything good about fall.
I hope you’ll make it your own. Swap in your favorite cheeses, add whatever fruit looks good at the market, use the meats you love. That’s the beauty of a board—it’s never the same twice. And if you make it, I’d love to hear about it. Leave a comment below or tag me in your photos. Tell me what you changed, what you loved, what you’d try next time.
Honestly, this recipe is more than just food. It’s a way to slow down, to share something with the people you care about, to make a memory. And that’s the best kind of recipe there is. Now go build yourself a beautiful board—you deserve it.
Frequently Asked Questions
Can I make this board ahead of time?
You can prep the components a few hours ahead, but I recommend assembling the board no more than 30 minutes before serving. Slice the apples at the last minute to keep them from browning. Store cheese and meat in the fridge until you’re ready to arrange.
What if I can’t find Honeycrisp apples?
Any crisp, sweet apple will work. Fuji, Gala, or Pink Lady are great substitutes. Avoid mealy apples like Red Delicious—they won’t hold up on the board. Look for apples that are firm and have a nice snap when you bite into them.
How do I keep the apple slices from turning brown?
Toss them in a little lemon juice or lime juice. You can also use a solution of 1 part honey to 2 parts water—it works surprisingly well. But honestly, if you slice them right before serving, they’ll be fine. The board usually gets eaten too fast for browning to matter.
Can I serve this board warm?
You can! If you want a warm element, try baking the brie for 10-15 minutes at 350°F until it’s soft and gooey. Top it with some honey and walnuts before baking. It adds a lovely warm, melty element to the board. Just be careful moving it—it’s hot!
How much should I make per person?
For a snack or appetizer, plan on about 2-3 ounces of cheese and 2 ounces of meat per person. For a main meal, double that. A good rule of thumb is to fill a 12×18 inch board for 6-8 people. If you’re serving a crowd, make two boards or a really big one.
Pin This Recipe!
Cozy Fall Charcuterie Board with Honeycrisp Apples
A simple, beautiful charcuterie board featuring crisp Honeycrisp apples, creamy brie, sharp cheddar, and savory meats. Perfect for fall gatherings, this board comes together in 20 minutes and is a crowd-pleaser.
- Prep Time: 20 minutes
- Cook Time: 0 minutes
- Total Time: 20 minutes
- Yield: 6-8 servings
- Category: Appetizer
- Cuisine: American
Ingredients
- Brie cheese (8 oz wheel)
- Aged sharp cheddar (6 oz)
- Goat cheese log (4 oz)
- Manchego (4 oz)
- Prosciutto (4 oz, thinly sliced)
- Genoa salami (4 oz)
- Soppressata (4 oz)
- Honeycrisp apples (2 large)
- Dried figs (1/2 cup)
- Red grapes (1 cup)
- Fresh rosemary sprigs (2-3)
- Artisan crackers (about 20-25)
- Baguette (1 small)
- Honey (for drizzling)
- Fig jam or apple butter (1/4 cup)
- Toasted walnuts (1/2 cup)
- Pumpkin seeds (1/4 cup, optional)
- Fresh thyme sprigs (a few)
Instructions
- Prep the cheese (5 minutes): Take the brie out of the fridge 20 minutes before serving so it softens. Cut the cheddar into thin slices or small cubes. Slice the manchego into thin triangles. Leave the goat cheese whole or slice it into rounds.
- Prep the apples (5 minutes): Wash and dry the Honeycrisp apples. Slice one apple into thin wedges, about 8-10 slices. Leave the core and seeds. Leave the second apple whole as a centerpiece. Toss the sliced apples in a little lemon juice if desired.
- Toast the nuts (3 minutes): In a dry skillet over medium heat, toast the walnuts for 3-4 minutes, shaking the pan often. Let them cool completely.
- Arrange the cheese (3 minutes): Place the brie wheel on the left side of the board, the goat cheese log on the right, and the cheddar and manchego in the middle.
- Add the meats (2 minutes): Fold the prosciutto slices into loose ribbons and place them near the brie. Fan out the salami and soppressata slices near the cheddar.
- Place the fruit (3 minutes): Put the whole Honeycrisp apple in the center of the board. Arrange the sliced apple wedges in a fan pattern near the manchego. Tuck the dried figs and grape clusters into the gaps.
- Add the crunch (2 minutes): Pile the crackers and baguette slices in two or three spots around the board.
- Fill the bowls (2 minutes): Spoon the fig jam into one small ramekin and the honey into another. Place them near the brie and goat cheese. Put the toasted walnuts and pumpkin seeds in a third bowl or scatter them around.
- Garnish (1 minute): Tuck fresh rosemary and thyme sprigs around the board. Drizzle a little honey over the brie and goat cheese.
- Final check (1 minute): Step back and look at your board. Fill any obvious gaps with extra crackers or apple slices.
Notes
Let cheese come to room temperature for best flavor. Slice apples just before serving to prevent browning. Toast nuts for enhanced flavor. Use a large board to avoid overcrowding.
Nutrition
- Serving Size: 1 serving (approx. 1
- Calories: 450550
- Sugar: 1520
- Sodium: 600800
- Fat: 3035
- Saturated Fat: 1215
- Carbohydrates: 3035
- Fiber: 46
- Protein: 1822
Keywords: fall charcuterie board, Honeycrisp apple charcuterie, easy charcuterie board, fall appetizer, cheese board, apple charcuterie