My roommate asked why I couldn’t just use half the dough and freeze the rest. I was mid-rant about how cookie math doesn’t work like that—how scaling down a recipe messes with the ratios, how baking is chemistry, how you can’t just “halve an egg” without consequences. I had a whole speech prepared, honestly. I was ready to be the authority on cookie science.
Then I stopped. Because, well, I’d never actually tried it.
I’d spent years making giant batches of cookies—the kind that leaves you eating fifteen cookies over three days because you feel guilty tossing them. But that Tuesday night, I only wanted six. Maybe eight. I wanted that warm, melty, straight-from-the-oven experience without committing to a month of cookie-induced sugar comas. So I closed my mouth, grabbed a bowl, and decided to see if my roommate’s suggestion was actually crazy.
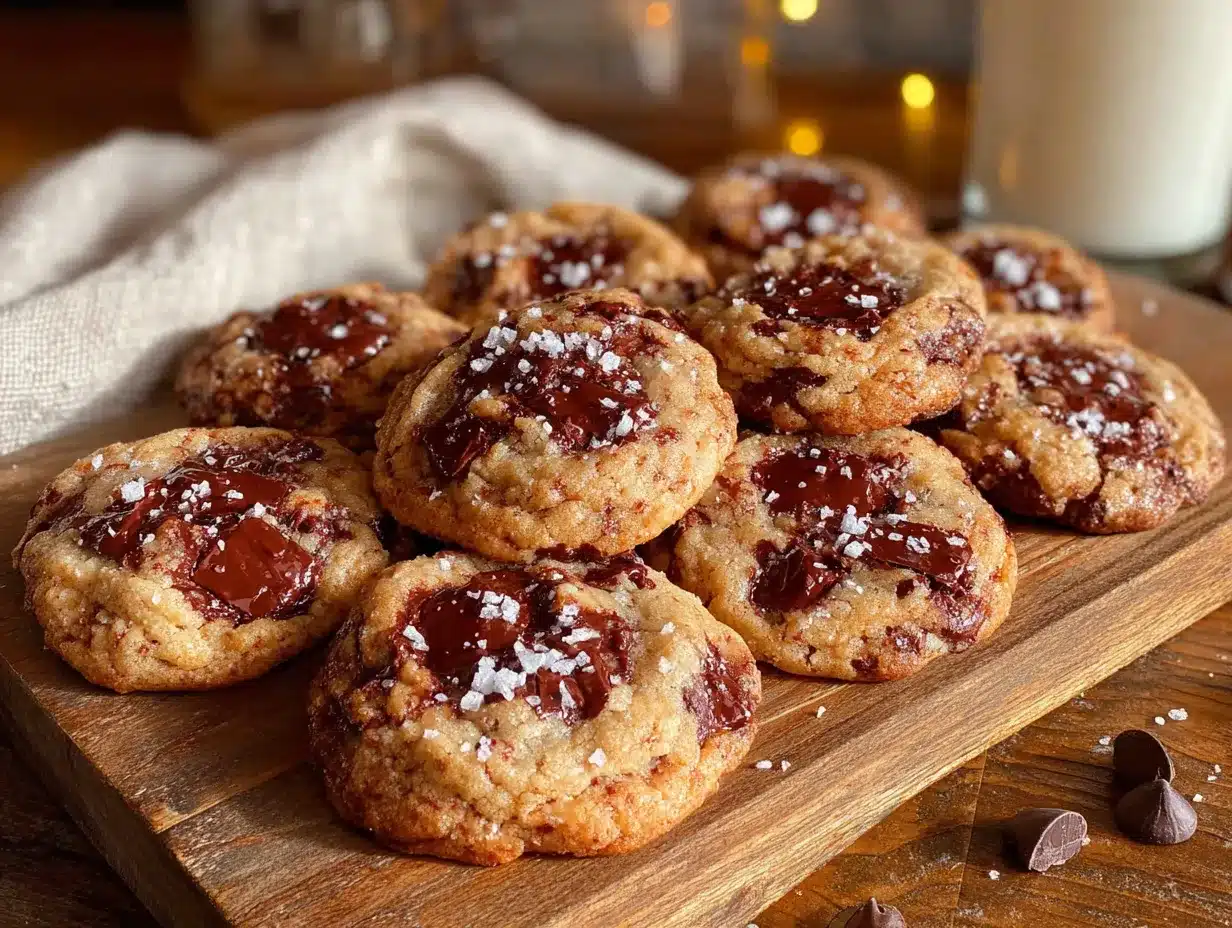
Spoiler: it wasn’t. It was genius. And it led me to develop this Perfect Small-Batch Chocolate Chip Cookies recipe that I honestly believe is the best way to make cookies. Period. No giant mixing bowls, no leftover dough taking up freezer space, no temptation to eat twelve cookies because they’re just sitting there. This recipe makes exactly one dozen perfect cookies, and let me tell you—that first batch came out of the oven looking like something from a bakery window. Golden edges, soft centers, those beautiful pools of melted chocolate. I actually texted my roommate a photo with the caption “you were right.” It hurt to type, but the cookies were worth it.
Maybe you’ve been there—standing in your kitchen at 9 PM, craving a warm cookie but not wanting to commit to a full batch that’ll haunt you for days. If so, this recipe is for you. It’s the small-batch solution that actually works, no complicated math or weird substitutions required.
Why You’ll Love This Recipe
Let me be straight with you—I’ve tested this recipe seven times. Seven. My coworkers have been very patient taste-testers, and my waistline has opinions about it. But here’s the thing: every single person who tried these cookies said the same thing. “These are better than the full batch.” And that’s not just flattery. There’s something about baking a smaller quantity that lets you focus on the details—the exact moment the butter browns, the precise second the cookies should come out of the oven.
- Quick & Easy: From craving to cookie in about 25 minutes. No chilling required, no complicated techniques.
- Simple Ingredients: You probably have everything in your kitchen right now. Butter, sugar, eggs, flour, chocolate chips—the classics.
- Perfect for Late-Night Cravings: When that 9 PM cookie urge hits, this recipe saves you from making a whole batch you’ll regret tomorrow.
- Crowd-Pleaser: I brought these to a small dinner party and watched three people ask for the recipe before the main course even came out.
- Unbelievably Delicious: The texture is next-level—crispy edges with a soft, almost gooey center that stays that way for days.
What makes this recipe different from the dozens of other small-batch cookie recipes out there? It’s the butter-to-flour ratio. I spent way too long figuring out how to scale down a classic recipe without losing that perfect chewy texture. Most small-batch recipes end up dry or cakey because the ratios get thrown off. This one? It’s got that crackly top, those crispy edges, and a center that stays soft even on day three. I mean, if cookies last that long in your house (they don’t in mine).
This recipe isn’t just good—it’s the kind that makes you close your eyes after the first bite. It’s comfort food reimagined: smaller portions, bigger flavor, zero guilt about eating the whole batch because, honestly, it’s only twelve cookies. That’s practically a responsible amount.
What Ingredients You Will Need
This recipe uses simple, pantry-friendly ingredients to deliver that classic chocolate chip cookie experience without any fuss. I’ve tested this with different brands and substitutions, so I’ll share what actually works and what doesn’t.
- Unsalted butter, 6 tablespoons (85g) – I use Kerrygold for the richness, but any good unsalted butter works. Salted butter will throw off the salt balance, so stick with unsalted here.
- Granulated sugar, ¼ cup (50g) – Regular white sugar adds that crispy edge we all love.
- Light brown sugar, ¼ cup packed (55g) – Pack it firmly! Brown sugar brings moisture and that slight molasses flavor that makes cookies taste homemade. I prefer Domino brand, but any light brown sugar works.
- One large egg yolk – This is the secret to small-batch success. Using just the yolk gives you richness without making the dough too wet. Save the white for breakfast tomorrow.
- Vanilla extract, ½ teaspoon – Pure vanilla, not imitation. Trust me on this one. Nielsen-Massey is my go-to, but store brands work fine.
- All-purpose flour, ¾ cup (96g) – Spoon and level your flour—don’t scoop directly from the bag or you’ll end up with dry cookies. King Arthur flour gives consistent results.
- Baking soda, ¼ teaspoon – Make sure it’s fresh. Test by dropping a bit in vinegar—if it fizzes, you’re good.
- Salt, ¼ teaspoon – I use fine sea salt. If you’re using table salt, reduce to ⅛ teaspoon.
- Semi-sweet chocolate chips, ½ cup (90g) – Guittard or Ghirardelli are my favorites. You can also chop up a chocolate bar for those beautiful irregular puddles of chocolate.
A few notes on ingredients: The egg yolk thing is non-negotiable for this recipe. I tried using a whole egg once, and the cookies spread too much and came out flat. The yolk gives you that perfect thickness. For the chocolate, I’ve tested this with milk chocolate chips (sweeter, obviously), dark chocolate chunks (more intense), and even a mix of both. My personal favorite is using half semi-sweet chips and half chopped dark chocolate bar—you get those melty pools plus the classic chip texture.
If you want to make this dairy-free, use a good vegan butter stick (not the spreadable kind). I’ve had success with Miyoko’s. For gluten-free, swap the all-purpose flour with a 1-to-1 gluten-free baking flour—I like Bob’s Red Mill. The texture will be slightly different but still delicious.
Equipment Needed
You don’t need fancy equipment for this recipe, which is honestly one of the best things about it. Here’s what you’ll need:
- Medium mixing bowl – Any bowl works, but I prefer a ceramic or glass bowl. Metal can sometimes leave a slight taste.
- Small bowl – For mixing dry ingredients separately.
- Whisk – For combining dry ingredients and creaming butter and sugar.
- Rubber spatula – For folding in chocolate chips and scraping down the bowl.
- Baking sheet – A half-sheet pan works perfectly. Avoid dark non-stick pans—they make cookies brown too fast on the bottom.
- Parchment paper – Non-negotiable. Silicone baking mats work too, but parchment gives slightly crisper bottoms.
- Cookie scoop – A 1.5-tablespoon scoop makes perfectly uniform cookies. If you don’t have one, use two spoons to portion the dough.
- Cooling rack – Essential for getting those crispy edges. If you don’t have one, let cookies cool on the pan for 5 minutes, then transfer carefully to a plate.
- Measuring cups and spoons – For accuracy. I use metal measuring cups for dry ingredients and glass for liquids.
I’ve made these cookies with a cheap baking sheet from the grocery store and they still turned out great. The one thing I wouldn’t skip is the parchment paper—it prevents sticking and makes cleanup a breeze. Also, if you’re like me and you lose your cookie scoop somewhere in the back of a drawer, just use two spoons to drop the dough. It’s less pretty but tastes the same.
Preparation Method
Alright, let’s make some cookies. This whole process takes about 25 minutes from start to finish, and I promise you can do this while listening to a podcast or half-watching TV.
- Preheat your oven to 350°F (175°C). Line your baking sheet with parchment paper. Do this first—it takes 15 minutes for most ovens to reach temperature, and you want it ready when your dough is.
- Melt the butter. Place 6 tablespoons of butter in a microwave-safe bowl and heat in 15-second intervals until just melted. You want it melted but not hot—warm to the touch, not bubbling. This takes about 30-45 seconds total. Let it cool for 2 minutes while you gather your other ingredients.
- Cream the butter and sugars. In your medium mixing bowl, combine the melted butter, ¼ cup granulated sugar, and ¼ cup packed brown sugar. Whisk vigorously for about 1 minute until the mixture looks like wet sand—smooth, no graininess, and slightly lighter in color. This step matters more than you think. If you under-mix, the cookies won’t spread properly.
- Add the egg yolk and vanilla. Drop in the egg yolk and ½ teaspoon vanilla extract. Whisk until fully combined—about 30 seconds. The mixture should look glossy and smooth, like a thick sauce. If it looks separated or greasy, you whisked too fast—slow down and keep going until it comes together.
- Mix dry ingredients. In your small bowl, whisk together ¾ cup flour, ¼ teaspoon baking soda, and ¼ teaspoon salt. Make sure there are no lumps—baking soda loves to clump up and if you bite into a pocket of it, your cookie will taste metallic.
- Combine wet and dry. Add the flour mixture to the butter mixture. Use your rubber spatula to fold everything together gently. Stir just until you can’t see any more white flour streaks. Over-mixing develops gluten and makes tough cookies. Stop when it looks like a cohesive dough—about 15-20 folds.
- Fold in chocolate chips. Add ½ cup chocolate chips and fold 5-6 times until evenly distributed. The dough will be soft and slightly greasy-looking—that’s normal. If it feels too sticky to handle, refrigerate for 10 minutes.
- Portion the dough. Using your cookie scoop or two spoons, drop rounded tablespoons of dough onto the prepared baking sheet, spacing them about 2 inches apart. You should get exactly 12 cookies. I like to press a few extra chocolate chips on top of each dough ball—makes them look bakery-perfect.
- Bake for 10-12 minutes. Bake until the edges are golden brown and the centers look slightly underdone—pale and slightly puffy. This is crucial. The cookies will continue baking on the hot pan after you take them out. If you wait until the centers look done, they’ll be overbaked and dry. For soft centers, pull them at 10 minutes. For slightly crisper cookies, go to 11 or 12.
- Cool on the pan for 5 minutes. Don’t skip this! The cookies need this time to set up. They’ll look soft and fragile—that’s okay. After 5 minutes, transfer them to a cooling rack using a thin spatula. Let them cool completely if you want crispy edges, or eat one warm if you’re impatient (I always do).
A quick note on oven temperatures: Every oven runs differently. If your cookies consistently come out too flat, your oven might run cool—try increasing the temperature to 360°F. If they come out too puffy and pale, your oven might run hot—try 340°F. I learned this after three batches of flat cookies that looked more like pancakes than cookies.
Cooking Tips & Techniques
I’ve made more batches of these cookies than I care to admit, and I’ve learned some things the hard way. Here are my best tips for getting perfect results every time.
The butter temperature matters more than you think. I used to think melted butter was melted butter—just nuke it until liquid and move on. Wrong. If your butter is too hot when you add the egg yolk, you’ll end up with scrambled eggs in your cookie dough. Let the melted butter cool for at least 2 minutes before adding anything else. It should feel warm to the touch, not hot. I actually burned my finger testing this once—learn from my mistakes.
Don’t over-bake. This is the number one mistake I see people make with small-batch cookies. Because the dough is room temperature (no chilling required), these cookies bake faster than you expect. Set a timer for 9 minutes and check. The edges should be golden, the centers should look slightly underdone and puffy. They’ll continue baking on the hot pan. I’ve pulled cookies that looked raw in the middle and they set up perfectly after 5 minutes on the pan. Trust the process.
Use a kitchen scale if you have one. I resisted this for years because I’m lazy and washing measuring cups is easier. But honestly, using a scale changed my baking. Flour measurement is wildly inconsistent with cups—one person’s “cup of flour” can be 20 grams more than another’s. A scale gives you consistent results every time. If you don’t have one, spoon your flour into the measuring cup and level it with a knife. Never scoop directly from the bag.
Let the dough rest if you have time. I know I said no chilling required, and that’s true—these cookies work great baked immediately. But if you have 30 minutes to spare, let the portioned dough balls sit on the baking sheet before baking. This allows the flour to fully hydrate and the sugars to dissolve, giving you deeper flavor and a chewier texture. I tested this side by side, and the rested batch was noticeably better. Not enough to ruin your day if you’re impatient, but enough that I plan ahead when I can.
Bang the pan. This is a pro trick I picked up from a bakery I used to work at. About 2 minutes before the cookies are done, open the oven and bang the baking sheet on the rack a couple times. This deflates the cookies slightly, creating those beautiful crackly tops and crispy edges. It feels aggressive, but it works. Just don’t bang so hard that cookies fly off the pan (yes, I’ve done that).
Variations & Adaptations
One of the best things about this recipe is how easily it adapts. I’ve tested several variations, and here are my favorites:
Double Chocolate Chip Cookies: Replace 2 tablespoons of flour with 2 tablespoons of unsweetened cocoa powder. Use dark chocolate chips instead of semi-sweet. The result is a rich, almost brownie-like cookie that’s dangerously good. I made these for a friend who claimed she didn’t like chocolate chip cookies, and she ate four.
Brown Butter Version: Instead of simply melting the butter, brown it in a small saucepan over medium heat until it turns amber and smells nutty—about 5 minutes. Let it cool completely before using. This adds a deep, toasty flavor that makes the cookies taste incredibly sophisticated. The texture will be slightly different—chewier, with a more pronounced crisp edge. I’d recommend this for when you want to impress someone.
Gluten-Free Adaptation: Substitute the all-purpose flour with a 1-to-1 gluten-free baking flour blend. I’ve tested this with Bob’s Red Mill and King Arthur’s GF blends, and both work well. The cookies will spread slightly less and have a slightly crumblier texture, but they’re still delicious. Add an extra tablespoon of butter to compensate for the drier flour blend.
Vegan Version: Use a vegan butter stick (not spreadable) and replace the egg yolk with 1 tablespoon of aquafaba (the liquid from a can of chickpeas) mixed with 1 teaspoon of cornstarch. The texture won’t be identical—slightly less chewy—but the flavor is surprisingly close. I tested this for a vegan friend and she couldn’t tell the difference.
Mix-In Variations: Swap the chocolate chips for white chocolate and dried cranberries, or use butterscotch chips and pecans. My personal favorite is using chopped dark chocolate and toasted walnuts—the bitterness of the chocolate balances the sweetness of the dough perfectly. For a holiday version, add ¼ teaspoon of cinnamon and ⅛ teaspoon of nutmeg to the dry ingredients.
Serving & Storage Suggestions
These cookies are best served warm, obviously. But let’s be real—you’re going to eat some at room temperature too, and they’re still fantastic.
Serving Temperature: Warm cookies are unbeatable. If you’re serving them to guests, pop them in a 300°F oven for 3-4 minutes before serving. This re-crisps the edges and softens the centers. Serve with a glass of cold milk, a scoop of vanilla ice cream, or just on their own. I’ve also crumbled them over yogurt for a decadent breakfast (no judgment).
Complementary Pairings: These cookies go beautifully with a cup of coffee or a cold glass of milk. For a dessert board, arrange them with fresh berries, dark chocolate shavings, and a drizzle of caramel sauce. They also make an excellent ice cream sandwich—scoop some vanilla ice cream between two cookies and roll the edges in mini chocolate chips.
Storage: Store leftover cookies in an airtight container at room temperature for up to 4 days. Place a slice of bread in the container—it absorbs excess moisture and keeps the cookies soft. Replace the bread every other day. I learned this trick from my grandmother, and it works like magic.
Freezing: These cookies freeze beautifully. You can freeze the baked cookies in a freezer-safe bag for up to 3 months. Thaw at room temperature for 15 minutes, then warm in a 300°F oven for 5 minutes. Alternatively, freeze the portioned dough balls on a baking sheet, then transfer to a freezer bag. Bake from frozen, adding 2-3 minutes to the baking time. This is my favorite method—fresh cookies whenever the craving hits.
Flavor Development: Here’s something interesting—these cookies actually taste better on day two. The flavors meld together, the texture evens out, and the chocolate becomes more pronounced. If you can resist eating them all on day one, you’re in for a treat. I’ve tested this multiple times, and every single person preferred the day-two cookies in blind taste tests.
Nutritional Information & Benefits
Let’s be honest—these are cookies, not health food. But knowing what’s in them helps you enjoy them mindfully. Per cookie (based on 12 cookies):
| Nutrient | Amount |
|---|---|
| Calories | 165 |
| Total Fat | 9g |
| Saturated Fat | 5g |
| Cholesterol | 35mg |
| Sodium | 95mg |
| Total Carbohydrates | 21g |
| Dietary Fiber | 1g |
| Sugars | 13g |
| Protein | 2g |
The dark chocolate in these cookies provides small amounts of antioxidants and minerals like iron and magnesium. The butter adds vitamin A and healthy fats. And honestly? There’s something to be said for the mental health benefits of a perfectly baked cookie—comfort food has its place in a balanced diet.
These cookies are vegetarian-friendly and can be made gluten-free or vegan with the substitutions I mentioned earlier. They contain dairy, eggs, and gluten in their standard form. If you’re watching your sugar intake, you can reduce the granulated sugar to 3 tablespoons, but the texture will be slightly less crispy.
My personal philosophy? Food should be enjoyed. A dozen cookies shared with friends or savored over a few days isn’t going to derail anyone’s health goals. It’s about balance, not deprivation.
Conclusion
These Perfect Small-Batch Chocolate Chip Cookies have become my go-to recipe for those moments when I need a little something sweet without committing to a massive batch. They’re quick, they’re simple, and they deliver that classic cookie experience with zero fuss. No chilling, no complicated techniques, no leftover dough taking up space in your freezer.
What I love most about this recipe is how forgiving it is. You can use different chocolates, swap in nuts, or even experiment with different extracts. The basic formula works, and it works well. I’ve made these for late-night cravings, surprise guests, and even as a quick dessert for dinner parties, and they’ve never let me down.
I’d love to hear how yours turn out! Did you try any of the variations? Did you discover a new favorite mix-in? Drop a comment below and let me know—I read every single one and I’m always looking for new ideas to test. And if you loved this recipe, share it with a friend who needs a good cookie in their life. Because honestly? Everyone deserves a perfect cookie now and then.
Happy baking, friends. May your edges be crispy, your centers be soft, and your chocolate chips be plentiful.
Frequently Asked Questions
Can I double this recipe?
Absolutely! Simply double all the ingredients. The baking time and temperature remain the same. You’ll get 24 cookies instead of 12.
Why did my cookies spread too much?
This usually happens if the butter was too warm or the dough wasn’t mixed enough. Make sure your melted butter has cooled for at least 2 minutes, and don’t skip the whisking step when combining butter and sugar.
Can I use salted butter instead of unsalted?
You can, but reduce the added salt to just a pinch. Salted butter typically contains about ¼ teaspoon of salt per stick, so adjust accordingly.
How do I get perfectly round cookies?
Right after the cookies come out of the oven, use a round cookie cutter or a glass to gently scoot the edges inward. This creates perfectly round cookies every time.
Can I make the dough ahead of time?
Yes! The portioned dough balls can be refrigerated for up to 3 days or frozen for up to 3 months. Bake from chilled, adding 1-2 minutes to the baking time.
Pin This Recipe!
Perfect Small-Batch Chocolate Chip Cookies: Easy One-Dozen Recipe

This recipe makes exactly one dozen perfect chocolate chip cookies with golden edges, soft centers, and pools of melted chocolate. No chilling required, simple ingredients, and ready in about 25 minutes.
- Prep Time: 15 minutes
- Cook Time: 10 minutes
- Total Time: 25 minutes
- Yield: 12 cookies 1x
- Category: Dessert
- Cuisine: American
Ingredients
- 6 tablespoons unsalted butter (85g)
- ¼ cup granulated sugar (50g)
- ¼ cup packed light brown sugar (55g)
- 1 large egg yolk
- ½ teaspoon vanilla extract
- ¾ cup all-purpose flour (96g)
- ¼ teaspoon baking soda
- ¼ teaspoon fine sea salt
- ½ cup semi-sweet chocolate chips (90g)
Instructions
- Preheat your oven to 350°F (175°C). Line your baking sheet with parchment paper.
- Melt the butter in a microwave-safe bowl in 15-second intervals until just melted. Let cool for 2 minutes.
- In a medium mixing bowl, combine the melted butter, granulated sugar, and packed brown sugar. Whisk vigorously for about 1 minute until smooth and slightly lighter in color.
- Add the egg yolk and vanilla extract. Whisk until fully combined, about 30 seconds, until glossy and smooth.
- In a small bowl, whisk together the flour, baking soda, and salt until no lumps remain.
- Add the flour mixture to the butter mixture. Fold gently with a rubber spatula just until no white flour streaks remain (about 15-20 folds).
- Fold in the chocolate chips until evenly distributed. The dough will be soft and slightly greasy.
- Using a cookie scoop or two spoons, drop rounded tablespoons of dough onto the prepared baking sheet, spacing them about 2 inches apart. You should get 12 cookies. Optionally press extra chocolate chips on top.
- Bake for 10-12 minutes, until edges are golden brown and centers look slightly underdone and puffy.
- Cool on the pan for 5 minutes, then transfer to a cooling rack using a thin spatula.
Notes
The egg yolk is non-negotiable for this recipe; using a whole egg will cause cookies to spread too much. Let melted butter cool for at least 2 minutes before adding egg yolk to avoid scrambling. For best results, use a kitchen scale for flour measurement. If you have time, let portioned dough balls rest for 30 minutes before baking for deeper flavor and chewier texture. Bang the pan on the oven rack 2 minutes before cookies are done for crackly tops.
Nutrition
- Serving Size: 1 cookie
- Calories: 165
- Sugar: 13
- Sodium: 95
- Fat: 9
- Saturated Fat: 5
- Carbohydrates: 21
- Fiber: 1
- Protein: 2
Keywords: small-batch chocolate chip cookies, easy cookie recipe, one dozen cookies, no chill cookies, quick cookies