I was supposed to be making a proper pumpkin pie. You know, the kind you bring to a Thanksgiving dinner and everyone oohs and aahs over the perfect crust. But it was a Tuesday night in late October, the air smelled like wet leaves, and I was already late for a Halloween potluck at my neighbor’s place. I had the canned pumpkin, the spices, the butter—everything was laid out on the counter like a promise.
Then I realized my pie dish was cracked. Not just a hairline crack, either. It was a full-on, “I-dropped-it-last-week-and-forgot-about-it” disaster. I stood there, staring at the bowl of filling I’d just mixed, feeling that familiar knot of panic. You know that feeling when a recipe goes sideways before it even starts? I was this close to just serving the filling in a bowl with spoons and calling it a day.
But then I spotted the leftover pie crust in the fridge. And a small biscuit cutter shaped like a leaf. And I thought, well, what if I just… made tiny pies? Handheld ones? Honestly, I was just trying to salvage the situation. I rolled out the dough, cut out some rough circles, spooned in the filling, and crimped the edges with a fork. They looked a little wonky, I won’t lie. Some leaked, some were lopsided, and one looked suspiciously like a potato.
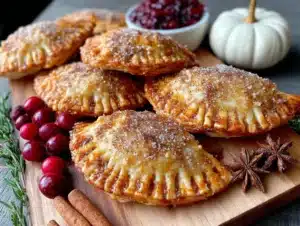
But when they came out of the oven, golden and puffed and smelling like a fall candle come to life, something clicked. That first bite—warm, flaky, with that spicy-sweet pumpkin filling—was better than any slice of pie I’d ever made. My neighbor asked for the recipe before I even left the party. And now, every Halloween, these mini pumpkin hand pies are the thing I’m asked to bring. Funny how a cracked dish changed everything, isn’t it?
Why You’ll Love This Recipe
Let me tell you, these cozy mini pumpkin hand pies are the kind of treat that makes people stop mid-conversation. I’ve tested this recipe about six times now—some batches were too dry, some too soggy—but this version? It’s the one. It’s the Goldilocks of hand pies. And trust me, if I can pull these off after a cracked-dish panic, you absolutely can too.
- Quick & Easy: From start to finish, these come together in about 45 minutes. No chilling the dough overnight, no complicated lattice tops. Just mix, fill, bake, and eat.
- Simple Ingredients: You probably have most of this stuff in your pantry already. Canned pumpkin, brown sugar, butter, flour—nothing fancy or hard to find.
- Perfect for Halloween: These are the ultimate Halloween party food. They’re portable, not messy, and they look adorable on a dessert table. Plus, no one wants to deal with slicing a full pie at a potluck.
- Crowd-Pleaser: Kids love the size, adults love the flavor, and everyone loves that they can eat them with one hand while holding a drink.
- Unbelievably Delicious: The filling is creamy and spiced just right—not too sweet, not too heavy. The crust stays flaky even after a day or two. It’s comfort food you can hold.
What makes these different from other pumpkin pie recipes? It’s the technique. I brush the edges with a little milk before crimping, which gives the crust that extra flakiness. And I use a tiny bit of cream cheese in the filling—don’t skip it—it adds a richness that makes people ask, “What’s your secret?”
Honestly, this recipe is for those evenings when you need something warm and cozy, but you don’t want to spend hours in the kitchen. It’s for the Halloween party where you want to impress without stress. And it’s for the moment you take that first bite and realize you made something truly special.
What Ingredients You Will Need
This recipe uses simple, wholesome ingredients to deliver that classic pumpkin pie flavor in a handheld form. Most of these are pantry staples, so you probably won’t need a special trip to the store.
- For the Crust:
- 2 ½ cups all-purpose flour (I use King Arthur for consistent results)
- 1 cup cold unsalted butter, cut into small cubes (keep it cold—warm butter makes a tough crust)
- 1 teaspoon salt
- 1 tablespoon granulated sugar
- 6-8 tablespoons ice water (you might need more or less depending on humidity)
- For the Filling:
- 1 cup canned pumpkin puree (not pumpkin pie filling—make sure it’s 100% pumpkin)
- ¼ cup brown sugar, packed
- 2 tablespoons cream cheese, softened (this is my secret ingredient—adds tanginess and creaminess)
- 1 large egg yolk
- 1 teaspoon pumpkin pie spice (or make your own: ½ tsp cinnamon, ¼ tsp ginger, ⅛ tsp nutmeg, ⅛ tsp cloves)
- ½ teaspoon vanilla extract
- Pinch of salt
- For Assembly:
- 1 large egg, beaten (for egg wash)
- 1 tablespoon milk (for brushing edges)
- Coarse sugar or sanding sugar for sprinkling (optional, but so pretty)
A few notes from my trials: Don’t use low-fat cream cheese—it makes the filling watery. And if you’re out of pumpkin pie spice, just mix cinnamon, ginger, nutmeg, and a tiny pinch of cloves. It works perfectly. For a dairy-free version, use cold vegan butter in the crust and a dairy-free cream cheese alternative.
Equipment Needed
You don’t need a lot of fancy tools for these hand pies, which is part of why I love them. Here’s what you’ll want:
- Large mixing bowl (for the crust)
- Medium mixing bowl (for the filling)
- Pastry cutter or two forks (for cutting butter into flour)
- Rolling pin (a wine bottle works in a pinch—I’ve done it)
- 3-inch round biscuit cutter or cookie cutter (I use a fluted one for pretty edges)
- Baking sheet lined with parchment paper
- Pastry brush (for egg wash)
- Fork (for crimping edges)
- Cooling rack
If you don’t have a pastry cutter, honestly, two forks work just fine. And if your biscuit cutter is a different size, just adjust the number of pies you get. I’ve used a glass before—just make sure the edges are thin enough to cut through dough cleanly.
Preparation Method
Alright, let’s get to the fun part. I’ll walk you through this step by step, with all the little details I wish someone had told me the first time.
- Make the crust: In a large bowl, whisk together the flour, salt, and sugar. Add the cold butter cubes. Use a pastry cutter or two forks to cut the butter into the flour until it looks like coarse meal with some pea-sized butter pieces. Don’t overwork it—those butter pieces are what make the crust flaky.
- Add the water: Drizzle 6 tablespoons of ice water over the flour mixture. Stir with a fork until the dough starts to come together. If it seems too dry, add the remaining water, one tablespoon at a time. The dough should hold together when squeezed but not be sticky.
- Chill the dough: Divide the dough in half, flatten into discs, wrap in plastic wrap, and refrigerate for at least 30 minutes. (I know, waiting is hard. But this step is crucial—cold dough is easier to roll and bakes up flakier.)
- Make the filling: While the dough chills, mix the pumpkin puree, brown sugar, cream cheese, egg yolk, pumpkin pie spice, vanilla, and salt in a medium bowl. Stir until smooth and well combined. Taste it—seriously, do it. Adjust the spices if you want more warmth.
- Preheat the oven: Set your oven to 375°F (190°C). Line a baking sheet with parchment paper.
- Roll out the dough: On a lightly floured surface, roll one disc of dough to about ⅛-inch thickness. Use a 3-inch round cutter to cut out circles. Reroll the scraps once—don’t reroll more than that or the crust gets tough.
- Fill the pies: Place half of the dough circles on the prepared baking sheet, spacing them about 2 inches apart. Spoon about 1 tablespoon of filling onto the center of each circle. Don’t overfill—it will leak and make a mess (ask me how I know).
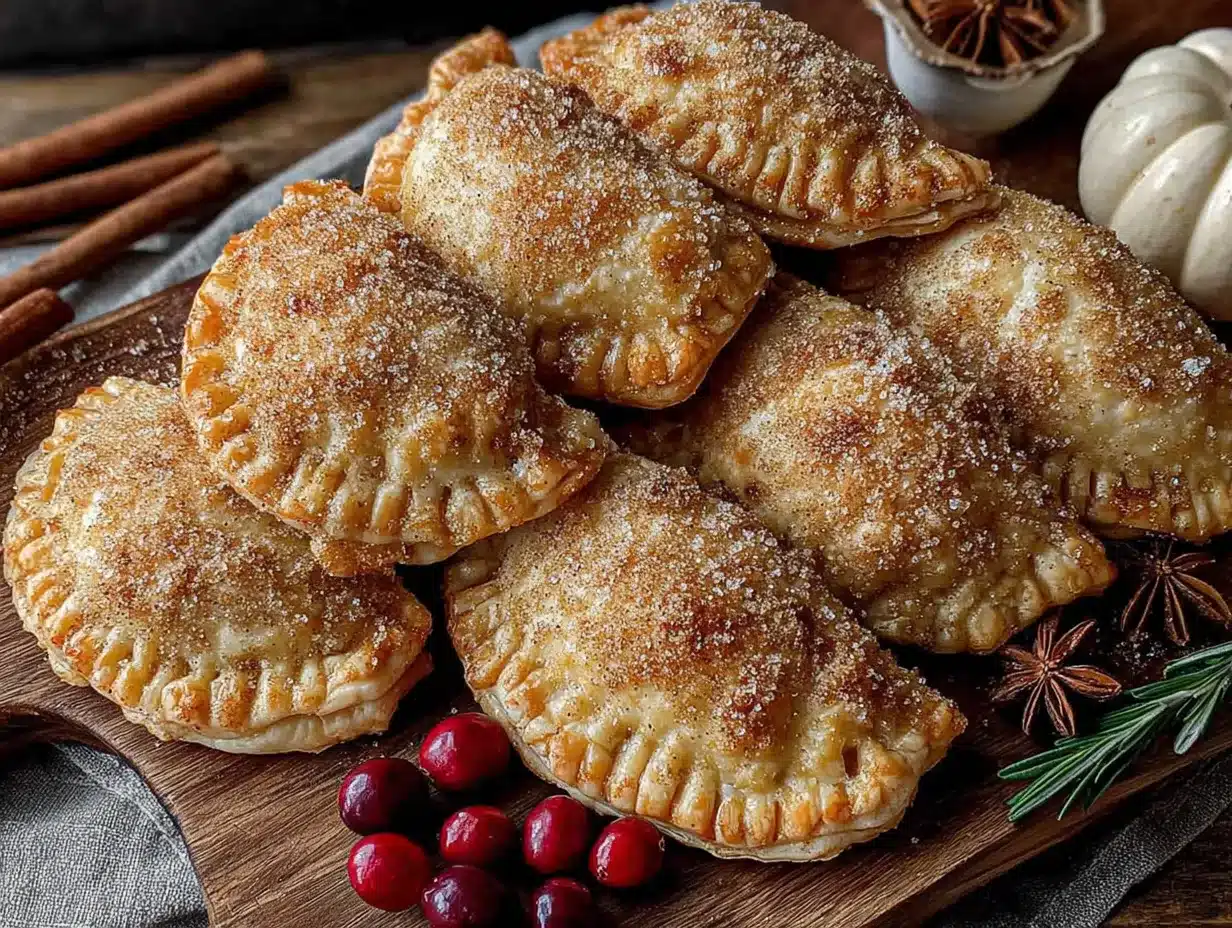
- Seal the pies: Brush the edges of the filled circles with a little milk. Place the remaining dough circles on top. Use a fork to crimp the edges and seal them. Cut a small slit in the top of each pie to let steam escape.
- Egg wash and sugar: Beat the egg with 1 tablespoon of water. Brush the tops of the pies with the egg wash. Sprinkle with coarse sugar if you’re using it.
- Bake: Bake for 18-22 minutes, until the crust is golden brown and the filling is bubbling slightly through the slits. Let them cool on the baking sheet for 5 minutes, then transfer to a cooling rack.
One thing I learned the hard way: if your filling looks too wet, cook it on the stovetop for a few minutes to thicken it before filling the pies. It makes a big difference.
Cooking Tips & Techniques
I’ve made these hand pies maybe a dozen times now, and I’ve picked up a few tricks that make a real difference. Let me share them so you don’t have to learn the hard way.
Keep everything cold. This is the number one rule for flaky pie crust. If your butter starts to soften while you’re working, pop the dough back in the fridge for 10 minutes. I once rushed through this step on a warm day, and the crust came out dense and greasy. Not cute.
Don’t skip the egg wash. I know it feels like an extra step, but it gives the pies that beautiful golden sheen. And the coarse sugar? It adds a little crunch that contrasts perfectly with the soft filling. Totally worth it.
Watch the edges. If the edges start browning too fast, cover them with strips of foil. Every oven runs differently—mine runs hot, so I check at 15 minutes instead of 18.
Multitask wisely. While the first batch bakes, roll out the second disc of dough. That way, you’re not waiting around. And if you’re making these for a party, you can assemble them a day ahead and bake them fresh. Just keep them in the fridge on the baking sheet, covered with plastic wrap.
One failure I’ll admit: I once forgot to cut slits in the tops. The pies basically exploded in the oven. Pumpkin filling everywhere. So, uh, don’t do that.
Variations & Adaptations
One of the best things about this recipe is how easy it is to adapt. Here are a few ways I’ve changed it up over the years:
- Gluten-Free Version: Use a good gluten-free all-purpose flour blend in the crust. I’ve had success with Cup4Cup. The texture is slightly more tender, but still delicious.
- Vegan Option: Use cold vegan butter in the crust and a flax egg (1 tablespoon ground flaxseed + 3 tablespoons water) instead of the egg yolk. Skip the cream cheese or use a vegan version. The filling won’t be quite as rich, but it’s still tasty.
- Savory Hand Pies: Leave out the sugar and pumpkin pie spice. Add cooked sausage, sage, and a little shredded cheese to the pumpkin filling. These are amazing for a fall brunch.
- Spiced-Up Version: Add a pinch of cayenne pepper or chipotle powder to the filling for a sweet-spicy kick. I tried this last year and it was a hit at a Halloween party.
- Different Shapes: Use Halloween-themed cookie cutters—pumpkins, ghosts, bats. Just make sure they’re roughly the same size so they bake evenly.
My personal favorite variation? I add a tablespoon of bourbon to the filling. It sounds weird, but the warmth of the bourbon pairs beautifully with the pumpkin and spices. Just don’t tell the kids.
Serving & Storage Suggestions
These hand pies are best served warm, about 10 minutes after they come out of the oven. The filling is still soft and the crust is at its flakiest. But honestly, they’re pretty great at room temperature too.
For a Halloween party, I arrange them on a wooden board with a little bowl of whipped cream or caramel sauce for dipping. They also pair beautifully with a cup of hot apple cider or a pumpkin spice latte. If you’re feeling fancy, dust them with a little powdered sugar right before serving.
Storage: Keep leftover hand pies in an airtight container at room temperature for up to 2 days. After that, move them to the fridge for up to 5 days. The crust will soften a bit in the fridge, but they’re still delicious.
Reheating: Pop them in a 350°F oven for 5-7 minutes to revive the flakiness. The microwave works in a pinch, but the crust will be soft rather than crispy. If you’re reheating from frozen, add a couple of extra minutes.
Freezing: You can freeze the unbaked hand pies on a baking sheet, then transfer them to a freezer bag. Bake from frozen, adding 5-7 minutes to the baking time. I always keep a batch in the freezer for last-minute cravings.
Nutritional Information & Benefits
Here’s a rough estimate per hand pie (based on 12 pies):
- Calories: 210
- Fat: 12g
- Carbohydrates: 24g
- Fiber: 2g
- Sugar: 9g
- Protein: 3g
Pumpkin is packed with vitamin A and fiber, which is great for your immune system and digestion. The cream cheese adds a little calcium, and the butter? Well, let’s just say a little butter never hurt anyone. These are a treat, not a health food, but they’re made with real ingredients you can feel good about.
For a lighter version, you can use a whole wheat pastry flour crust and reduce the sugar to 2 tablespoons. The texture will be a little different, but still satisfying.
Potential allergens: wheat, dairy, eggs. If you’re serving a crowd, it’s worth noting these on the table.
Conclusion
Look, I know making pie from scratch can feel intimidating. But these mini pumpkin hand pies are forgiving in a way that full-sized pies just aren’t. They don’t have to be perfect. In fact, the slightly imperfect ones are often the most charming. That lopsided crimp? It’s character. That little leak? It’s caramelized goodness.
I love this recipe because it reminds me that some of the best things in the kitchen come from accidents. A cracked dish, a forgotten ingredient, a moment of panic—sometimes that’s where the magic happens. And every time I make these, I think of that Tuesday night and the neighbor who asked for the recipe before I even had a chance to explain what they were supposed to be.
So go ahead. Make a mess. Crack a dish. And then make these hand pies. I promise you won’t regret it. And if you try them, come back and tell me how they turned out—I’d love to hear about your own kitchen accidents and victories.
Happy Halloween, friend. May your crust be flaky and your filling be warm.
Frequently Asked Questions
Can I use store-bought pie crust?
Absolutely. If you’re short on time, a refrigerated pie crust works great. Just roll it out a little thinner and cut your circles. The texture won’t be quite as flaky as homemade, but it’s still delicious.
Why did my hand pies leak in the oven?
This usually happens for two reasons: overfilling or not sealing the edges properly. Make sure you’re only using about 1 tablespoon of filling per pie, and press the edges firmly with a fork. Cutting a steam vent also helps prevent explosions.
Can I make these ahead of time?
Yes! You can assemble the hand pies up to 24 hours in advance and keep them in the fridge. Bake them just before serving for the best texture. You can also freeze the unbaked pies for up to 3 months.
What if I don’t have pumpkin pie spice?
No problem. Mix together ½ teaspoon cinnamon, ¼ teaspoon ginger, ⅛ teaspoon nutmeg, and a tiny pinch of cloves. That’s basically pumpkin pie spice. You can also use apple pie spice in a pinch.
Can I use fresh pumpkin instead of canned?
You can, but you’ll need to cook and puree it first, and then drain off any excess liquid. Fresh pumpkin tends to be more watery than canned, so your filling might be runnier. I recommend canned for consistency, but fresh works if that’s what you have.
Pin This Recipe!

Cozy Mini Pumpkin Hand Pies: Easy Halloween Treat

These mini pumpkin hand pies are the perfect Halloween treat—portable, delicious, and easy to make. With a flaky crust and creamy, spiced pumpkin filling, they’re a crowd-pleaser for any fall gathering.
- Prep Time: 30 minutes
- Cook Time: 20 minutes
- Total Time: 50 minutes
- Yield: 12 servings 1x
- Category: Dessert
- Cuisine: American
Ingredients
- 2 ½ cups all-purpose flour
- 1 cup cold unsalted butter, cut into small cubes
- 1 teaspoon salt
- 1 tablespoon granulated sugar
- 6–8 tablespoons ice water
- 1 cup canned pumpkin puree (not pumpkin pie filling)
- ¼ cup brown sugar, packed
- 2 tablespoons cream cheese, softened
- 1 large egg yolk
- 1 teaspoon pumpkin pie spice
- ½ teaspoon vanilla extract
- Pinch of salt
- 1 large egg, beaten (for egg wash)
- 1 tablespoon milk (for brushing edges)
- Coarse sugar or sanding sugar for sprinkling (optional)
Instructions
- Make the crust: In a large bowl, whisk together the flour, salt, and sugar. Add the cold butter cubes. Use a pastry cutter or two forks to cut the butter into the flour until it looks like coarse meal with some pea-sized butter pieces.
- Add the water: Drizzle 6 tablespoons of ice water over the flour mixture. Stir with a fork until the dough starts to come together. If it seems too dry, add the remaining water, one tablespoon at a time. The dough should hold together when squeezed but not be sticky.
- Chill the dough: Divide the dough in half, flatten into discs, wrap in plastic wrap, and refrigerate for at least 30 minutes.
- Make the filling: While the dough chills, mix the pumpkin puree, brown sugar, cream cheese, egg yolk, pumpkin pie spice, vanilla, and salt in a medium bowl. Stir until smooth and well combined.
- Preheat the oven: Set your oven to 375°F (190°C). Line a baking sheet with parchment paper.
- Roll out the dough: On a lightly floured surface, roll one disc of dough to about ⅛-inch thickness. Use a 3-inch round cutter to cut out circles. Reroll the scraps once—don’t reroll more than that or the crust gets tough.
- Fill the pies: Place half of the dough circles on the prepared baking sheet, spacing them about 2 inches apart. Spoon about 1 tablespoon of filling onto the center of each circle.
- Seal the pies: Brush the edges of the filled circles with a little milk. Place the remaining dough circles on top. Use a fork to crimp the edges and seal them. Cut a small slit in the top of each pie to let steam escape.
- Egg wash and sugar: Beat the egg with 1 tablespoon of water. Brush the tops of the pies with the egg wash. Sprinkle with coarse sugar if using.
- Bake: Bake for 18-22 minutes, until the crust is golden brown and the filling is bubbling slightly through the slits. Let them cool on the baking sheet for 5 minutes, then transfer to a cooling rack.
Notes
Keep everything cold for a flaky crust. Don’t overfill the pies to prevent leaking. If the filling seems too wet, cook it on the stovetop for a few minutes to thicken. For a dairy-free version, use cold vegan butter and dairy-free cream cheese. For a gluten-free version, use a good gluten-free all-purpose flour blend.
Nutrition
- Serving Size: 1 hand pie
- Calories: 210
- Sugar: 9
- Sodium: 180
- Fat: 12
- Saturated Fat: 7
- Carbohydrates: 24
- Fiber: 2
- Protein: 3
Keywords: mini pumpkin hand pies, Halloween treat, pumpkin pie, hand pies, fall dessert, easy pumpkin recipe