The school Halloween party was in four hours and I’d completely forgotten. I mean, I’d remembered to buy the bag of candy for handing out at the door, but the classroom party sign-up sheet? That had slipped my mind entirely. My son’s teacher sent a friendly reminder that morning, and I felt that familiar cold splash of panic. Everyone else would be bringing elaborate themed cupcakes from the fancy bakery or those adorable little mummy pizzas that looked like they took all weekend. I had a block of cheddar, some pretzel sticks, and a bag of clementines. Honestly, I was ready to just stop at the store for a tray of store-bought cookies.
But then I looked at my six-year-old, who was already buzzing with excitement in his little vampire costume. He wanted to *make* something. So, with the clock ticking and a very energetic helper at my side, we raided the pantry. We found some cream cheese, a few crackers, and a bag of chocolate chips. I grabbed the Halloween cookie cutters I’d shoved in a drawer last year—a ghost and a bat. Twenty minutes later, I had two small, silly, and surprisingly cute little boards assembled on two paper plates. I threw in some clementines for a pop of color and called it a day.
You know what happened? His teacher sent me a picture later that night. The kids went absolutely nuts for them. The other parents were asking for the recipe, and my son strutted around like he’d won a Michelin star. I didn’t win the party, but my kid felt like a rockstar, and that was way better. That’s the thing about these kid-friendly mini Halloween charcuterie boards for two—they’re not about impressing the adults. They’re about giving your little goblin something fun to build and devour without a sugar crash an hour later. It’s the recipe that kept me sane that day, and I keep coming back to it because it’s the easiest win in the book.
Why You’ll Love This Recipe
Let’s be real for a second. Halloween is a marathon for parents. Between the costume drama, the school parade, and the actual trick-or-treating, the last thing you need is a complicated recipe that leaves your kitchen looking like a disaster zone. These mini boards are the opposite of that. They are the calm in the storm of the holiday chaos.
- Super Quick & Easy: From start to finish, you’re looking at about 15 minutes of active work. No baking, no melting, no fussing with hot pans. It’s all assembly, which makes it a perfect activity for little hands to help with.
- Simple Ingredients: You probably have 80% of this stuff in your fridge and pantry right now. A block of cheese, some crackers, a handful of fruit. No need for a special trip to the fancy grocery store for imported prosciutto or weird cheese.
- Perfect for Two Little Monsters: This is sized specifically for one or two kids. It’s not a massive party platter that leaves you with a ton of leftovers. It’s just enough for a pre-trick-or-treat snack or a fun school lunch surprise.
- Crowd-Pleaser (Even for Picky Eaters): Because it’s a “build-your-own” situation, kids feel in control. They get to pick what goes in their mouth. My own picky eater, who usually turns his nose up at cheese, will devour a bat-shaped cheddar slice without a second thought.
- Unbelievably Cute: Let’s not kid ourselves. The aesthetic is a huge part of the fun. Using a simple cookie cutter to turn a slice of cheese into a ghost makes a boring snack feel like a special Halloween treat. It’s the kind of thing that makes them smile before they even take a bite.
What makes this different from just throwing some snacks on a plate? It’s the presentation. It’s the intentionality. It’s the little “wow” factor that comes from spending five extra seconds cutting cheese into a fun shape. It’s comfort food for the kids and a sanity-saver for you. It’s the kind of snack that makes you feel like a super-parent, even when you’re running on coffee and three hours of sleep.
What Ingredients You Will Need
For these kid-friendly mini Halloween charcuterie boards for two, we are keeping it simple and wholesome. The goal is a balanced snack that feels like a treat. Here is everything you need to grab from your pantry and fridge.
- Cheddar Cheese Block (4 oz): A solid block of cheddar is your best friend here. It holds its shape perfectly when you use cookie cutters. Pre-sliced cheese is too thin and flimsy. I usually grab a block of sharp cheddar for the best flavor. (Tip: Let it sit out for 10 minutes to soften slightly—it cuts cleaner and is less likely to crack.)
- Halloween Cookie Cutters (1-2 small shapes): You absolutely need these. Small plastic cutters in shapes like ghosts, bats, pumpkins, or cats are cheap and easy to find at any craft store or dollar store. They are the magic wand for this recipe. Don’t skip them!
- Pretzel Sticks (1/2 cup): These act as the “bones” or “spiders” on the board. They add a fantastic salty crunch that balances the creamy cheese. I like the classic thin pretzel sticks, but the thicker ones work too.
- Seedless Clementines or Mandarin Oranges (2-3): These are nature’s perfect finger food. They are sweet, easy to peel, and add a beautiful pop of orange color to the board. Plus, the vitamin C is a nice bonus for immune systems during cold season.
- Round Crackers (about 12): Go for a neutral, buttery cracker like Ritz or a simple whole-wheat round. These are the foundation for stacking. You want something sturdy enough to hold a piece of cheese without breaking.
- Cream Cheese (2 tablespoons): A small dollop of cream cheese is a fantastic “glue” for holding things together. You can use it to stick a chocolate chip “eye” onto a ghost-shaped cheese or to hold a pretzel stick “broom” in place. Use full-fat for the best texture.
- Chocolate Chips (1 tablespoon): A few mini or regular chocolate chips are perfect for making tiny faces on your cheese shapes. They add a tiny hint of sweetness without overdoing it. Dark chocolate chips are a great option for a less sugary choice.
- Optional: Sliced Turkey or Ham (2-3 slices): If you want to add a bit of protein to make it a more substantial snack, roll up a slice of turkey or ham and cut it into bite-sized pinwheels. My kids love these, and it makes the board feel more like a mini meal.
That’s it. Seven simple ingredients. No scary shopping list, no weird specialty items. This is the kind of snack you can throw together on a Tuesday afternoon when the kids are bouncing off the walls with Halloween excitement.
Equipment Needed
You don’t need a lot of fancy gear to pull this off. In fact, you probably have most of this stuff in your kitchen drawers right now. Here is the short list of tools that make the process smooth and fun.
- Small Halloween Cookie Cutters: This is the non-negotiable item. Look for a set of 4-5 small plastic or metal cutters. The smaller the better, as they fit perfectly on a standard cracker. I bought a set of three at the dollar store last year, and they are still going strong.
- Small Cutting Board: You need a clean, flat surface to cut your cheese. A small plastic or wooden board is perfect. Bonus points if it’s a fun color!
- Sharp Paring Knife: Even with a cookie cutter, you might need to trim a little excess cheese off the edges. A small, sharp knife is much safer and easier to control than a big chef’s knife, especially if you have little helpers.
- Two Small Plates or Boards: This is what you serve the charcuterie on. I love using small wooden boards or even just plain white paper plates for easy cleanup. The key is keeping it small and individual.
- Small Bowl: You will need a tiny bowl for the cream cheese dip. A ramekin or a small dipping bowl works perfectly.
If you don’t have Halloween cookie cutters, you can absolutely use a small knife to freehand a shape. A simple circle or square is still fun! For a budget-friendly option, check your local dollar store or the seasonal aisle at the grocery store. They usually have them for a buck or two.
Preparation Method
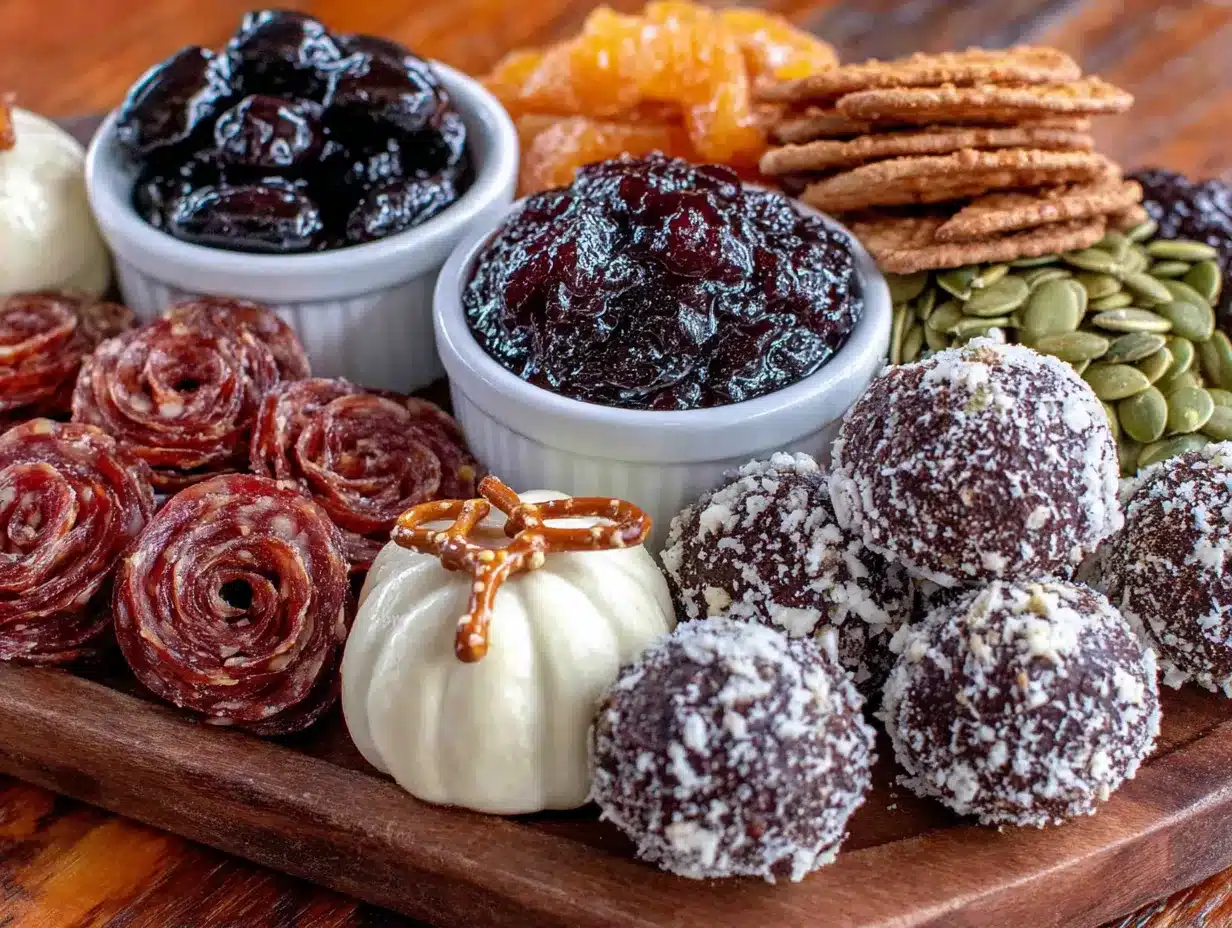
Alright, let’s get to the fun part. This whole process should take you about 15 minutes, maybe 20 if you have a very enthusiastic helper who insists on doing everything themselves. Get your little goblin to wash their hands, and let’s build some boards.
- Prep the Cheese (5 minutes): Unwrap your block of cheddar. Using a sharp knife, carefully slice the block into slabs that are about ¼-inch thick. You want them thick enough so the cookie cutter can press through cleanly, but thin enough to fit on a cracker. If the cheese is too cold from the fridge, it might crack. Let it sit on the counter for 5-10 minutes first.
- Cut the Shapes (5 minutes): Place a cheese slab on your cutting board. Press your Halloween cookie cutter firmly into the cheese. Give it a little wiggle, then pull it straight up. Gently push the cheese shape out of the cutter with your finger. Repeat until you have about 6-8 shapes per board. Don’t worry about the scraps—you can eat those yourself or let the kids snack on them. (My son calls them “cheese crumbs” and they are his favorite part.)
- Make the Faces (2 minutes): This is where the magic happens. Take a tiny dab of cream cheese on your finger and place it on the cheese shape where you want an eye. Press a chocolate chip into the cream cheese. Do the same for the other eye. You can make a little smile with a tiny sliver of pretzel stick or just leave them with two big, googly eyes. It’s silly and imperfect, and kids love it.
- Assemble the Boards (5 minutes): Take your two small plates or boards. Start by placing the small bowl of cream cheese in the center or off to one side. Arrange the cheese shapes around the bowl. Next, add a pile of pretzel sticks. You can break a few in half to look like little logs or spider legs. Add the clementines next to the pretzels. Finally, fan out the round crackers around the edges of the board.
- Add the Final Touches (2 minutes): If you are using rolled turkey or ham, place those pinwheels in any empty spots. Take a look at the board. Does it look balanced? Is there a good mix of colors and textures? Move things around until it looks fun and inviting. The goal is a little landscape of snacks that feels special.
- Serve Immediately: These boards are best enjoyed right away. The crackers stay crunchy, and the cheese is perfectly soft. Hand one board to each kid and watch them dig in. They will likely deconstruct it and rebuild it in their own order, and that is totally part of the fun.
One quick note: if you are making these ahead of time for a school party or a lunchbox surprise, you can cut the cheese shapes the night before and store them in an airtight container in the fridge. Just assemble the boards right before serving to keep everything fresh.
Cooking Tips & Techniques
I’ve made these boards about a dozen times now, and I’ve learned a few tricks the hard way. Here are my best tips to make your kid-friendly mini Halloween charcuterie boards for two a total success.
- Room Temperature Cheese is Key: I cannot stress this enough. If you try to cut cold cheese straight from the fridge, it will crack and crumble. Let the block sit on the counter for at least 10-15 minutes. It becomes much more pliable and the cookie cutter will glide through like butter. I learned this after ruining my first batch of cheese shapes—they looked more like cheese gravel than ghosts.
- Use a Little Cornstarch: If your cheese feels a bit sticky when you are trying to push it out of the cookie cutter, dip the cutter in a tiny bit of cornstarch first. It acts as a dry lubricant and helps the cheese release cleanly. This is a pro tip I picked up from a baking blog, and it works like a charm.
- Don’t Overthink the Faces: I used to try to make perfect little smiles and noses with tiny slivers of food. It took forever and looked messy. Now, I just use two chocolate chips for eyes. That’s it. A ghost with two big eyes is universally cute. Keep it simple. Your kids will not care if the face is perfect.
- Let the Kids Build Their Own: This is the biggest lesson I learned. The first time I made these, I carefully arranged everything on the board in a perfect pattern. My son immediately picked up a ghost, licked the chocolate chip off, and put it back. I realized then that the fun is in the *doing*. Let them arrange the pretzel sticks. Let them choose which cracker goes where. It gives them ownership of the snack.
- Watch the Salt: Pretzel sticks are salty. Cheddar cheese is salty. If you are using salted crackers, the whole board can become a sodium bomb for little kidneys. I recommend using low-sodium pretzels or unsalted butter crackers to balance it out. Your kids won’t taste the difference.
My biggest failure? I once tried to make these with pre-shredded cheese. It was a disaster. The shreds don’t hold a shape at all. You absolutely need a solid block. Learn from my mistakes, friends. A block of cheese is non-negotiable.
Variations & Adaptations
The beauty of this recipe is how flexible it is. You can swap things in and out based on what your kids like or what you have in the fridge. Here are a few fun ways to change it up.
- Monster Mash Board: Swap the cheddar for a block of Colby-Jack or Monterey Jack. Use a round cookie cutter to make little monster faces. Instead of chocolate chip eyes, use a dab of cream cheese and a small slice of black olive for a more savory, spooky look. My husband actually prefers this version because it’s less sweet.
- The Allergy-Friendly Board: If you have a kid with a dairy allergy, swap the cheese for slices of firm tofu that have been pressed and lightly salted. Use a gluten-free cracker and omit the pretzels or find gluten-free pretzel sticks. The cream cheese can be swapped for a dairy-free version or hummus. It still looks cute and festive.
- The Fruity Phantom Board: For a less savory, more fruit-forward snack, swap the cheese for slices of firm apple or pear. Use the cookie cutters to cut shapes out of the fruit. Brush them with a little lemon juice to prevent browning. Add some grapes and dried cranberries alongside the clementines. This is a fantastic option for a school party where sugar is limited.
- The Spooky Spider Board: Instead of cutting cheese shapes, make little “spiders” using a round cracker as the body. Spread a tiny bit of cream cheese on the cracker. Break pretzel sticks in half and stick four on each side for legs. Place two chocolate chips on top for eyes. These are so easy and look incredibly creepy-crawly.
- The Breakfast Boo Board: Who says charcuterie is just for snacks? Make a breakfast version using mini pancakes or waffles as the base. Use the cookie cutters to cut shapes out of a slice of hard cheese or a slice of ham. Serve with a side of apple slices and a tiny cup of maple syrup for dipping. It’s a guaranteed hit on Halloween morning.
I personally love the Spooky Spider variation. My son and I made them for a playdate, and the other moms thought I was some kind of culinary genius. Little did they know it took about four minutes to assemble. It’s all about the presentation.
Serving & Storage Suggestions
These boards are designed to be eaten immediately, but I have a few tips for making them work for different occasions.
Serving: Serve these at room temperature. The cheese is softer and more flavorful, and the crackers stay crunchy. If you are serving them at a small Halloween party, let the kids assemble their own boards at a “charcuterie station.” Put all the ingredients in little bowls and let them pick and choose. It keeps them entertained for 15 minutes, which is a lifetime in parent time.
Storage: If you have leftover cheese shapes (which, let’s be honest, is unlikely), store them in an airtight container in the fridge for up to 2 days. They will be fine, but the texture will be firmer. I do not recommend storing assembled boards. The crackers will get soft from the moisture in the cheese and fruit. It is much better to store the components separately.
Reheating: There is no reheating needed for this recipe. If the cheese feels too cold straight from the fridge, let the shapes sit on the counter for 5 minutes before serving. That is all they need.
Packing for School: If you want to pack one of these in a lunchbox, I have a trick. Use a bento box with separate compartments. Put the crackers in one section, the cheese shapes in another, the pretzels in a third, and the clementine in the last. Use a tiny silicone cup for the cream cheese dip. This keeps everything separate and crunchy until lunchtime. My son’s lunchbox has never come home emptier on days I pack these.
The flavors actually develop a little bit if the cheese sits out for a while. The cheddar becomes creamier and the chocolate chips soften slightly. It’s a lovely little evolution, but honestly, these boards rarely last long enough for that to matter.
Nutritional Information & Benefits
I am not a nutritionist, but I am a mom who cares about what goes into my kid’s body. This snack is a fantastic alternative to a bag of candy. Here is a rough estimate for one full board (serves one child).
Estimated Nutritional Values (per board):
- Calories: ~250-300
- Protein: ~10g
- Fat: ~15g
- Carbohydrates: ~25g
- Fiber: ~3g
- Sugar: ~12g (mostly from fruit)
Health Benefits: The cheddar cheese provides a solid dose of calcium and protein, which is great for growing bones and keeping them full. The clementines are packed with Vitamin C, which is a godsend during the cold and flu season that coincides with Halloween. The pretzels and crackers offer quick energy for all that trick-or-treating walking.
Dietary Considerations: This recipe is naturally vegetarian. It can be made gluten-free by using gluten-free crackers and pretzels. It can be made dairy-free by using a plant-based cheese block and cream cheese alternative. It is relatively low in added sugar, with the only sweetener being the chocolate chips.
Potential Allergens: This recipe contains dairy (cheese, cream cheese) and gluten (crackers, pretzels). It may contain soy (in some chocolate chips). Always check labels if you are serving a child with known allergies.
I feel good about giving my kid this snack. It feels like a treat, but it’s actually a pretty balanced little meal. It keeps the sugar monster at bay for a little while longer.
Conclusion
Look, Halloween is already stressful enough. Between the costume that doesn’t fit right, the face paint that smudges, and the sugar rush that hits at 8 PM, you don’t need a complicated recipe on your plate. These kid-friendly mini Halloween charcuterie boards for two are the antidote to all that chaos. They are simple, they are fast, and they make your kid feel incredibly special. That’s a win in my book.
I love this recipe because it saved my sanity on a day I was completely unprepared. It turned a moment of panic into a memory of laughing with my son over a ghost-shaped piece of cheese. It’s not about being a perfect parent. It’s about being a resourceful one. So, grab a block of cheese, dig out those cookie cutters, and give it a try. Your little monster will thank you.
I would love to hear how yours turn out! Did your kids make any funny faces? Did you come up with a new variation? Drop a comment below and share your spooky snack creations. And if you found this helpful, please share it with a friend who needs a little Halloween sanity saver. Happy haunting, and happy snacking!
Frequently Asked Questions
Can I make these boards ahead of time for a party?
Yes, partially. You can cut the cheese shapes up to 24 hours in advance and store them in an airtight container in the fridge. I recommend assembling the boards no more than an hour before serving to keep the crackers crunchy.
What if I don’t have Halloween cookie cutters?
No problem at all! You can use a small knife to cut the cheese into simple shapes like circles, squares, or triangles. You can also just leave the cheese as small cubes. The fun is in the arrangement, not just the shape.
My kid is allergic to dairy. What can I use instead of cheese?
You have a few great options. Firm, pressed tofu works wonderfully with cookie cutters. You can also use slices of firm apple or pear. Just brush them with a little lemon juice to stop them from turning brown. Serve with a dairy-free dip like hummus.
How can I make this a more filling meal for dinner?
To turn this into a light dinner, add a source of protein. Rolled slices of turkey, ham, or even rotisserie chicken work great. You can also add some hard-boiled egg slices or a small cup of yogurt for dipping. Serve it with a side of veggie sticks like cucumber or bell pepper.
Can I use pre-sliced cheese from the deli?
I do not recommend it. Pre-sliced cheese is usually too thin and flimsy to hold a cookie cutter shape. It will tear and crumble. A solid block of cheese is much sturdier and gives you a cleaner, more professional-looking cut. It is worth the extra minute to slice it yourself.
Pin This Recipe!
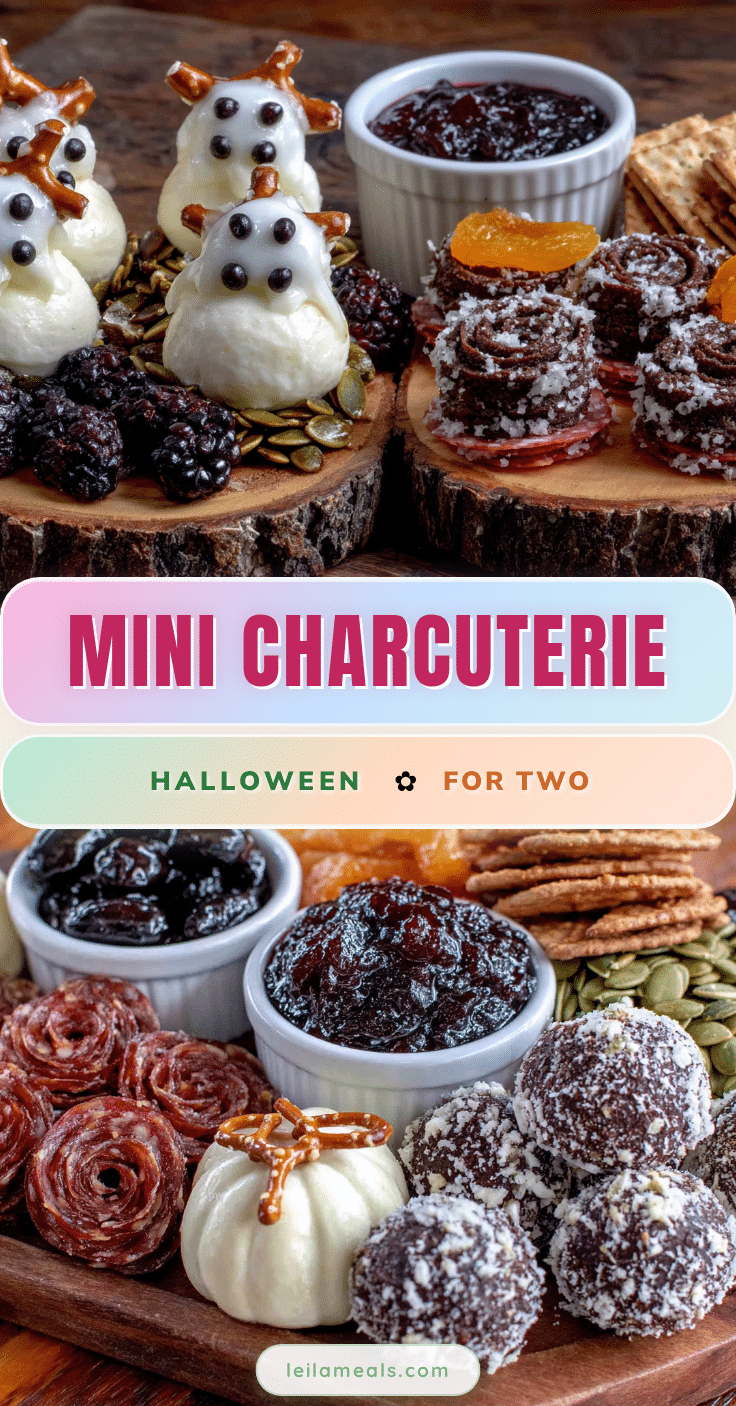
Easy Mini Halloween Charcuterie Boards for Kids
These kid-friendly mini Halloween charcuterie boards for two are the perfect quick and easy snack for little goblins. Made with simple ingredients like cheddar cheese, pretzels, and clementines, they are fun to assemble and a sanity-saver for busy parents.
- Prep Time: 15 minutes
- Cook Time: 0 minutes
- Total Time: 15 minutes
- Yield: 2 servings 1x
- Category: Snack
- Cuisine: American
Ingredients
- 4 oz cheddar cheese block
- 1–2 small Halloween cookie cutters
- 1/2 cup pretzel sticks
- 2–3 seedless clementines or mandarin oranges
- 12 round crackers (e.g., Ritz or whole-wheat)
- 2 tablespoons cream cheese
- 1 tablespoon chocolate chips
- 2–3 slices turkey or ham (optional)
Instructions
- Prep the Cheese: Unwrap the cheddar block. Using a sharp knife, slice the block into slabs about 1/4-inch thick. Let the cheese sit at room temperature for 5-10 minutes to soften slightly.
- Cut the Shapes: Place a cheese slab on a cutting board. Press a Halloween cookie cutter firmly into the cheese, wiggle it, and pull it straight up. Gently push the cheese shape out of the cutter. Repeat until you have 6-8 shapes per board.
- Make the Faces: Take a tiny dab of cream cheese and place it on a cheese shape where you want an eye. Press a chocolate chip into the cream cheese. Repeat for the other eye. Optionally, add a small sliver of pretzel stick for a smile.
- Assemble the Boards: Place two small plates or boards. Put a small bowl of cream cheese in the center or off to one side. Arrange the cheese shapes around the bowl. Add a pile of pretzel sticks, clementines, and fan out the round crackers around the edges.
- Add the Final Touches: If using, place rolled turkey or ham pinwheels in any empty spots. Adjust the arrangement for balance and color.
- Serve Immediately: Hand one board to each child and enjoy right away.
Notes
Let the cheese sit at room temperature for 10-15 minutes before cutting to prevent cracking. If the cheese is sticky, dip the cookie cutter in a little cornstarch. For a less salty snack, use low-sodium pretzels or unsalted crackers. The boards are best served immediately, but cheese shapes can be cut up to 24 hours in advance and stored in an airtight container in the fridge.
Nutrition
- Serving Size: 1 board
- Calories: 275
- Sugar: 12
- Sodium: 450
- Fat: 15
- Saturated Fat: 9
- Carbohydrates: 25
- Fiber: 3
- Protein: 10
Keywords: Halloween charcuterie, kid-friendly snack, mini charcuterie board, Halloween snack, easy Halloween recipe, cheese shapes, spooky snack


