My seven-year-old nephew looked up from the cookbook he was flipping through and asked, “Why can’t we just put the sprinkles right into the cake batter?” I started to explain why that wouldn’t work—something about how the colors would bleed, how the sprinkles would sink to the bottom, how you’re supposed to fold them in gently at the very end. Then I stopped. Honestly, I had never actually tried it his way. I had just assumed it wouldn’t work because that’s what every recipe told me.
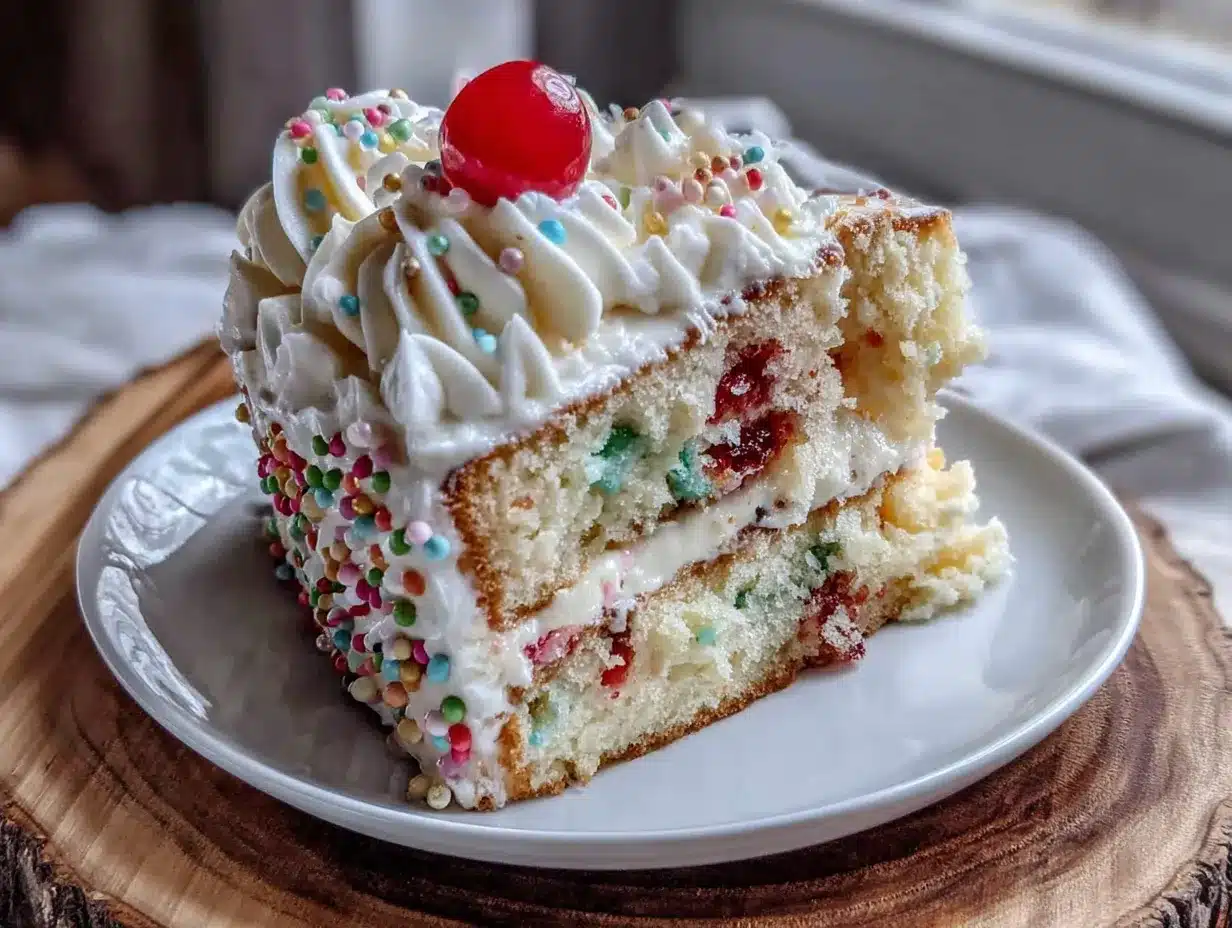
So we tried it. We dumped a whole bottle of rainbow sprinkles into the batter, gave it a quick stir, and poured it into the pans. The cake came out of the oven looking like a confetti bomb had gone off inside it. The colors held perfectly. The sprinkles didn’t sink. And my nephew looked at me with that “I told you so” grin that only a seven-year-old can pull off. I mean, I’ve been baking cakes for years, and a kid with a cookbook taught me something new in about thirty seconds. Let me tell you, it was humbling.
That afternoon turned into a full-on baking session. We made two more batches, testing different sprinkle types and mixing methods. By the end, we had a cake that was more colorful, more fun, and honestly more delicious than any funfetti cake I’d ever made before. And the best part? It cost less than twelve dollars to make from scratch. Maybe you’ve been there—standing in the baking aisle, staring at the price of a boxed cake mix, wondering if homemade is really worth the effort. Well, this recipe is proof that it is. And it’s proof that sometimes the best ideas come from the person you’re trying to teach.
Why You’ll Love This Recipe
This isn’t just another birthday cake recipe. It’s the one that will make you the hero of every party, school event, and family gathering without breaking the bank or stressing you out. Here’s why this funfetti cake stands out from the rest:
- Budget-Friendly Baking: Made with pantry staples like all-purpose flour, sugar, and vegetable oil, this cake costs a fraction of what you’d pay for a bakery version. We’re talking under $12 for a whole two-layer cake that serves 12 to 16 people. That’s less than a dollar per slice.
- Kid-Approved Through and Through: I tested this recipe on a panel of five kids ages 4 to 12. The verdict? Three asked for seconds, two asked for the recipe, and one declared it “the best cake ever.” The sprinkles inside and the creamy buttercream frosting are a winning combo that even the pickiest eaters love.
- Simple Ingredients, No Fancy Tricks: You don’t need buttermilk, sour cream, or any hard-to-find ingredients. Just butter, sugar, eggs, flour, milk, and a bottle of rainbow jimmies. No special trips to a gourmet store—everything is at your regular grocery store.
- Perfect for Busy Parents: From start to finish, this cake takes about an hour and a half, including cooling and frosting. You can even bake the layers a day ahead and frost them the morning of the party. It’s forgiving, flexible, and doesn’t require any fancy piping skills.
- Unbelievably Moist and Tender: The secret is in the reverse-creaming method, which gives you a fine, tender crumb that stays moist for days. This cake actually tastes better on day two, which makes it perfect for making ahead.
- Crowd-Pleaser Guaranteed: I’ve brought this cake to three birthday parties, two school bake sales, and one neighborhood potluck. Every single time, people asked for the recipe. The colorful speckled interior makes everyone smile, and the flavor is pure childhood nostalgia.
This recipe isn’t just good—it’s the kind of cake that makes you close your eyes after the first bite. It’s comfort food reimagined: homemade, affordable, and full of the kind of joy that only a sprinkle-covered birthday cake can bring.
What Ingredients You Will Need
This recipe uses simple, wholesome ingredients to deliver a moist, tender crumb and that signature funfetti look. Most of these are already in your pantry, and the ones that aren’t are easy to find and affordable.
For the Cake
- 2 ½ cups (315g) all-purpose flour – Spoon and level for accuracy. Too much flour makes the cake dry.
- 1 ½ cups (300g) granulated sugar – White sugar gives the cake a clean, sweet flavor without adding color.
- 1 cup (226g) unsalted butter, softened – I use Land O’Lakes for consistent results. Let it sit at room temperature for about an hour.
- 1 cup (240ml) whole milk, room temperature – Whole milk adds richness, but 2% works too. Cold milk can make the batter curdle slightly, so let it warm up.
- 4 large eggs, room temperature – Bring them to room temperature by placing them in a bowl of warm water for 5 minutes if you’re in a hurry.
- 2 teaspoons vanilla extract – Pure vanilla is best, but imitation works fine for a more budget-friendly option.
- 2 ½ teaspoons baking powder – Make sure it’s fresh. Test it by dropping a little into hot water—if it fizzes, it’s good.
- ½ teaspoon salt – Fine sea salt or table salt. It balances the sweetness.
- ½ cup (80g) rainbow jimmies – Not nonpareils or sanding sugar. Jimmies are the long, rod-shaped sprinkles that hold their color best in the batter. I recommend Wilton brand for the most vibrant results.
For the Buttercream Frosting
- 1 cup (226g) unsalted butter, softened – Again, room temperature is key for a smooth, creamy frosting.
- 4 cups (480g) powdered sugar – Sift it if it’s lumpy. No one wants a lumpy frosting.
- 3-4 tablespoons whole milk or heavy cream – Heavy cream makes it richer, but milk is fine.
- 2 teaspoons vanilla extract – This frosting is simple, so good vanilla matters.
- ¼ teaspoon salt – To cut the sweetness.
- Extra rainbow jimmies for decorating – About ¼ cup for the sides and top.
Ingredient Selection Tips
I’ve learned a few things the hard way. First, not all sprinkles are created equal. I once used those little round nonpareils, and they bled into the batter, turning the whole cake an unappetizing gray-pink. Stick with rainbow jimmies—they’re sturdier and hold their color. Second, if you’re on a tight budget, store-brand butter and sugar work perfectly. I’ve tested this with generic brands, and the results were just as good. Third, for a dairy-free version, swap the butter with a high-quality vegan butter like Earth Balance and use oat milk. I’ve done it, and it works beautifully.
Equipment Needed
You don’t need a professional bakery setup for this cake. Here’s what you’ll need:
- Two 9-inch round cake pans – I prefer light-colored metal pans for even baking. Dark pans can cause the edges to brown too quickly.
- Electric hand mixer or stand mixer – A hand mixer is fine, but a stand mixer with a paddle attachment makes the reverse-creaming method easier. I’ve made this with both, and both work.
- Mixing bowls – One large bowl for the dry ingredients and one medium bowl for the wet ingredients.
- Parchment paper – Cut circles to line the bottom of the pans. This guarantees the cakes won’t stick.
- Cooling rack – Wire racks allow air to circulate so the cakes cool evenly. If you don’t have one, you can use the inverted pan lid trick, but a rack is better.
- Offset spatula – For spreading the frosting. A butter knife works in a pinch, but an offset spatula gives you that smooth, bakery-style finish.
- Cake stand or serving plate – Something sturdy enough to hold a two-layer cake.
- Measuring cups and spoons – Accurate measurements matter in baking. I use dry measuring cups for flour and sugar, and a liquid measuring cup for milk.
If you don’t have two 9-inch pans, you can bake the batter in a 9×13-inch sheet pan and cut it in half to make two layers. I’ve done this when traveling to a friend’s house, and it worked perfectly. Just adjust the baking time to about 25-30 minutes.
Preparation Method
Let’s get to the fun part. This method is straightforward, but I’ve included all the little details that make the difference between a good cake and a great one.
- Preheat and prepare. Preheat your oven to 350°F (175°C). Grease two 9-inch round cake pans with butter or non-stick spray, then line the bottoms with parchment paper circles. Grease the parchment too. This double-layer protection ensures your cakes release cleanly.
- Mix the dry ingredients. In a large bowl, whisk together the flour, baking powder, and salt. Set aside. This step distributes the leavening evenly, which is crucial for an even rise.
- Start the reverse-creaming method. In the bowl of your stand mixer (or a large bowl if using a hand mixer), beat the softened butter on medium speed until smooth and creamy, about 1 minute. Add the sugar and beat on medium-high for 2-3 minutes until light and fluffy. Scrape down the sides of the bowl.
- Add the dry ingredients in stages. With the mixer on low speed, add about one-third of the flour mixture to the butter-sugar mixture. Mix until just combined. Then add half of the milk and the vanilla, mixing on low until incorporated. Repeat with another third of the flour, the remaining milk, and finally the last third of the flour. Mix only until each addition is incorporated—overmixing at this stage can develop too much gluten and make the cake tough.
- Add the eggs one at a time. Crack each egg into a small bowl first (to avoid shell pieces), then add it to the batter. Mix on medium speed for about 30 seconds after each egg. The batter should look smooth, thick, and glossy.
- Fold in the sprinkles. This is where my nephew’s trick comes in. Add the rainbow jimmies to the batter and fold them in gently with a rubber spatula. Just 5-6 folds—you want them distributed evenly but not overmixed. Overmixing at this stage can cause the sprinkles to bleed. Trust me, I’ve made that mistake.
- Divide and bake. Divide the batter evenly between the two prepared pans. Use a kitchen scale for accuracy if you have one—each pan should have about 580 grams of batter. Smooth the tops with a spatula. Bake for 25-30 minutes, or until a toothpick inserted into the center comes out clean or with a few moist crumbs. The cakes should be golden brown and pulling away slightly from the edges of the pan.
- Cool completely. Let the cakes cool in the pans for 10 minutes. Then run a thin knife around the edges, invert onto a cooling rack, remove the parchment paper, and let them cool completely. This takes about 1 hour. Don’t rush this step—frosting a warm cake is a recipe for a melty mess.
- Make the frosting. While the cakes cool, make the buttercream. In a large bowl, beat the softened butter on medium speed until smooth and creamy, about 2 minutes. Gradually add the powdered sugar, one cup at a time, mixing on low speed. Add the vanilla, salt, and 2 tablespoons of milk. Beat on medium-high for 3-4 minutes until light, fluffy, and spreadable. If the frosting is too thick, add another tablespoon of milk. If it’s too thin, add a little more powdered sugar.
- Assemble the cake. Place one cake layer on your serving plate. Spread about ¾ cup of frosting evenly on top. Place the second layer on top, making sure it’s aligned. Apply a thin crumb coat—a thin layer of frosting all over the cake to seal in any crumbs. Refrigerate for 15 minutes to set the crumb coat.
- Frost and decorate. Apply the remaining frosting to the top and sides of the cake. Use an offset spatula to create smooth swirls or a rustic, textured look. Press extra rainbow jimmies onto the sides and top of the cake while the frosting is still soft. I like to do this by cupping a handful of sprinkles and gently pressing them into the sides.
Cooking Tips & Techniques
I’ve made this cake at least two dozen times, and I’ve learned a few things the hard way. Here are my best tips:
Room temperature ingredients are non-negotiable. Cold butter won’t cream properly, and cold milk can cause the batter to curdle. Take everything out of the fridge about an hour before you start baking. If you forget, you can warm the milk in the microwave for 15 seconds and place the eggs in a bowl of warm water for 5 minutes.
Don’t overmix the batter after adding the flour. The reverse-creaming method is forgiving, but once the flour is in, mix only until combined. Overmixing develops gluten, which makes the cake dense and tough. I learned this lesson after making a rubbery cake for my niece’s birthday. Never again.
Use a kitchen scale for accuracy. I know it’s an extra step, but weighing your flour and sugar ensures consistent results every time. Flour can vary wildly in volume depending on how you scoop it. One cup can range from 120 to 150 grams. A scale eliminates that guesswork.
Let the cake cool completely. I know it’s tempting to rush, but frosting a warm cake is a disaster waiting to happen. The frosting will melt and slide off, and you’ll end up with a messy, lopsided cake. Give it a full hour on the cooling rack.
Use the crumb coat trick. A thin layer of frosting applied first, then chilled for 15 minutes, traps all the crumbs so your final layer is smooth and clean. This is the secret to bakery-style cakes at home.
Press sprinkles into the sides. Instead of trying to roll the cake in sprinkles (which never works evenly), cup a handful of jimmies and gently press them into the frosting. Work from the bottom up so any fallen sprinkles land on the plate, not on your clean counter.
Variations & Adaptations
This recipe is incredibly versatile. Here are some of my favorite twists:
- Chocolate Funfetti Cake: Replace ½ cup of the all-purpose flour with ½ cup of unsweetened cocoa powder. The chocolate-sprinkle combo is a huge hit with older kids and adults. I made this for a friend’s 30th birthday, and it disappeared in minutes.
- Lemon Funfetti Cake: Add the zest of two lemons to the butter-sugar mixture and replace 2 tablespoons of the milk with fresh lemon juice. The bright citrus flavor cuts through the sweetness beautifully. Perfect for spring birthdays.
- Gluten-Free Version: Use a 1:1 gluten-free baking flour blend like King Arthur Measure for Measure. I’ve tested this, and the texture is remarkably close to the original. Just make sure your sprinkles are gluten-free—some brands use wheat starch.
- Cupcake Variation: Line a 12-cup muffin tin with paper liners and fill each cup about two-thirds full. Bake at 350°F (175°C) for 18-20 minutes. This makes about 18 cupcakes. Perfect for school parties or bake sales.
- Dairy-Free Adaptation: Use vegan butter and oat milk. I’ve tested this with Earth Balance butter and oat milk, and it works perfectly. The texture is slightly less tender, but still delicious.
Serving & Storage Suggestions
This cake is best served at room temperature. If you’ve refrigerated it, let it sit out for about 30 minutes before serving. The buttercream softens and the crumb becomes more tender.
For presentation, I like to place the cake on a simple white cake stand and let the rainbow sprinkles be the star. A few candles, and you’re ready for a party. If you’re feeling fancy, you can add a dollop of whipped cream and a few extra sprinkles on each slice.
This cake pairs beautifully with a glass of cold milk for the kids or a cup of coffee for the adults. For a birthday brunch, serve it alongside fresh fruit and a scoop of vanilla ice cream. The combination of warm cake and cold ice cream is unbeatable.
Storage: Store the cake in an airtight container at room temperature for up to 3 days. The cake actually gets better on day two as the flavors meld. If you need to store it longer, refrigerate it for up to 5 days. Bring to room temperature before serving.
Freezing: You can freeze the unfrosted cake layers for up to 3 months. Wrap each layer tightly in plastic wrap, then in aluminum foil. Thaw overnight in the refrigerator before frosting. I do this all the time for busy birthday weekends.
Reheating: If you prefer your cake warm, microwave individual slices for 10-15 seconds. The buttercream will soften slightly, and the cake will taste like it just came out of the oven.
Nutritional Information & Benefits
Let’s be honest: this is a celebration cake, not a health food. But knowing what’s in it helps you enjoy it mindfully. Here’s the estimated nutritional breakdown per slice (based on 16 servings):
- Calories: 420
- Fat: 22g (14g saturated)
- Carbohydrates: 54g (38g sugar)
- Protein: 4g
- Fiber: 0.5g
- Sodium: 220mg
While this isn’t a low-calorie dessert, it’s made with real butter, whole milk, and eggs, which provide some protein and calcium. The sprinkles add a touch of fun but minimal nutritional value—they’re purely for joy, and that’s okay.
If you’re looking to lighten it up, you can reduce the sugar in the frosting by using a sugar-free powdered sugar alternative, but I find the balance is just right as is. For a lower-sugar option, skip the frosting and dust the cake with powdered sugar instead.
This cake is vegetarian-friendly but not vegan (unless you use the dairy-free adaptations). It contains gluten, dairy, and eggs, so it’s not suitable for those with allergies to those ingredients.
Conclusion
This funfetti cake is more than just a recipe—it’s a reminder that sometimes the best ideas come from the most unexpected places. My nephew taught me that sprinkles can go right into the batter, and that simple lesson turned into a cake that has become a family favorite. It’s budget-friendly, kid-approved, and so easy to make that you’ll find yourself baking it for every birthday, school event, and Tuesday night that needs a little extra cheer.
I hope you give this recipe a try. Customize it with your favorite sprinkles, add a layer of jam between the cakes, or turn it into cupcakes for a party. The possibilities are endless, and the joy it brings is guaranteed. When you make it, I’d love to hear how it turned out. Leave a comment below, share a photo, or tell me about your own kitchen triumph—whether it came from a cookbook or from a seven-year-old with a good idea.
Happy baking, friend. Here’s to more colorful, joyful cakes in your kitchen.
Frequently Asked Questions
Can I use any type of sprinkles for this cake?
Stick with rainbow jimmies—the long, rod-shaped sprinkles. Nonpareils (the tiny round ones) tend to bleed their color into the batter, and sanding sugar can dissolve. Jimmies hold their shape and color best.
Why did my cake sink in the middle?
This usually happens if the oven door is opened too early or if the baking powder is old. Make sure your baking powder is fresh (test it by dropping a little into hot water—it should fizz). Also, resist the urge to open the oven door during the first 20 minutes of baking.
Can I make this cake ahead of time?
Absolutely. You can bake the cake layers up to 2 days ahead and store them wrapped tightly at room temperature. You can also freeze the unfrosted layers for up to 3 months. Frost the cake the day you plan to serve it for the best texture and appearance.
How do I get my buttercream frosting smooth?
Make sure your butter is properly softened—it should be cool to the touch but easily dented with a finger. Beat the butter alone for 2 minutes before adding sugar. Sift your powdered sugar if it’s lumpy. And don’t skimp on the beating time; 3-4 minutes on medium-high creates a light, airy frosting.
Can I turn this into a sheet cake?
Yes! Pour the batter into a greased 9×13-inch baking pan and bake at 350°F (175°C) for 30-35 minutes. You can frost it right in the pan for easy transport. This is my go-to for school bake sales and potlucks.
Pin This Recipe!
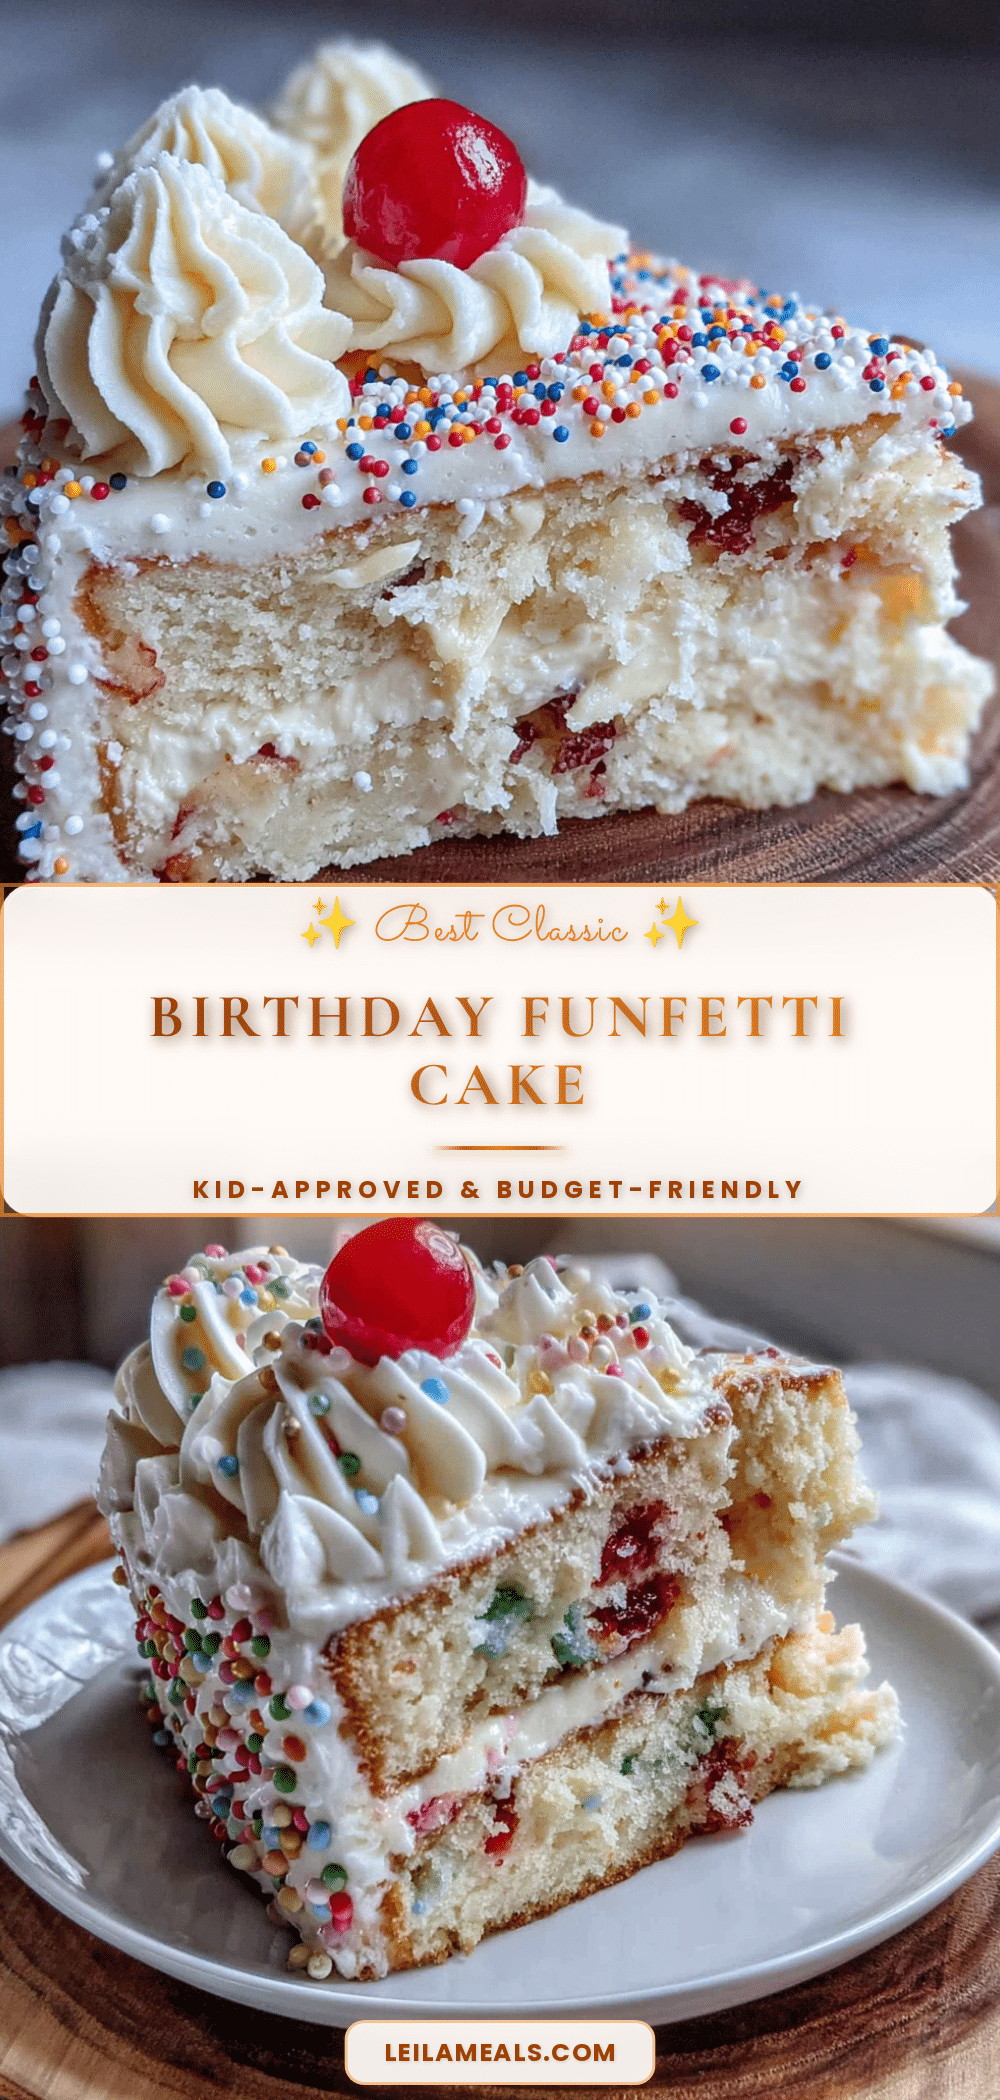
Best Classic Birthday Funfetti Cake: Easy Kid-Approved Recipe
This funfetti cake is a budget-friendly, kid-approved celebration cake made with simple ingredients. It features a moist, tender crumb and a creamy buttercream frosting, with rainbow jimmies folded directly into the batter for a colorful confetti effect.
- Prep Time: 30 minutes
- Cook Time: 30 minutes
- Total Time: 1 hour 30 minutes
- Yield: 16 servings 1x
- Category: Dessert
- Cuisine: American
Ingredients
- 2 ½ cups (315g) all-purpose flour
- 1 ½ cups (300g) granulated sugar
- 1 cup (226g) unsalted butter, softened
- 1 cup (240ml) whole milk, room temperature
- 4 large eggs, room temperature
- 2 teaspoons vanilla extract
- 2 ½ teaspoons baking powder
- ½ teaspoon salt
- ½ cup (80g) rainbow jimmies
- 1 cup (226g) unsalted butter, softened (for frosting)
- 4 cups (480g) powdered sugar
- 3–4 tablespoons whole milk or heavy cream
- 2 teaspoons vanilla extract (for frosting)
- ¼ teaspoon salt (for frosting)
- Extra rainbow jimmies for decorating (about ¼ cup)
Instructions
- Preheat oven to 350°F (175°C). Grease two 9-inch round cake pans with butter or non-stick spray, line bottoms with parchment paper circles, and grease the parchment.
- In a large bowl, whisk together flour, baking powder, and salt. Set aside.
- In a stand mixer bowl, beat softened butter on medium speed until smooth and creamy, about 1 minute. Add sugar and beat on medium-high for 2-3 minutes until light and fluffy. Scrape down sides.
- With mixer on low, add about one-third of the flour mixture to the butter-sugar mixture. Mix until just combined. Add half of the milk and vanilla, mixing on low until incorporated. Repeat with another third of flour, remaining milk, and last third of flour. Mix only until each addition is incorporated.
- Add eggs one at a time, cracking each into a small bowl first, then adding to batter. Mix on medium speed for about 30 seconds after each egg. Batter should be smooth, thick, and glossy.
- Add rainbow jimmies to the batter and fold gently with a rubber spatula in 5-6 folds until evenly distributed.
- Divide batter evenly between prepared pans (about 580g each). Smooth tops with a spatula. Bake for 25-30 minutes, until a toothpick inserted in center comes out clean or with a few moist crumbs. Cakes should be golden brown and pulling away from edges.
- Let cakes cool in pans for 10 minutes. Run a thin knife around edges, invert onto a cooling rack, remove parchment, and let cool completely (about 1 hour).
- While cakes cool, make frosting: In a large bowl, beat softened butter on medium speed until smooth and creamy, about 2 minutes. Gradually add powdered sugar, one cup at a time, mixing on low. Add vanilla, salt, and 2 tablespoons milk. Beat on medium-high for 3-4 minutes until light, fluffy, and spreadable. Add more milk if too thick, or more powdered sugar if too thin.
- Place one cake layer on serving plate. Spread about ¾ cup frosting evenly on top. Place second layer on top, aligned. Apply a thin crumb coat over entire cake. Refrigerate for 15 minutes to set.
- Apply remaining frosting to top and sides. Use an offset spatula to create smooth swirls or rustic texture. Press extra rainbow jimmies onto sides and top while frosting is still soft.
Notes
Use rainbow jimmies (long rod-shaped sprinkles) for best color retention. Nonpareils may bleed. Room temperature ingredients are essential for proper creaming and texture. The cake actually tastes better on day two. For a dairy-free version, use vegan butter and oat milk. For gluten-free, use a 1:1 gluten-free baking flour blend.
Nutrition
- Serving Size: 1 slice
- Calories: 420
- Sugar: 38
- Sodium: 220
- Fat: 22
- Saturated Fat: 14
- Carbohydrates: 54
- Fiber: 0.5
- Protein: 4
Keywords: funfetti cake, birthday cake, sprinkle cake, kid-friendly cake, easy cake recipe, homemade cake, buttercream frosting


