My neighbor, Mrs. Gable, watched me trying to balance a grocery bag, my keys, and a toddler who had decided that the sidewalk was lava. She didn’t say anything at first. Then she just shook her head, walked over, and took the bag from my arms. “You look like you need a recipe that doesn’t need a recipe,” she said, and that was how the candy corn bark came into my life.
She was a retired home economics teacher from a different era—the kind of woman who could make a three-course meal from a can of soup and a box of crackers. We ended up sitting on her porch steps while my kid chased leaves, and she told me about the fall baking she used to do for the school’s harvest festival. She mentioned this bark almost as an afterthought, like it was too simple to even call a recipe. “You just melt, layer, and sprinkle,” she said. “It’s not fancy, but kids love it.”
Honestly, I was skeptical. Candy corn and white chocolate? It sounded like something a convenience store would sell in October. But I was tired, my brain was fried, and the idea of not having to cream butter or sift flour sounded like a small miracle. So I tried it that weekend, and let me tell you—I have never been so happy to be wrong.
The first batch came out a little too thick because I got distracted by a phone call. The second batch was perfect, and I stood there in my kitchen eating pieces off the parchment paper like I hadn’t eaten in days. Maybe you’ve been there—that moment when a recipe is so easy it feels like cheating, but the result is so good you feel like you actually did something special.
That’s this bark. It’s the recipe you turn to when you need a Halloween treat that looks impressive but takes ten minutes of actual work. It’s the one you make with kids, or when you’re too tired to bake but still want to show up with something homemade. Mrs. Gable moved away a couple years ago, but every time I make this bark, I think of her sitting on that porch, telling me that the best recipes are the ones you don’t have to think about.
Why You’ll Love This Recipe
This easy candy corn bark with white chocolate is the kind of recipe that makes you look like a kitchen hero without actually having to be one. I’ve tested it six times now—three times on purpose, three times because I kept eating it and had to make more—and it works every single time. Here is why this one is different from all the other holiday treats out there:
- Quick & Easy: From start to finish, this takes about 10 minutes of active work. The rest is just waiting for the chocolate to set. You can make it while dinner is in the oven or while the kids are doing homework.
- Simple Ingredients: You only need three ingredients. Three. No fancy baking chocolate, no specialty stores, no hunting down obscure sprinkles. White chocolate chips, candy corn, and a little bit of vegetable oil. That’s it.
- Perfect for Halloween: This is the ideal treat for classroom parties, trick-or-treat bowls, or just having something festive on the counter. It’s also great for fall gatherings, Thanksgiving dessert tables, or even as a homemade gift in a little cellophane bag.
- Crowd-Pleaser: Kids go nuts for it because of the candy corn. Adults go nuts for it because of the white chocolate and the salty-sweet thing that happens. I brought a batch to a book club meeting and it was gone before we even talked about the book.
- Unbelievably Delicious: The texture is what gets you. The white chocolate is smooth and creamy, the candy corn adds a little chew, and when you break the bark into pieces, you get these satisfying shards with colorful bits scattered throughout. It’s simple, but it hits every note.
What makes this recipe different from the rest is the technique. Most people just melt chocolate and dump candy on top, but I’ve found that layering the candy corn into the chocolate itself gives you a better distribution. Every piece gets a little bit of that orange and yellow, instead of just having a few pieces with all the candy corn on top. It’s a small tweak, but it makes a big difference.
This recipe isn’t just good—it’s the kind that makes you close your eyes after the first bite. It’s comfort food for the fall season, made in a fraction of the time it takes to bake cookies or a cake. Perfect for impressing guests without stress, or turning a simple Tuesday into something a little bit special.
What Ingredients You Will Need
This recipe uses simple, mostly pantry-staple ingredients to deliver that perfect Halloween treat without any fuss. Here is everything you need and a few notes on how to pick the best ones:
- White chocolate chips (340g / 12 oz): This is the base of the whole bark, so quality matters. I personally prefer Ghirardelli white chocolate chips for their smooth melt and creamy flavor. If you use a generic store brand, look for one that contains cocoa butter rather than just palm oil—it will melt more evenly and taste less waxy. You can also use white chocolate melting wafers if you want an even easier melt, but chips work just fine.
- Candy corn (200g / 1 ½ cups): The star of the show. I use classic Brach’s candy corn because it’s what Mrs. Gable used and it just feels right. You can also use the autumn mix that has the little pumpkins and leaves, which adds some nice variety in color and shape. If you’re one of those people who claims to hate candy corn—and I used to be one of them—this recipe might change your mind. The white chocolate mellows out the super-sweet honey flavor and adds a creamy element that balances everything.
- Vegetable oil (5ml / 1 tsp): This is optional but highly recommended. Adding a tiny bit of oil to the melting chocolate helps it flow more smoothly and gives the finished bark a nicer snap when you break it. Coconut oil works great here too, and adds a subtle flavor that pairs nicely with the white chocolate. Just make sure it’s refined coconut oil if you don’t want a coconut taste.
- Optional: Sea salt (a pinch): I know I said three ingredients, but hear me out. A tiny sprinkle of flaky sea salt over the top before the chocolate sets takes this from good to absolutely addictive. The salt cuts through the sweetness and makes the flavors pop. I use Maldon sea salt flakes, but any coarse sea salt will do.
- Optional: Fall sprinkles (30g / ¼ cup): If you want to make this look extra festive, add some orange, yellow, and brown sprinkles on top. I like the little leaf-shaped ones you can find at craft stores or online. They’re purely decorative, but they make the bark look like something from a fancy bakery.
Ingredient Selection Tips: For the white chocolate, avoid “white chips” that are labeled as vanilla chips or baking chips—these often don’t contain cocoa butter and will seize up when melted. Look for actual white chocolate with cocoa butter listed in the ingredients. For the candy corn, fresh is better. Stale candy corn gets hard and loses that chewy texture that makes this bark so good. If your candy corn feels rock hard, it’s probably been sitting in the pantry too long.
Substitution Guidance: If you need a dairy-free option, use dairy-free white chocolate chips and make sure your candy corn doesn’t contain any milk ingredients (most brands don’t). For a nut-free version, this recipe is naturally nut-free as written, but double-check your white chocolate chips for cross-contamination warnings if that’s a concern. You can also swap the candy corn for candy pumpkins or even chopped-up caramel candies for a different twist.
Equipment Needed
You don’t need much for this recipe, which is honestly one of the best things about it. Here’s what you’ll need:
- Baking sheet (13×18 inch / 33×46 cm): A standard half-sheet pan works perfectly. If you don’t have one, any rimmed baking sheet will do—just adjust the thickness of your bark accordingly.
- Parchment paper: Non-negotiable. The bark will stick to wax paper and foil, so use parchment. I buy the pre-cut sheets from Costco because I’m lazy, but a roll works fine too.
- Microwave-safe bowl or double boiler: I use a glass Pyrex measuring cup for melting chocolate because the pour spout makes it easier to spread. A double boiler gives you more control if you’re nervous about burning the chocolate.
- Spatula or offset spatula: For spreading the melted chocolate into an even layer. A regular rubber spatula works fine, but an offset spatula gives you a smoother surface.
- Sharp knife: For cutting or breaking the bark after it sets. A chef’s knife or a large serrated knife both work well.
- Refrigerator space: You’ll need a flat spot in your fridge to let the bark set. Clear a shelf before you start melting the chocolate.
Budget-Friendly Options: If you don’t have an offset spatula, the back of a spoon works perfectly fine. If you don’t have a microwave, use a double boiler setup with a heatproof bowl over a pot of simmering water. If you don’t have a baking sheet, a large cutting board covered in parchment will work in a pinch—just make sure it’s completely flat.
Preparation Method
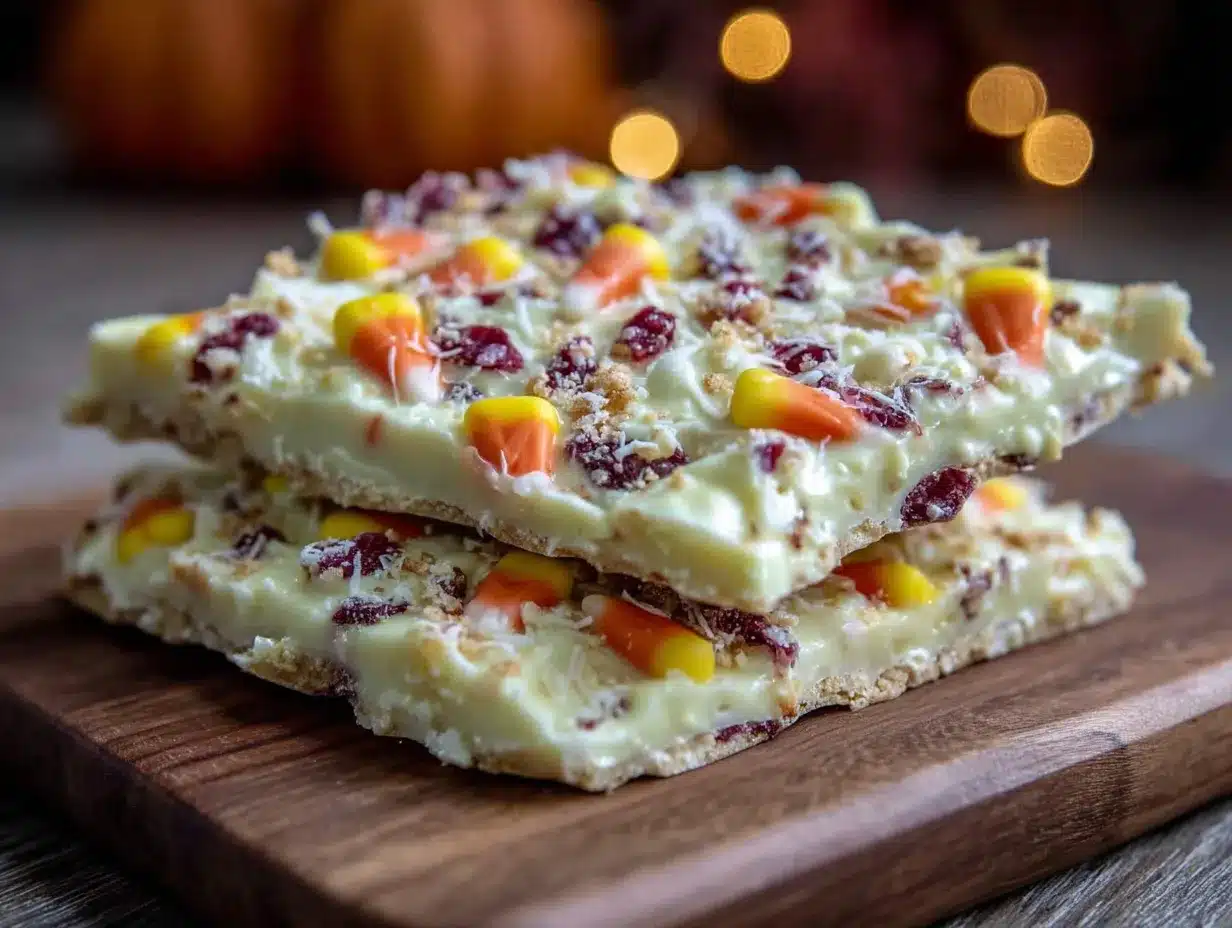
This is the easiest part. Follow these steps and you’ll have beautiful, crackly candy corn bark in no time. I’ve included all the little details that I learned through trial and error so you don’t have to make the same mistakes I did.
- Prep your pan (5 minutes): Line your baking sheet with parchment paper. Make sure the paper extends up the sides a little bit—this gives you something to grab onto later when you’re breaking the bark. Smooth out any wrinkles in the parchment so your bark has a nice flat surface. I learned this the hard way after my first batch came out with weird ripples on the bottom.
- Melt the white chocolate (3-4 minutes): Put your white chocolate chips in a microwave-safe bowl. Add the vegetable oil on top. Microwave in 30-second intervals at 50% power, stirring well between each interval. This is crucial—full power will scorch the chocolate and turn it into a grainy, clumpy mess. After about 2 minutes, the chips should look mostly melted but still hold their shape a little. Stir continuously until the residual heat melts everything into a smooth, glossy liquid. If you see any lumps, microwave for another 10 seconds and stir again. Do not overheat.
- Add the candy corn (2 minutes): Reserve about ¼ cup of candy corn for the top. Pour the remaining candy corn into the melted white chocolate and fold gently with your spatula. You want the candy corn to be evenly distributed but not crushed. The chocolate will start to thicken slightly as it cools, so work quickly but gently. This is where the magic happens—every piece of bark will have little pops of orange and yellow throughout.
- Spread the mixture (3 minutes): Pour the chocolate-candy corn mixture onto your prepared baking sheet. Use your spatula to spread it into an even layer about ¼ inch (6mm) thick. Don’t make it too thin or the bark will be fragile and break into tiny pieces. Don’t make it too thick or it will be hard to bite through. Aim for an even, consistent layer. The shape doesn’t matter—it can be a rough rectangle or even an oval. This is bark, not a geometric sculpture.
- Top with reserved candy corn (2 minutes): Sprinkle the reserved candy corn over the top of the melted chocolate. Press each piece down gently with your finger so it sticks. This step is purely aesthetic, but it makes the bark look so much more intentional and pretty. I like to space them out evenly, but my kids prefer to cluster them, so sometimes we compromise and do a little of both.
- Add optional toppings (1 minute): If you’re using sea salt or sprinkles, sprinkle them over the top now while the chocolate is still wet. The salt should be a light dusting—you want little flecks here and there, not a crust. The sprinkles can be more generous. Work quickly because the chocolate sets fast, especially if your kitchen is cool.
- Set the bark (30-45 minutes): Place the baking sheet in the refrigerator on a flat surface. Let it set for at least 30 minutes, but 45 is better. The bark should be completely firm to the touch and should lift easily off the parchment paper. If it bends or feels soft, give it more time. I once tried to rush this step and ended up with chocolate all over my fingers and a broken piece of bark on the floor.
- Break into pieces (5 minutes): Once the bark is fully set, lift the parchment paper out of the baking sheet. Place it on a cutting board. Use your hands to break the bark into irregular pieces—this is where the “bark” name comes from. If you want cleaner edges, use a sharp knife to cut it into squares or triangles. I prefer the rustic, jagged look because it feels more homemade and less like something from a factory. Plus, the irregular pieces are more fun to eat.
- Serve or store (2 minutes): Arrange the pieces on a platter or pack them into an airtight container. If you’re serving them right away, they’re perfect at room temperature. If you’re storing them, see the storage section below for tips on keeping them fresh.
Sensory Cues: When the chocolate is perfectly melted, it should be glossy and smooth, like thick cream. When you spread it on the pan, it should flow easily but hold its shape. When the bark is fully set, it should make a satisfying snap when you break it—not a crumble or a bend, but a clean break. The candy corn should still be slightly chewy, creating a lovely contrast with the crisp chocolate.
Cooking Tips & Techniques
After making this bark more times than I care to admit, I’ve collected a few tricks that make the process smoother and the results better. Here are the ones that matter most:
The Chocolate Seizing Problem: This is the number one mistake people make with melted white chocolate. If even a single drop of water gets into your melting chocolate, it will seize up into a grainy, clumpy mess that cannot be saved. Make sure your bowl and spatula are completely dry. Don’t use a wet towel under your bowl. Don’t let steam from a double boiler touch the chocolate. I ruined an entire batch of expensive white chocolate this way and wanted to cry. Now I’m paranoid about dryness, and you should be too.
The Temperature Trap: White chocolate burns at a lower temperature than milk or dark chocolate because of the milk solids. If you microwave on full power, you’ll get scorched spots that ruin the flavor. Always use 50% power and short intervals. If you’re using a double boiler, make sure the water is simmering, not boiling, and keep the bowl from touching the water. Patience is the secret ingredient here.
The Candy Corn Distribution Trick: If you want every piece of bark to have a good mix of candy corn, don’t just dump it all in at once. Add half, stir, add the other half, stir again. This prevents clumping and ensures even distribution. Also, if your candy corn is very fresh and soft, chill it in the freezer for 5 minutes before adding it to the warm chocolate. This keeps it from melting or bleeding its colors into the white chocolate.
Timing and Multitasking: The active time for this recipe is about 10 minutes, but the setting time is 30-45 minutes. I like to make the bark while I’m cleaning up after dinner, so by the time the kitchen is tidy, the bark is ready to break and pack. You can also make it the night before and let it set overnight in the fridge—it actually gets a better snap this way.
The Perfect Break: To get nice, clean pieces without a million tiny shards, let the bark sit at room temperature for about 2 minutes after it comes out of the fridge. This takes the edge off the chill and makes it less likely to shatter. Then use your hands to break it, starting from the edges and working inward. If you use a knife, score the bark lightly before refrigerating, then break along the scored lines after it sets.
Variations & Adaptations
This recipe is a great base for experimentation. Here are a few variations I’ve tried and loved:
Dark Chocolate Candy Corn Bark
Swap the white chocolate for dark chocolate (60-70% cacao) for a more sophisticated version. The bitterness of the dark chocolate balances the sweetness of the candy corn beautifully. I made this for a Halloween party and the adults went crazy for it while the kids stuck to the white chocolate version. Use the same melting technique, but dark chocolate can handle slightly higher heat if you’re in a hurry.
Salty-Sweet Pretzel Bark
Add ½ cup of crushed pretzels to the mix along with the candy corn. The salty crunch is incredible against the smooth white chocolate and chewy candy corn. I like to use mini pretzel twists and break them into small pieces with my hands. This version is dangerously addictive—I ate almost an entire batch in one sitting and had to make another one for the party I was supposed to bring it to.
Halloween Mix Bark
Use the autumn mix of candy corn that includes the little pumpkins and leaves. You can also add other Halloween candies like chopped-up Reese’s cups, M&M’s, or even crushed Oreos. Just be careful not to overload the chocolate or it won’t hold together well. I aim for about 1 cup of mix-ins total, including the candy corn.
Dairy-Free Version
Use dairy-free white chocolate chips (Enjoy Life makes a good one) and skip the optional butter or cream. The texture will be slightly different—a little less creamy—but the flavor is still fantastic. Make sure your candy corn is also dairy-free, which most brands are. This version is great for friends with dietary restrictions, and honestly, most people won’t even notice the difference.
Spiced Fall Bark
Add ½ teaspoon of pumpkin pie spice or cinnamon to the melted white chocolate before adding the candy corn. The warm spices complement the sweetness and make the bark taste like autumn in every bite. I tried this on a whim one rainy October afternoon and it’s now my go-to version for Thanksgiving gatherings.
Serving & Storage Suggestions
Serving Temperature: This bark is best served at room temperature. If you’ve stored it in the fridge, let it sit out for about 10 minutes before serving. The texture is more pleasant when the chocolate has softened slightly, and the candy corn is chewier at room temperature. For parties, I like to arrange the pieces on a wooden board or a pretty plate with some extra candy corn scattered around for color.
Presentation Ideas: For Halloween parties, arrange the bark pieces in a glass jar or a clear cellophane bag tied with orange ribbon. They make excellent party favors or small gifts for neighbors and teachers. For a dessert table, stack the pieces in a pyramid shape or scatter them around a cake stand. The bright orange and yellow colors are naturally festive and eye-catching.
Complementary Dishes: This bark pairs beautifully with a cup of hot apple cider or a pumpkin spice latte. It also goes well with vanilla ice cream—just crumble a few pieces over the top for a quick sundae. If you’re serving a full Halloween spread, this bark works alongside other treats like caramel apples, pumpkin cookies, or chocolate cupcakes.
Storage Instructions: Store the bark in an airtight container at room temperature for up to 5 days. If your kitchen is warm or humid, store it in the refrigerator for up to 2 weeks. Layer the pieces between sheets of parchment paper to prevent them from sticking together. Do not store in the freezer—the candy corn becomes hard and the texture suffers when thawed.
How Flavors Develop: The bark is actually better the next day. The flavors meld together overnight, and the white chocolate develops a slightly deeper, more complex taste. If you can resist eating it all on the first day, you’ll be rewarded with an even better treat on day two. I always try to make this at least a day ahead for parties, and nobody has ever complained.
Nutritional Information & Benefits
Let’s be honest—this is a treat, not a health food. But here’s what you should know about what’s in each piece:
Estimated Nutritional Values (per 1 oz / 28g serving, about 2-3 pieces):
- Calories: 150
- Total Fat: 8g
- Saturated Fat: 5g
- Cholesterol: 5mg
- Sodium: 25mg
- Total Carbohydrates: 20g
- Sugar: 18g
- Protein: 2g
Health Highlights: White chocolate contains calcium and a small amount of iron from the milk solids. Candy corn is mostly sugar and corn syrup, so there’s not much nutritional value there, but it does provide quick energy. The optional sea salt adds trace minerals. Honestly, this is a treat to enjoy in moderation—it’s about the joy and the memories, not about meeting your daily nutrient goals.
Dietary Considerations: This recipe is naturally nut-free (check labels for cross-contamination). It contains dairy from the white chocolate. It is not vegan, gluten-free (white chocolate is naturally gluten-free, but check labels), or low-sugar. If you have specific dietary needs, the variations section above offers some alternatives.
Personal Perspective: I believe that treats like this have a place in a balanced life. This bark is something I make for celebrations, for holidays, for moments when I want to share something special with the people I love. It’s not about the nutritional content—it’s about the experience, the memory, and the smile on someone’s face when they bite into a piece. And honestly, a little piece of this bark is a lot more satisfying than a whole box of store-bought cookies.
Conclusion
This easy candy corn bark with white chocolate is everything I want in a recipe: simple, fast, and genuinely delicious. It’s the kind of thing you can make with a toddler “helping” or while you’re half-watching a movie. It’s the recipe you pull out when you need something festive but don’t have the energy for a full baking project. And it always, always gets compliments.
I love that this recipe came from a casual conversation on a porch, not from a cooking show or a food blog. It’s a reminder that the best recipes are often the ones that travel through real life, passed from person to person without any fuss. Mrs. Gable probably made this a hundred times before she mentioned it to me, and now I’ve made it dozens of times myself. Every batch feels like a little connection to her and to that afternoon.
I encourage you to make this your own. Add your favorite mix-ins, adjust the sweetness, experiment with different chocolates. The beauty of a recipe this simple is that it’s a blank canvas. And if you come up with a version you love, I’d love to hear about it. Drop a comment below or tag me in your photos—I genuinely get excited seeing how other people make this recipe their own.
So go ahead. Melt that chocolate, scatter those candy corns, and make something that brings a little sweetness to your fall. You deserve it, and honestly, it’s so easy that there’s really no reason not to.
Frequently Asked Questions
Can I use milk chocolate instead of white chocolate?
Absolutely. Milk chocolate works great, though the flavor will be different—less sweet and more chocolatey. The melting technique is the same, but milk chocolate is a bit more forgiving than white chocolate when it comes to overheating. Dark chocolate also works well if you prefer a less sweet bark.
Why did my white chocolate seize up?
White chocolate seizes when it comes into contact with even a tiny amount of water. Make sure your bowl and spatula are completely dry. Also, avoid overheating—white chocolate burns easily. If your chocolate does seize, unfortunately there’s no saving it. You’ll need to start over with fresh chocolate and a completely dry bowl.
Can I make this bark ahead of time?
Yes, and I actually recommend it. The bark tastes even better the next day after the flavors have had time to meld. Store it in an airtight container at room temperature for up to 5 days, or in the refrigerator for up to 2 weeks. Just let it come to room temperature before serving for the best texture.
How do I get clean, even pieces?
For clean edges, score the bark lightly with a knife before refrigerating. After it sets, break along the scored lines. For perfectly even squares, you can cut the bark with a sharp chef’s knife while it’s still slightly chilled. Just be careful not to shatter the pieces—let the bark sit at room temperature for a minute or two before cutting.
Can I freeze this candy corn bark?
I don’t recommend freezing this bark. The candy corn becomes hard and loses its chewy texture when frozen, and the white chocolate can develop a whitish bloom on the surface when thawed. If you need to keep it longer than 2 weeks, your best bet is to store it in the refrigerator in an airtight container with parchment paper between the layers.
Pin This Recipe!
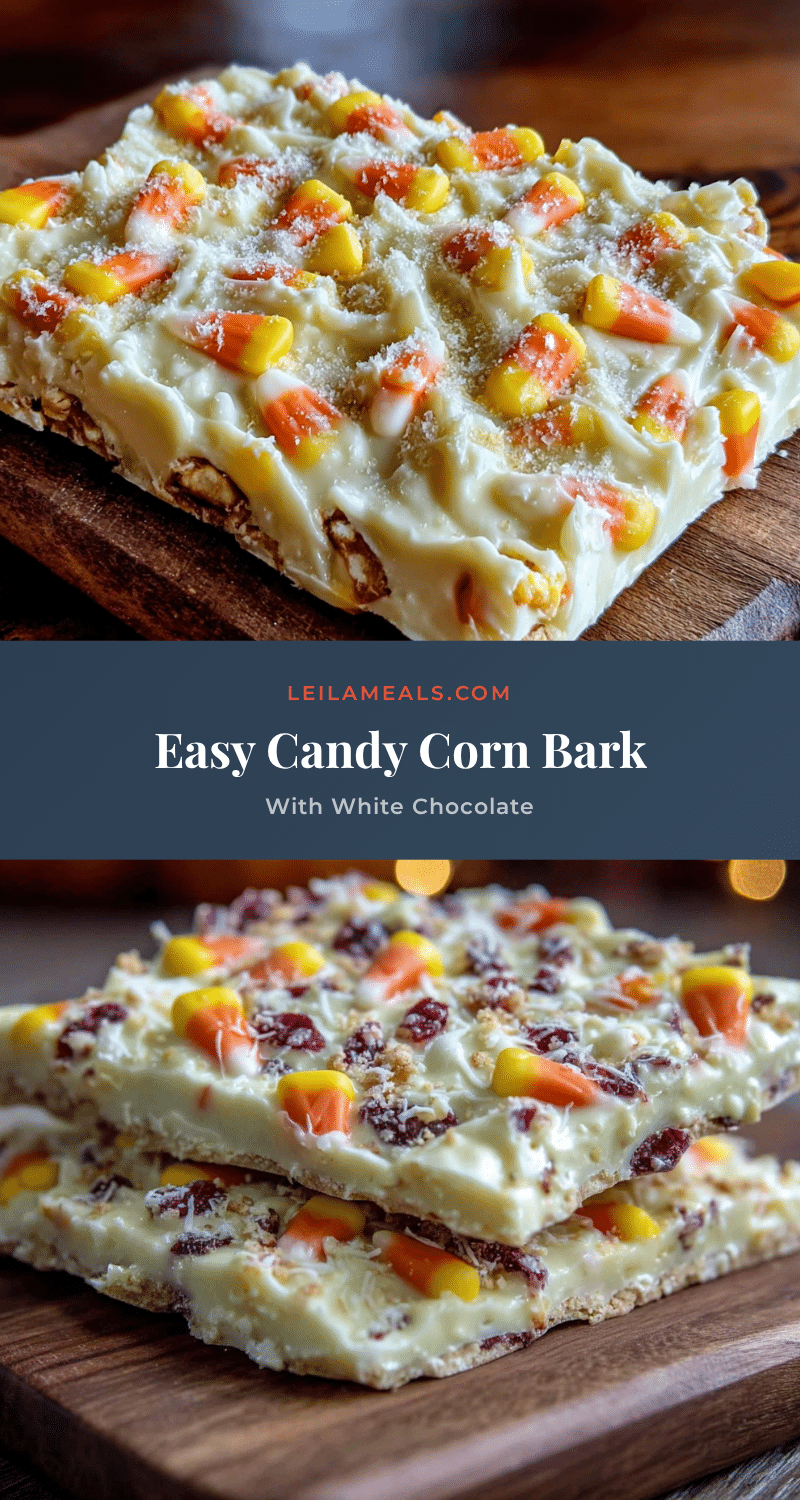
Easy Candy Corn Bark Recipe with White Chocolate
This easy candy corn bark with white chocolate is a quick, no-fuss Halloween treat that looks impressive but takes only 10 minutes of active work. Made with just three ingredients, it’s perfect for parties, gifts, or a festive snack.
- Prep Time: 10 minutes
- Cook Time: 0 minutes
- Total Time: 45 minutes (including setting time)
- Yield: 12 servings 1x
- Category: Dessert
- Cuisine: American
Ingredients
- 340g (12 oz) white chocolate chips
- 200g (1 ½ cups) candy corn
- 5ml (1 tsp) vegetable oil
- Optional: a pinch of flaky sea salt
- Optional: 30g (¼ cup) fall sprinkles
Instructions
- Line a 13×18 inch (33×46 cm) baking sheet with parchment paper, smoothing out wrinkles.
- Place white chocolate chips and vegetable oil in a microwave-safe bowl. Microwave in 30-second intervals at 50% power, stirring well between each, until smooth and glossy (about 2-3 minutes). Do not overheat.
- Reserve ¼ cup of candy corn for topping. Fold the remaining candy corn into the melted white chocolate gently until evenly distributed.
- Pour the mixture onto the prepared baking sheet and spread into an even layer about ¼ inch (6mm) thick.
- Sprinkle the reserved candy corn over the top, pressing each piece gently into the chocolate.
- If using, sprinkle sea salt or fall sprinkles over the top while chocolate is still wet.
- Refrigerate on a flat surface for 30-45 minutes until completely firm.
- Lift parchment from the baking sheet and break the bark into irregular pieces by hand, or cut into squares with a sharp knife.
- Serve at room temperature or store in an airtight container.
Notes
White chocolate seizes if it contacts water—ensure all equipment is dry. For best texture, let bark sit at room temperature for 2 minutes after refrigeration before breaking. The bark tastes even better the next day. Store in an airtight container at room temperature for up to 5 days or refrigerate for up to 2 weeks. Do not freeze.
Nutrition
- Serving Size: 1 oz (28g), about 2-
- Calories: 150
- Sugar: 18
- Sodium: 25
- Fat: 8
- Saturated Fat: 5
- Carbohydrates: 20
- Protein: 2
Keywords: candy corn bark, white chocolate bark, Halloween treat, easy dessert, no-bake, fall recipe, 3-ingredient


