Let me be honest with you—when my nephew asked if we could just crush up Oreos and dump them in pudding cups for his Halloween party, I almost said no. I had this whole plan for a layered dessert with homemade chocolate mousse and fancy piped “dirt.” But he looked at me with those big eyes and said, “Auntie, why make it hard?” And you know what? He was right. That moment of being wrong turned into one of my favorite recipes, and now I make these Graveyard Dirt Cups every single October.
These little cups of chocolatey goodness are the perfect weeknight treat because they come together in about 15 minutes flat. No baking, no fancy equipment, no stress. Just crushed Oreos, creamy pudding, and a few gummy worms for that spooky factor. I mean, honestly, what’s not to love?
You might be thinking, “But will they taste as good as the complicated version?” Let me tell you—the answer is a resounding yes. The combination of silky chocolate pudding with those crunchy Oreo crumbs creates this texture that’s just… perfect. And the best part? Kids can help make them, which means less work for you and more fun for everyone.
I’ve been making these for years now, and every time I pull them out at a party, people go crazy. There’s something about eating “dirt” that brings out the kid in everyone. Plus, they’re completely customizable—you can use any pudding flavor, any cookie, any candy. The possibilities are endless, and that’s what makes this recipe a keeper.
So whether you’re planning a Halloween party, need a quick dessert for a school event, or just want something fun to make with the kids on a Tuesday night, these Graveyard Dirt Cups are your answer. Trust me—sometimes the simplest recipes are the ones that stick with you.
Why You’ll Love This Recipe
- Quick & Easy : Comes together in under 15 minutes with zero baking required. Perfect for those evenings when you need a dessert fast.
- Simple Ingredients : You probably already have most of these in your pantry—Oreos, pudding mix, milk, and some fun Halloween candy.
- Perfect for Halloween : These little cups are the star of any spooky celebration, from classroom parties to family gatherings.
- Crowd-Pleaser : Kids and adults alike go wild for these. I’ve never seen anyone turn down a Graveyard Dirt Cup.
- Unbelievably Delicious : The combination of creamy pudding and crunchy Oreo crumbs is pure comfort food magic.
What makes these different from every other dirt cup recipe out there? It’s the texture. Most recipes just sprinkle crumbs on top, but I’ve perfected the ratio of Oreo to pudding so every single bite has that perfect crunch-to-cream balance. Plus, I’ve tested this with different pudding brands and I can tell you—Jell-O instant pudding gives the best results every time.
This recipe isn’t just good—it’s the kind that makes you feel like a kid again. There’s something deeply satisfying about eating what looks like a cup of dirt, complete with gummy worms crawling out. It’s comfort food reimagined—faster, simpler, but with the same soul-soothing satisfaction.
What Ingredients You Will Need
This recipe uses simple, pantry-friendly ingredients to create something truly magical. Here’s what you’ll need to make these spooky treats:
For the Pudding Base
- 1 (3.9 oz) box instant chocolate pudding mix (I recommend Jell-O brand for the smoothest texture)
- 2 cups cold milk (whole milk gives the creamiest result, but 2% works great too)
- 1/2 cup heavy cream (optional, but adds extra richness—trust me on this one)
For the “Dirt” Topping
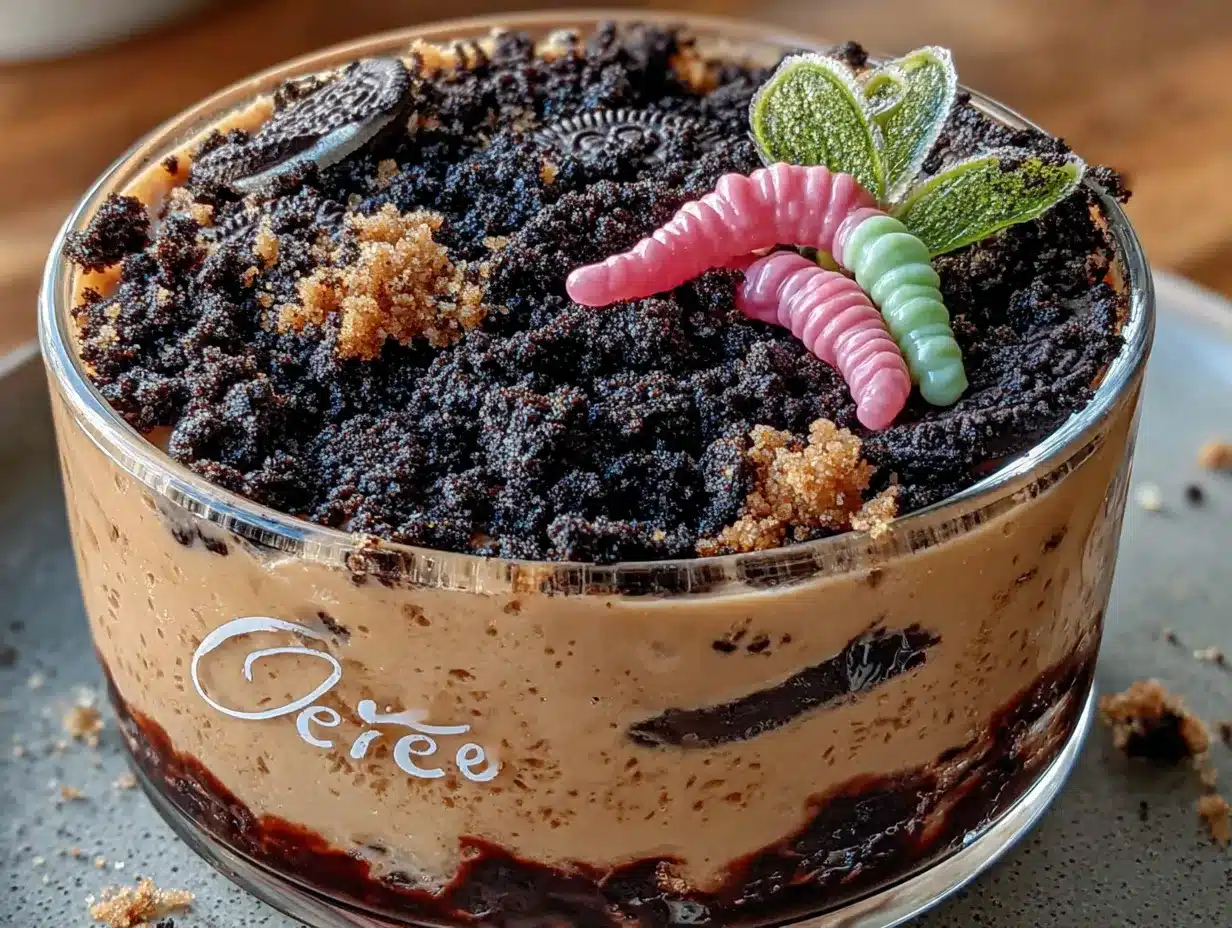
- 1 (14.3 oz) package Oreo cookies (regular or Double Stuf—both work perfectly)
- 2 tablespoons melted butter (helps the crumbs stick together for that authentic dirt texture)
For the Graveyard Decorations
- Gummy worms (the classic choice—I use Trolli brand)
- Mini candy pumpkins or candy corn (for that fall harvest feel)
- Small plastic skeletons or tombstones (optional, but so fun)
- Green food coloring (for making “grass” if you want to get fancy)
One thing I’ve learned from making these dozens of times—don’t skimp on the Oreos. You want enough crumbs to create that thick layer of “dirt” that completely covers the pudding. I usually use about 20 cookies for 6 cups, which gives you a generous topping.
If you’re dairy-free, you can absolutely use almond milk or oat milk with a dairy-free pudding mix. Just make sure to let the pudding set a few minutes longer since non-dairy milks can be thinner. And for the cookies, there are some great gluten-free chocolate sandwich cookies available now that work just as well.
Equipment Needed
One of the best things about this recipe is how little equipment you need. Here’s what you’ll need:
- 6 small clear cups or glasses (I love using 8-ounce plastic cups for parties—they’re inexpensive and perfect for kids)
- A medium mixing bowl (for the pudding)
- A whisk (hand whisk works fine, but an electric mixer makes it even easier)
- A resealable plastic bag (for crushing the Oreos—trust me, this method is genius)
- A rolling pin or heavy-bottomed pan (for smashing the cookies)
- A small spoon (for layering)
If you don’t have clear cups, small mason jars work beautifully and give that rustic look. I’ve also used small bowls in a pinch, but the clear cups really let you see those beautiful layers. And honestly, you don’t need anything fancy—I’ve made these with just a bowl, a whisk, and a zip-top bag.
Preparation Method
Ready to make these spooky treats? Let me walk you through it step by step. I’ve made these so many times I could do it in my sleep, but I’ll share all my little tricks so yours turn out perfect the first time.
- Crush the Oreos — Place the entire package of Oreos (cream filling and all) into a large resealable plastic bag. Seal it up tight, then use a rolling pin or the bottom of a heavy pan to crush them into fine crumbs. You want a mix of fine powder and small chunks for that authentic dirt texture. Pro tip: Let the kids do this part—they love it, and it saves you the work.
- Make the pudding — In a medium bowl, whisk together the instant chocolate pudding mix and 2 cups of cold milk. If you’re using the heavy cream, replace 1/2 cup of the milk with the cream. Whisk for about 2 minutes until it starts to thicken. You’ll notice it going from liquid to this silky, thick consistency—that’s when you know it’s ready.
- Let the pudding set — This is the hardest part, I know. Let the pudding sit for about 5 minutes to fully set. It should be thick enough that it doesn’t run when you spoon it into the cups. If it’s still too thin, give it another minute or two.
- Layer the cups — Start with a layer of crushed Oreos at the bottom of each cup—about 2 tablespoons per cup. Then spoon the pudding on top, filling each cup about 3/4 full. Finally, top with another generous layer of Oreo crumbs. I use about 3 tablespoons for the top layer because that’s where the “dirt” effect really shines.
- Add the decorations — This is where the fun really starts. Press gummy worms into the “dirt” so they look like they’re crawling out. Add a mini candy pumpkin or two. If you have those little plastic tombstones, stick one in each cup. The key is to make it look like a miniature graveyard scene.
- Chill before serving — Pop the cups in the fridge for at least 30 minutes before serving. This lets everything set up properly and makes the flavors meld together. I’ve made these the night before many times, and they actually taste better the next day.
One thing I learned the hard way—don’t overmix the pudding. If you whisk it too vigorously, it can get lumpy. Just gentle, steady whisking until it comes together. And if you do end up with lumps? No worries—just strain it through a fine-mesh sieve before layering.
Cooking Tips & Techniques
After making these Graveyard Dirt Cups more times than I can count, I’ve picked up some tricks that make a real difference. Here are my best tips for getting them just right:
Get the Oreo texture right. You don’t want all fine powder—that looks more like cocoa powder than dirt. Aim for a mix of fine crumbs and small chunks. The easiest way to do this is to crush the cookies in the bag, then pick out a few bigger pieces and crush them separately. Or just leave some chunks—they add great texture.
Use cold milk. This is crucial for instant pudding. If your milk is warm, the pudding won’t set properly. I always pull my milk from the fridge right before mixing. If you forgot to chill it, pop it in the freezer for 10 minutes first.
Let the pudding rest. I know you’re excited, but don’t rush this step. The pudding needs those 5 minutes to fully thicken. If you layer it too soon, the crumbs will get soggy and you’ll lose that beautiful texture contrast.
Make extra crumbs. Trust me on this one. You’ll want more than you think for the top layer. Plus, having extra crumbs means you can refresh the tops right before serving if they’ve gotten a bit soft in the fridge.
Chill the cups upright. If you’re transporting these, make sure they stay level. There’s nothing sadder than arriving at a party to find your graveyard scene has shifted to one side. I use a muffin tin to keep them stable in the car.
Variations & Adaptations
One of the best things about this recipe is how endlessly customizable it is. Here are some variations I’ve tried and loved:
Chocolate Peanut Butter Dirt Cups: Swap half the Oreos for crushed peanut butter cookies. The combination of chocolate and peanut butter is absolutely irresistible. I tried this on a whim one Halloween and it was gone in minutes.
Mint Chocolate Chip Dirt Cups: Use mint chocolate pudding instead of regular chocolate. Add some mini chocolate chips to the “dirt” mixture. The cool mint flavor with the crunchy Oreos is surprisingly perfect for fall.
Vegan Dirt Cups: Use dairy-free chocolate pudding (I like Simply Delish brand) and vegan chocolate sandwich cookies. Almond milk works great for the pudding. The texture is slightly different but still delicious.
Gluten-Free Dirt Cups: There are several brands of gluten-free chocolate sandwich cookies available now. I’ve had good luck with Kinnikinnick brand. Just make sure all your other ingredients are certified gluten-free too.
Spooky Spider Dirt Cups: Instead of gummy worms, use black licorice strings to make spider legs. Add a chocolate truffle or large chocolate-covered raisin for the body. These look amazing and are perfect for older kids who might find worms a little too cute.
Serving & Storage Suggestions
These Graveyard Dirt Cups are best served chilled, right from the fridge. The contrast between the cold, creamy pudding and the crunchy Oreo topping is what makes them so special. I like to serve them with a small spoon and maybe a napkin—things can get a little messy, but that’s part of the fun.
For a party, I set up a “graveyard” display on a tray or platter. Arrange the cups in rows, add some fake spider webs around the edges, and scatter a few extra gummy worms on the tray. It makes for such a fun presentation that guests always photograph before digging in.
Storage: These will keep in the refrigerator for up to 3 days. The key is to cover them tightly with plastic wrap or place them in an airtight container. The Oreo topping will soften over time, but that’s not necessarily a bad thing—some people actually prefer the softer texture the next day.
Freezer Instructions: You can freeze these for up to a month! Just make sure to use freezer-safe cups and leave a little room at the top. Thaw in the refrigerator for about 2 hours before serving. The texture will be slightly different—more like a frozen pudding pop—but still delicious.
One thing I’ve noticed—the flavors actually develop and get better after a day in the fridge. The Oreo crumbs meld with the pudding, creating this almost cookie-dough-like texture in spots. It’s different from the fresh version, but honestly, I might like it even more.
Nutritional Information & Benefits
Let’s be real—these are a treat, not a health food. But here’s what you’re looking at per serving (based on 6 servings):
- Calories: Approximately 380-420 per cup
- Fat: 18-22g (mostly from the Oreos and cream)
- Carbohydrates: 52-58g
- Protein: 6-8g
- Fiber: 2-3g
- Sugar: 34-40g
Now, I’m not a nutritionist, but here’s what I can tell you from a real-world perspective. These are a special occasion dessert, perfect for Halloween parties or birthday celebrations. They’re not something you’d eat every day, but for a holiday treat, they’re absolutely worth it.
If you’re watching your sugar intake, you can use sugar-free pudding mix and reduced-fat Oreos. The taste is slightly different, but still satisfying. And if you’re serving these at a school party, they’re nut-free (always check labels) and can be made dairy-free with simple substitutions.
One thing I love about this recipe is that it’s portion-controlled. Each cup is a single serving, which makes it easier to enjoy without overdoing it. Plus, the clear cups make it easy to see exactly how much you’re eating—no hidden calories here!
Conclusion
These Graveyard Dirt Cups with Crushed Oreos are proof that sometimes the simplest recipes are the best ones. They’re quick, they’re fun, and they never fail to bring smiles to faces—both young and old. Whether you’re making them for a Halloween party, a classroom celebration, or just because it’s Tuesday and you need something sweet, these little cups deliver every single time.
I love that this recipe has become a tradition in my family. Every October, my nephew asks when we’re making “the dirt cups,” and we spend an afternoon crushing cookies and layering pudding and laughing at our spooky creations. It’s not just about the dessert—it’s about the memories we make while making it.
So go ahead, give these a try. Customize them with your favorite candies, make them your own, and don’t be afraid to get a little messy. And when you do, I’d love to hear about it. Drop a comment below and tell me how your Graveyard Dirt Cups turned out—what decorations did you use? Did the kids help? Did you come up with a fun variation? Your ideas might just inspire someone else’s Halloween tradition.
Happy Halloween, friends. Now go make some dirt!
Frequently Asked Questions
Can I use homemade pudding instead of instant?
Absolutely! Homemade chocolate pudding works beautifully in this recipe. Just make sure it’s fully cooled and thickened before layering. The texture will be even richer and creamier than the instant version.
How far in advance can I make these?
You can make these up to 3 days ahead of time. The Oreo topping will soften slightly, but many people actually prefer that texture. If you want to keep the crunch, just add the top layer of crumbs right before serving.
Can I use different cookies instead of Oreos?
Definitely! Chocolate wafer cookies, graham crackers (for a lighter “sand” look), or even crushed chocolate chip cookies all work great. Each gives a slightly different texture and flavor.
My pudding didn’t set properly. What went wrong?
This usually happens when the milk isn’t cold enough or you didn’t whisk long enough. Make sure your milk is straight from the fridge, and whisk for the full 2 minutes. If it’s still runny after 5 minutes, pop it in the freezer for 10 minutes to speed up the setting process.
Can I make these in a large dish instead of individual cups?
Yes! This works great for a party. Just layer the Oreos and pudding in a 9×13 dish, then scoop into bowls when serving. You might want to double the recipe for a larger crowd.
Pin This Recipe!
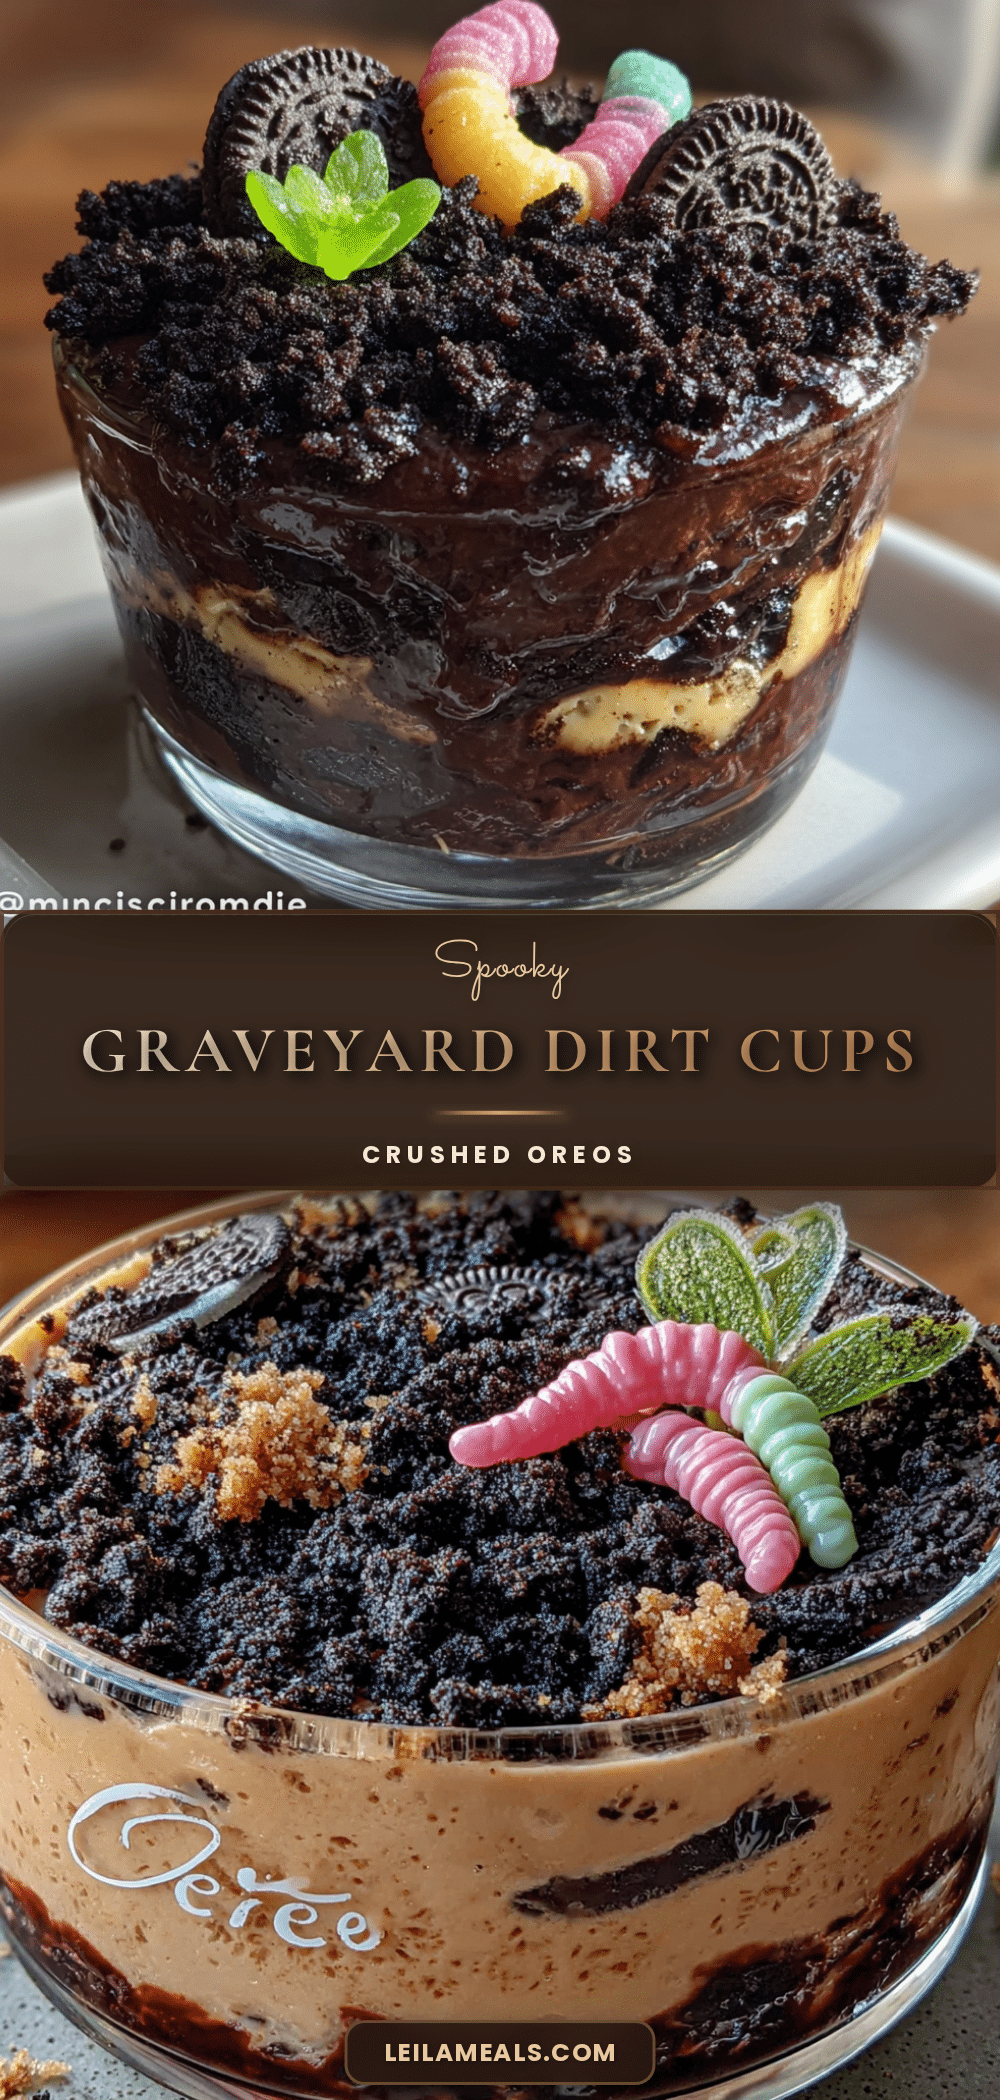
Best Easy Graveyard Dirt Cups with Crushed Oreos Recipe
These no-bake Graveyard Dirt Cups are a quick and fun Halloween treat made with creamy chocolate pudding, crushed Oreos, and gummy worms. Perfect for parties and kids, they come together in just 15 minutes.
- Prep Time: 15 minutes
- Cook Time: 0 minutes
- Total Time: 45 minutes (includes chilling time)
- Yield: 6 servings 1x
- Category: Dessert
- Cuisine: American
Ingredients
- 1 (3.9 oz) box instant chocolate pudding mix (Jell-O brand recommended)
- 2 cups cold milk (whole milk preferred, 2% works too)
- 1/2 cup heavy cream (optional, for extra richness)
- 1 (14.3 oz) package Oreo cookies (regular or Double Stuf)
- 2 tablespoons melted butter
- Gummy worms (Trolli brand recommended)
- Mini candy pumpkins or candy corn
- Small plastic skeletons or tombstones (optional)
- Green food coloring (optional, for grass)
Instructions
- Crush the Oreos: Place the entire package of Oreos (cream filling and all) into a large resealable plastic bag. Seal tightly and crush with a rolling pin or heavy pan into fine crumbs with some small chunks.
- Make the pudding: In a medium bowl, whisk together the instant chocolate pudding mix and 2 cups cold milk. If using heavy cream, replace 1/2 cup of the milk with the cream. Whisk for about 2 minutes until it starts to thicken.
- Let the pudding set: Allow the pudding to sit for about 5 minutes to fully set until thick enough to spoon.
- Layer the cups: Start with a layer of crushed Oreos at the bottom of each cup (about 2 tablespoons per cup). Spoon the pudding on top, filling each cup about 3/4 full. Top with another generous layer of Oreo crumbs (about 3 tablespoons per cup).
- Add the decorations: Press gummy worms into the ‘dirt’ so they look like they’re crawling out. Add mini candy pumpkins or other decorations. If using plastic tombstones, stick one in each cup.
- Chill before serving: Refrigerate the cups for at least 30 minutes before serving. Can be made up to 3 days ahead.
Notes
For best results, use cold milk straight from the fridge. Don’t overmix the pudding to avoid lumps. If pudding is too thin, let it set longer or pop in the freezer for 10 minutes. Extra Oreo crumbs can be added just before serving to maintain crunch. The flavors develop and improve after a day in the fridge.
Nutrition
- Serving Size: 1 cup
- Calories: 400
- Sugar: 37
- Sodium: 350
- Fat: 20
- Saturated Fat: 10
- Carbohydrates: 55
- Fiber: 2.5
- Protein: 7
Keywords: Halloween dessert, dirt cups, Oreo pudding, no-bake dessert, kid-friendly, spooky treats


