The PTA Halloween party was in six hours and I’d completely forgotten. My son had reminded me every day for two weeks, and I still managed to let it slip. Everyone else would be bringing those elaborate cauldron cakes and those creepy-crawly cupcakes that take three days to decorate. I had a half-empty bottle of lime sherbet in the freezer, a carton of pineapple juice that was about to expire, and a vague memory of something my grandma used to mix up for church socials. Honestly, I was already mentally preparing my apology note.
I started pulling things out of the fridge in a panic. The green food coloring was from last Easter, and the ginger ale was flat-ish. Not ideal. I mean, who brings flat ginger ale to a Halloween party? But I had no time to run to the store. So I just started pouring, hoping for the best and expecting the worst. You know that feeling when you’re just throwing things together and praying the kids don’t notice?
Well, let me tell you, that Budget-Friendly Witches’ Brew Green Punch ended up being the star of the party. I’m not kidding. The kids were lined up for refills before the mummy dogs were even set out. One mom actually asked me for the recipe, and I had to scribble it on a napkin because I hadn’t measured a thing. It was that kind of day. But that’s why I keep making it every single year now. It’s the recipe that saved me from total Halloween humiliation, and honestly, it tastes like a haunted house in the best way possible. Maybe you’ve been there too, scrambling for something easy at the last minute. This punch is your answer.
Why You’ll Love This Recipe
Let’s be real for a second. Halloween can get expensive. Between the costumes, the candy, and the decorations, the last thing you need is a complicated punch that costs a fortune. This Budget-Friendly Witches’ Brew Green Punch is the opposite of that. It’s the kind of recipe that makes you look like a Halloween hero without actually trying very hard.
- Quick & Easy: This comes together in under 10 minutes. No boiling, no blending, no fuss. Perfect for those last-minute parties or when the kids are already buzzing on sugar.
- Simple Ingredients: You probably have most of this stuff in your fridge or pantry right now. No fancy grocery trips needed. It uses basic, affordable things like lime sherbet and pineapple juice.
- Perfect for Halloween Parties: Whether it’s a school event, a neighborhood gathering, or just a spooky movie night at home, this punch fits right in. It looks creepy and fun without being gross.
- Crowd-Pleaser: Kids absolutely love it. Adults sneak extra glasses too. I’ve seen it disappear at every party I’ve brought it to. It’s just sweet and fizzy enough to hit that Halloween craving.
- Unbelievably Budget-Friendly: This whole recipe costs less than a fancy coffee drink. You can make a huge batch for a fraction of what store-bought punch would cost. Your wallet will thank you.
What makes this recipe different from all the other green punches out there? It’s the balance. Some punches are too sweet, some are too watery, and some just taste like food coloring. This one has a creamy, fizzy texture from the sherbet and ginger ale, with a bright citrus kick from the pineapple juice. It’s not just another version — it’s the version that actually works for real families on a real budget.
This recipe isnt just good — it is the kind that makes you close your eyes after the first sip. It’s Halloween comfort in a cup. Perfect for impressing other parents without any stress, or turning a simple Friday night into something memorable.
What Ingredients You Will Need
This recipe uses simple, affordable ingredients to deliver that spooky green color and refreshing flavor without any fuss. Most of these are pantry staples you might already have hanging around.
- 1 (64-ounce) bottle of pineapple juice – This is the base of the punch. It adds sweetness and a tropical note that balances the lime. I usually go with Dole or a store brand, both work fine. Look for 100% juice if you can, it tastes cleaner.
- 1 (2-liter) bottle of lemon-lime soda (like Sprite or 7-Up) – This gives the punch its fizz. You can use ginger ale for a slightly spicier kick, but lemon-lime is classic. Make sure it’s cold before you pour it in, or the ice will melt too fast.
- 1 (1.75-quart) container of lime sherbet – This is the secret weapon. It adds creaminess, sweetness, and that bright green color. Let it sit out for 5 minutes before scooping so it’s easier to work with. I prefer the store brand here, it’s cheaper and tastes just as good.
- Green food coloring (optional) – If you want a deeper, more “witchy” green, add a few drops. I recommend gel food coloring for a more vibrant color without watering things down. Start with just 2-3 drops and stir.
- Ice cubes or a frozen hand (for effect) – A big block of ice keeps the punch cold without diluting it too fast. You can freeze a plastic glove filled with water or juice for a creepy “witches hand” effect. It’s a fun touch that costs nothing.
- Gummy worms or plastic spiders (for garnish) – Totally optional, but they make the punch look extra spooky. Drop a few gummy worms into the punch bowl right before serving. They’ll float around and freak people out in a fun way.
Substitution Guidance: If you need a dairy-free option, look for a lime sorbet instead of sherbet. The texture will be a little icier, but it still tastes great. For a less sugary version, use diet lemon-lime soda and sugar-free sherbet. You can also swap the pineapple juice with white grape juice if you want a milder flavor. I’ve tried it both ways, and honestly, the pineapple juice version is always the crowd favorite.
Equipment Needed
You don’t need any fancy tools for this. That’s part of the beauty of it.
- A large punch bowl or a big plastic cauldron – This is for serving. A clear glass bowl lets everyone see that creepy green color. If you don’t have a punch bowl, a large mixing bowl or even a clean plastic bucket works fine for a party.
- A ladle – For serving. Make sure it’s big enough to scoop up the sherbet chunks too.
- A large pitcher or mixing container – If you need to mix the punch before pouring it into the serving bowl. A half-gallon pitcher works well.
- A whisk or long spoon – For stirring everything together. A whisk helps break up the sherbet a little faster.
- Measuring cups – Not strictly necessary if you’re eyeballing it, but helpful if you want to be precise. I usually just pour and taste.
- A freezer-safe plastic glove (optional) – If you’re making the frozen hand garnish. Fill it with water or juice, tie it off, and freeze it overnight.
I’ve made this punch with just a big plastic bowl and a wooden spoon before. It works perfectly. Don’t let a lack of fancy equipment stop you.
Preparation Method
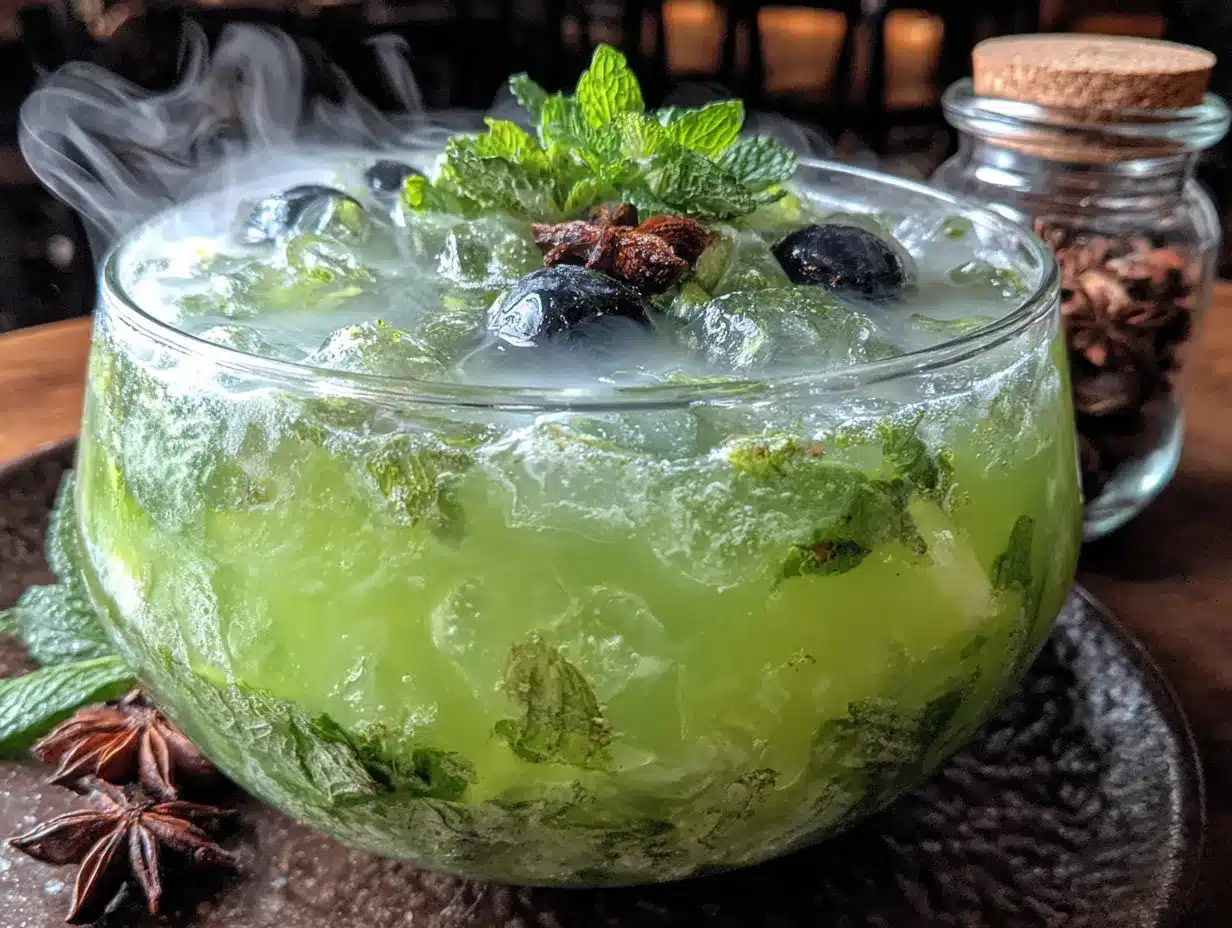
This is so simple, you’ll wonder why you ever bought pre-made punch. Follow these steps, and you’ll have a spooky drink in minutes.
- Chill your ingredients. About an hour before you plan to serve, put the pineapple juice and lemon-lime soda in the fridge. You want everything as cold as possible. Warm soda will melt the sherbet too fast and make the punch watery. Trust me on this one.
- Prepare your ice or frozen hand. If you’re making a frozen hand, fill a clean plastic glove with water or extra pineapple juice the night before. Tie the end closed and lay it flat in the freezer. It takes about 6-8 hours to freeze solid. For regular ice, just fill a large muffin tin or a small bowl with water and freeze it overnight. A big block melts slower than cubes.
- Pour the pineapple juice into your punch bowl. Start with the full 64-ounce bottle. This is your base. It should fill the bowl about halfway. If your bowl is smaller, you can save some juice for refills later.
- Add the lemon-lime soda. Slowly pour in the 2-liter bottle. Go gentle here, or it will foam up and spill over the sides. I usually pour it down the side of the bowl to keep the fizz intact. Stir gently with a whisk or spoon.
- Add the green food coloring (if using). Start with 2-3 drops of gel food coloring or 5-6 drops of liquid. Stir it in and check the color. You want a bright, swampy green. Add more if needed, but go slow. You can always add, but you can’t take it away.
- Scoop in the lime sherbet. Use a large spoon or ice cream scoop to add big dollops of sherbet to the punch. Use the whole container. It will start to melt and create a creamy, frothy top layer. Don’t stir it in completely. Let some chunks float around — it looks more like a witches brew that way.
- Add your ice or frozen hand. Gently place your big ice block or frozen hand into the punch. It will keep everything cold for about an hour. If you’re using the frozen hand, position it so the “fingers” are reaching up out of the punch. It’s wonderfully creepy.
- Garnish and serve. Drop in a few gummy worms or plastic spiders right before serving. They’ll float around and add to the spooky effect. Ladle the punch into cups, making sure each cup gets a little bit of the melted sherbet foam.
- Keep it cold. As the punch sits, the ice will melt and the sherbet will dissolve. After about 45 minutes, it might get a little watery. Just add a few more scoops of lime sherbet to freshen it up. I keep an extra container in the freezer for this reason.
Sensory cues: When you first pour the soda, you’ll hear that satisfying fizz. The sherbet should look like floating green clouds at the top. The punch should smell sweet and citrusy, like a lime popsicle. When you taste it, it should be cold, creamy, and bubbly — not too sweet, not too watery. If it tastes flat, add a splash more soda.
Cooking Tips & Techniques
I’ve made this punch for about seven different Halloween events now, and I’ve learned a few things the hard way. Let me save you some trouble.
Don’t over-stir the sherbet. I know it’s tempting to mix it all in until it’s smooth, but the best part of this punch is those floating chunks of creamy sherbet. They slowly melt and keep the punch flavorful for longer. If you stir it all in at once, you’ll end up with a uniformly green, slightly flat drink. Leave some texture in there.
Temperature matters more than you think. I once made this punch with room-temperature ingredients because I forgot to chill them. The sherbet melted instantly into a sad, watery mess. The punch was lukewarm and nobody wanted a second cup. Everything needs to be cold. The pineapple juice, the soda, even the bowl if you can manage it. Stick the punch bowl in the fridge for 15 minutes before you start.
Watch out for the frozen hand disaster. The first time I made a frozen hand, I used a cheap plastic glove that had a tiny hole in it. Water leaked out into the freezer and made a huge mess. Use a high-quality glove or a freezer bag shaped like a hand. Also, don’t forget to tell people it’s there. I had one guest who nearly screamed when she scooped up a cup and saw fingers floating in her drink. It was hilarious, but she was not amused.
Make it in batches for a big party. If you’re serving more than 20 people, this recipe might not be enough. I usually double it and keep the second batch in a pitcher in the fridge. When the punch bowl gets low, I just pour in the backup. It keeps things flowing without a lot of fuss.
Variations & Adaptations
This recipe is super flexible. Here are a few ways to change it up depending on your crowd or what you have on hand.
Spooky Adult Version: Add a cup of vodka or white rum to the punch for an adult-only gathering. The citrus flavors mask the alcohol really well, so go easy on it. You can also use a lime-flavored vodka for extra punch. Just stir it in before you add the sherbet. Label the bowl clearly so kids don’t accidentally grab it.
Dairy-Free Adaptation: Use lime sorbet instead of sherbet. Sorbet is dairy-free and has a brighter, icier texture. It won’t be as creamy, but it’s still delicious. Check the label to make sure it’s vegan if that matters for your crowd. I’ve used the store brand lime sorbet before and it worked great.
Bloody Berry Twist: Add a cup of frozen raspberries or strawberries to the punch. They’ll sink to the bottom and look like creepy little blood clots floating around. It adds a tart flavor that cuts through the sweetness. Plus, it makes the punch look even more like a real witches brew.
Gluten-Free Friendly: This recipe is naturally gluten-free as long as you check your labels. Most lemon-lime sodas and pineapple juices are gluten-free, but some store brands might have additives. Just double-check if you’re serving someone with celiac disease. I’ve never had an issue, but better safe than sorry.
Less Sugar Version: Use diet lemon-lime soda and sugar-free lime sherbet. The taste will be a little less rich, but kids won’t notice the difference. You can also cut the pineapple juice with half water or sparkling water to reduce the sugar load. It still looks just as spooky.
Serving & Storage Suggestions
This punch is best served immediately, but there are a few ways to manage leftovers or prep ahead.
Serving Temperature: Serve this punch ice-cold. The colder it is, the better the sherbet holds up. I like to put the cups in the freezer for 10 minutes before the party starts so they’re frosty. It keeps the punch cold longer and adds to the Halloween vibe.
Presentation Ideas: Serve the punch in a plastic cauldron if you have one. They sell them at party stores for a few dollars. If you don’t have one, a clear glass bowl works fine. Wrap some fake spiderwebs around the base of the bowl. Add dry ice for a truly spooky effect — just make sure to handle it safely and never let anyone touch it directly.
Complementary Dishes: This punch goes great with salty snacks like pretzels, popcorn, or mummy hot dogs. The sweetness of the punch balances the saltiness perfectly. I also like to serve it with a plate of veggie sticks shaped like fingers. It makes the whole table feel cohesive without a lot of extra work.
Storage Instructions: This punch does not store well once mixed. The soda goes flat and the sherbet separates. If you have leftovers, pour them into a pitcher and refrigerate for up to 24 hours. It won’t be fizzy anymore, but it will still taste like a sweet limeade. You can drink it as is or use it as a base for smoothies.
Reheating: Do not reheat this punch. It’s meant to be cold. If you want to use leftover punch for something else, freeze it in ice cube trays and use the cubes in future punches or lemonades. It’s a great way to avoid waste.
Flavor Development: This punch is best within the first hour of mixing. After that, the sherbet melts completely and the flavors blend together into a more uniform taste. It’s still good, just less exciting. If you’re serving over a long period, add fresh scoops of sherbet every 30 minutes to keep it interesting.
Nutritional Information & Benefits
Let’s be honest — this is a treat, not a health food. But here’s what you should know.
Estimated Nutritional Values (per 8-ounce serving):
- Calories: 180-220
- Total Fat: 2g
- Saturated Fat: 1g
- Sodium: 30mg
- Total Carbohydrates: 45g
- Sugars: 38g
- Protein: 1g
- Vitamin C: 15% of daily value (from pineapple juice)
Health Benefits: The pineapple juice provides a decent amount of vitamin C, which is great for immune support during cold season. The lime sherbet contains some calcium from the dairy. It’s not a health drink, but it’s not the worst thing you could serve at a party either.
Dietary Considerations: This recipe contains dairy from the sherbet. It can be made dairy-free by using sorbet. It is naturally gluten-free. It is not low-carb or keto-friendly due to the sugar content. If you’re watching sugar, use the diet version mentioned above.
Potential Allergens: Dairy (from sherbet). Some commercial sherbets may contain corn syrup or artificial colors. Check labels if you have sensitivities. The gummy worms may contain gelatin or wheat, so skip them if you’re serving someone with those allergies.
Personal Wellness Perspective: I think Halloween should be fun. One glass of this punch isn’t going to derail anyone’s healthy habits. It’s a special occasion drink for a special occasion. Serve it with a big platter of veggies and fruit to balance things out. That’s what I do, and nobody complains.
Conclusion
This Budget-Friendly Witches’ Brew Green Punch is the recipe you didn’t know you needed. It’s cheap, it’s easy, and it looks like something straight out of a haunted castle. I’ve been making it for years now, and it never fails to get compliments. The best part? It costs almost nothing and takes almost no time. That’s a win in my book.
I hope you give this a try for your next Halloween party. Feel free to tweak it to your taste — add more sherbet if you like it creamier, or skip the food coloring if you prefer a natural look. The beauty of this recipe is that it’s forgiving. You can’t really mess it up.
I’d love to hear how it turned out for you. Drop a comment below and let me know if your kids loved it as much as mine did. Did you add any creepy garnishes? Did you use the frozen hand trick? Share your stories! And if you know another parent who’s scrambling for a last-minute Halloween idea, send them this post. Trust me, they’ll thank you.
Now go make some spooky memories — and don’t forget to save some punch for yourself.
Frequently Asked Questions
Can I make this punch ahead of time?
You can mix the pineapple juice and soda a few hours ahead and keep it in the fridge. But wait to add the sherbet and ice until right before serving. The sherbet melts quickly, and you want those creamy chunks to stay intact for the best look and texture.
How do I get the punch to be a brighter green?
Use gel food coloring instead of liquid. Gel is more concentrated, so you need less of it, and it doesn’t water down the punch. Start with 2-3 drops and stir. You can also use a lime-flavored drink mix powder for extra color and flavor.
What can I use instead of a punch bowl?
A large plastic cauldron from a party store works perfectly. You can also use a clean plastic bucket, a large mixing bowl, or even a slow cooker set to “keep warm” (without turning it on) as a serving vessel. Just make sure it’s food-safe and big enough.
How much does this recipe serve?
This recipe makes about 20-24 servings (8 ounces each). For a smaller group, cut the ingredients in half. For a larger group, double the recipe and keep a backup batch in a pitcher in the fridge. The punch will disappear faster than you think.
Can I use frozen limeade instead of sherbet?
Yes, but the texture will be different. Frozen limeade concentrate will make the punch more like a slushie. Thaw the concentrate slightly and stir it in with the soda. It won’t have that creamy foam on top, but it will still taste great and look green.
Pin This Recipe!
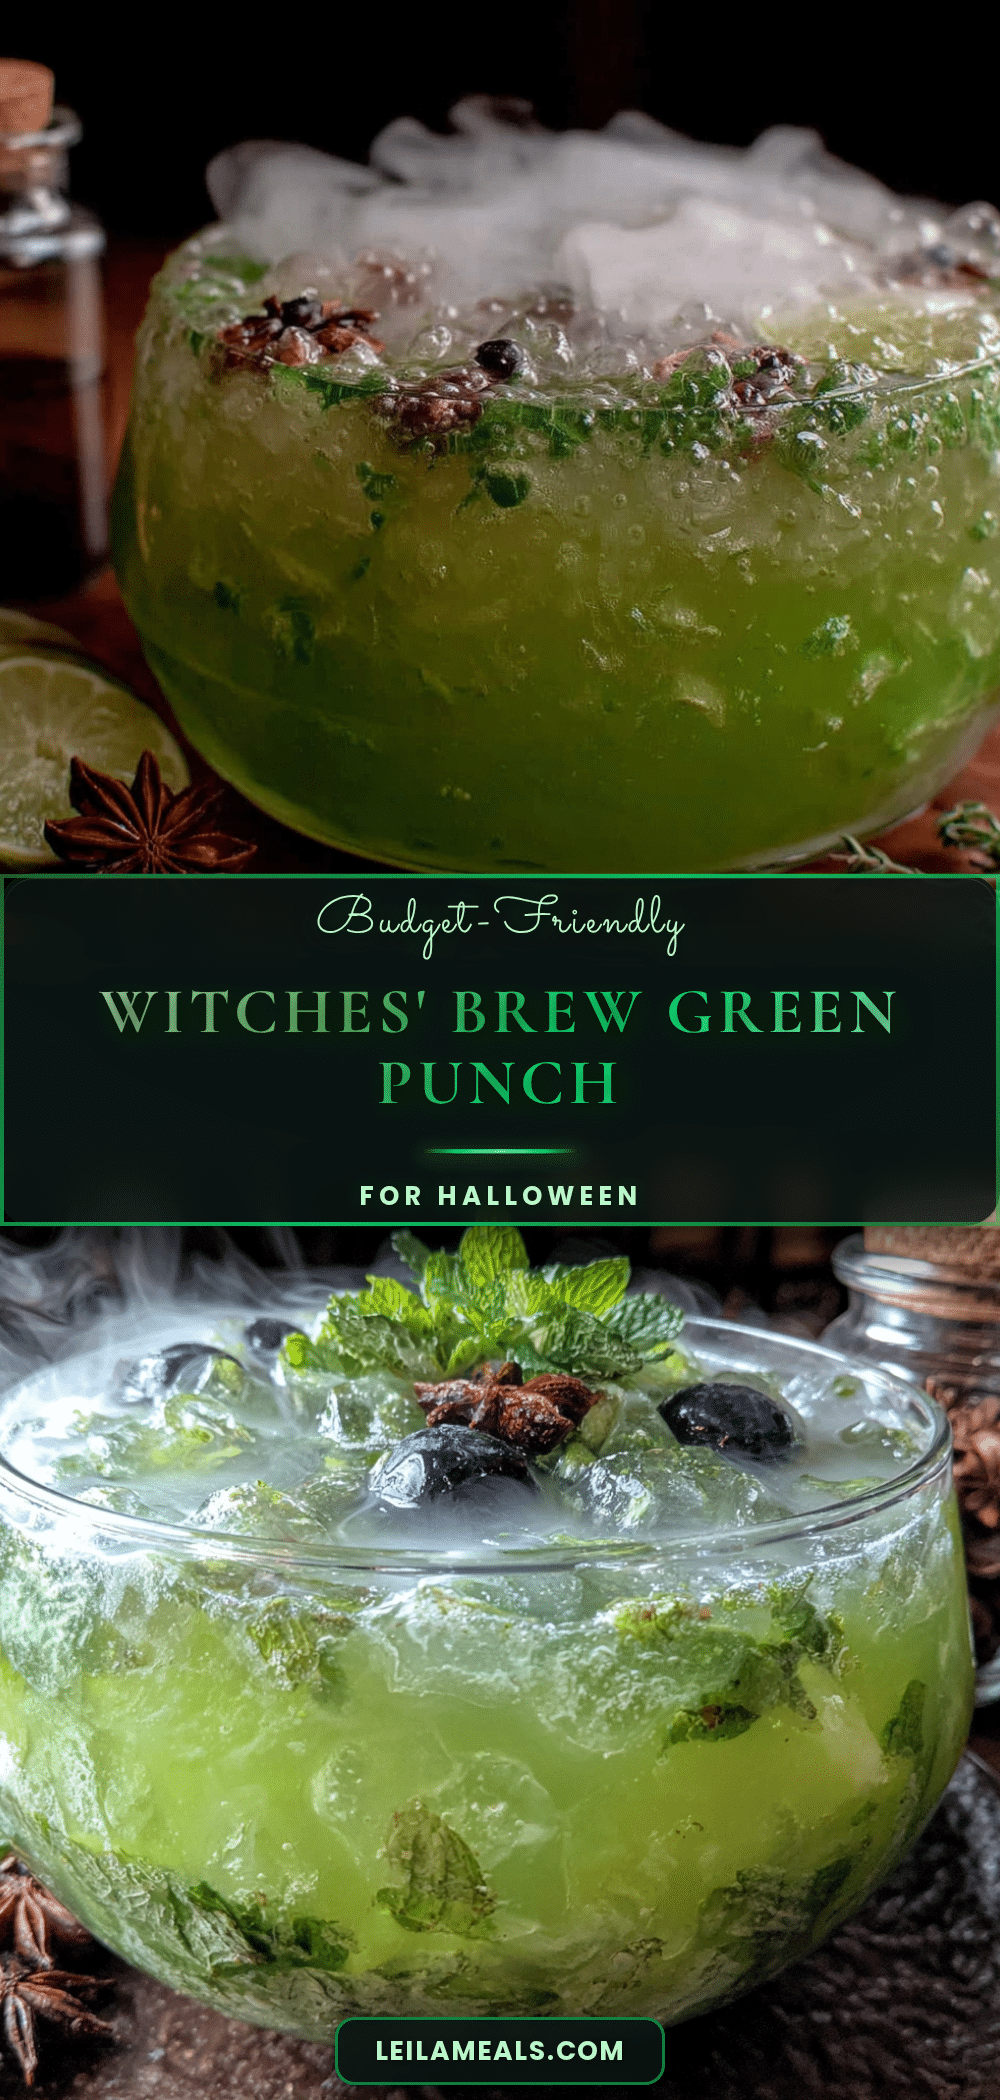
Budget-Friendly Witches Brew Green Punch: Easy Halloween Recipe
This Budget-Friendly Witches’ Brew Green Punch is the recipe you didn’t know you needed. It’s cheap, it’s easy, and it looks like something straight out of a haunted castle.
- Prep Time: 10 minutes
- Cook Time: 0 minutes
- Total Time: 10 minutes
- Yield: 20-24 servings 1x
- Category: Beverage
- Cuisine: American
Ingredients
- 1 (64-ounce) bottle of pineapple juice
- 1 (2-liter) bottle of lemon-lime soda (like Sprite or 7-Up)
- 1 (1.75-quart) container of lime sherbet
- Green food coloring (optional)
- Ice cubes or a frozen hand (for effect)
- Gummy worms or plastic spiders (for garnish)
Instructions
- Chill your ingredients. About an hour before you plan to serve, put the pineapple juice and lemon-lime soda in the fridge.
- Prepare your ice or frozen hand. If you’re making a frozen hand, fill a clean plastic glove with water or extra pineapple juice the night before. Tie the end closed and lay it flat in the freezer. It takes about 6-8 hours to freeze solid. For regular ice, just fill a large muffin tin or a small bowl with water and freeze it overnight.
- Pour the pineapple juice into your punch bowl. Start with the full 64-ounce bottle.
- Add the lemon-lime soda. Slowly pour in the 2-liter bottle. Stir gently with a whisk or spoon.
- Add the green food coloring (if using). Start with 2-3 drops of gel food coloring or 5-6 drops of liquid. Stir it in and check the color.
- Scoop in the lime sherbet. Use a large spoon or ice cream scoop to add big dollops of sherbet to the punch. Use the whole container. Don’t stir it in completely.
- Add your ice or frozen hand. Gently place your big ice block or frozen hand into the punch.
- Garnish and serve. Drop in a few gummy worms or plastic spiders right before serving. Ladle the punch into cups, making sure each cup gets a little bit of the melted sherbet foam.
- Keep it cold. As the punch sits, the ice will melt and the sherbet will dissolve. After about 45 minutes, add a few more scoops of lime sherbet to freshen it up.
Notes
Don’t over-stir the sherbet. Temperature matters more than you think. Watch out for the frozen hand disaster. Make it in batches for a big party.
Nutrition
- Serving Size: 8 ounces
- Calories: 200
- Sugar: 38
- Sodium: 30
- Fat: 2
- Saturated Fat: 1
- Carbohydrates: 45
- Protein: 1
Keywords: Halloween punch, green punch, witches brew, budget-friendly, easy Halloween recipe, party punch, lime sherbet punch


