I was standing in the checkout line at the grocery store last October, staring blankly at a display of Halloween-themed cookie cutters, when the smell hit me. Not from the store, but from somewhere deep in my memory—that specific, slightly smoky scent of hot dogs grilling at a school Halloween carnival. And suddenly I was seven years old, standing in my neighbor Mrs. Kowalski’s kitchen, watching her wrap strips of crescent dough around hot dogs with the kind of intense focus that only a kid who desperately wants to get it right can muster. She let me press the little olive eyes into the dough, and I remember thinking, “This is the most important job I’ve ever had.”
Mrs. Kowalski has been gone for years now, and I honestly can’t remember the last time I thought about that Halloween carnival. But that smell in the grocery store? It stopped me cold. I stood there holding a package of hot dogs, and I could almost feel the sticky dough on my fingers and hear her saying, “Not too tight, honey—you want them to puff up when they bake.” I grabbed the hot dogs, grabbed some crescent rolls, and I swear I could hear her laughing as I nearly tripped over my own feet getting to the checkout. Maybe you’ve had that feeling—where a recipe isn’t just food, it’s a time machine.
So here we are. These Easy Mummy Hot Dogs are my attempt to capture that exact moment: the joy, the goofiness, the pure Halloween magic that comes from turning a regular dinner into something that makes kids (and, let’s be honest, adults) giggle. They’re simple, they’re ridiculous, and they taste exactly like childhood. I make them every year now, and every time I press those little olive eyes in, I think of Mrs. Kowalski’s flour-dusted apron and the way she’d wink at me like we were getting away with something. Honestly, we were.
Why You’ll Love This Recipe
Let me tell you why these Easy Mummy Hot Dogs have become my go-to Halloween dish. I’ve tested this recipe more times than I care to admit, and I’ve learned a few things along the way.
- Quick & Easy: These come together in under 20 minutes. I mean it. From fridge to table in about the time it takes to convince a toddler to put on shoes. Perfect for those “I forgot it was Halloween” moments (which, let’s be real, happen to all of us).
- Simple Ingredients: You only need three things—hot dogs, crescent roll dough, and olives. No fancy grocery trips, no obscure spices. You probably have everything right now.
- Perfect for Halloween Parties: These are the life of the party. Kids love them, adults sneak them when they think no one is looking, and they’re the easiest thing to bring to a potluck or classroom celebration.
- Crowd-Pleaser: I’ve brought these to three different Halloween gatherings, and every single time, they disappeared first. Even the picky eaters go for them.
- Unbelievably Fun: There’s something about food that looks like little monsters that just makes people happy. It’s comfort food with a silly face.
What makes these different from every other version out there? It’s the little things. I’ve learned that using thick-cut hot dogs gives you a better “body” for the mummy. I also figured out that cutting the dough strips just right—not too thin, not too thick—makes all the difference. And the olive eyes? Don’t skip them. They’re what sells the whole mummy illusion.
This recipe is the kind that makes you smile before you even take a bite. It’s Halloween food at its best: playful, delicious, and so easy you’ll wonder why you haven’t been making them every year.
What Ingredients You Will Need
This recipe uses the most straightforward ingredients you can imagine. I love recipes that don’t require a treasure hunt at the grocery store, and these Easy Mummy Hot Dogs are exactly that. Here’s what you’ll need, along with a few notes from my own kitchen experiments.
For the Mummies
- 1 can (8 oz) refrigerated crescent roll dough — I personally prefer Pillsbury for the flakiest texture, but any brand works. Look for the seamless sheets if you can find them—they make cutting strips easier. (Pro tip: Let the dough sit at room temperature for about 5 minutes before you unroll it. Cold dough cracks when you try to cut it.)
- 8 hot dogs — Use your favorite brand. I’ve tested this with beef, turkey, and even plant-based hot dogs, and they all work. For the best “mummy body,” I recommend thick-cut hot dogs. They hold their shape better and look more substantial. (Personal note: I’ve had the best luck with Nathan’s or Hebrew National—they don’t split when baking.)
- 16 small pitted black olives — These become the mummy eyes. You can use sliced olives or whole ones cut in half. I’ve also tried this with green olives stuffed with pimento, and honestly? They work great too. Just make sure they’re pitted so nobody breaks a tooth.
Optional Additions
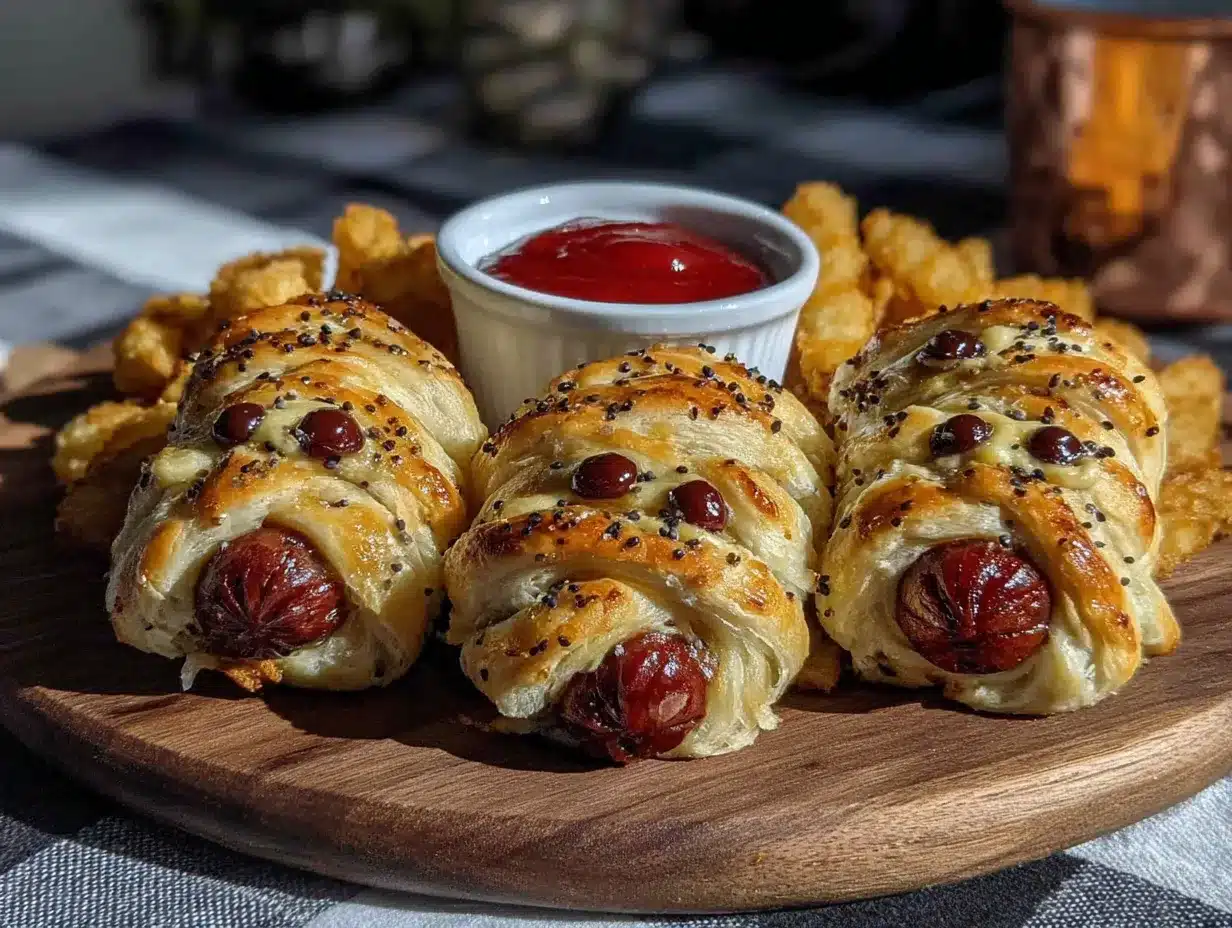
- Ketchup or mustard for dipping — My kids insist on ketchup. I’m a mustard person. We’ve learned to coexist.
- Pretzel sticks — If you want to get creative, you can break them in half and stick them in the sides for “arms.” It’s extra, but the kids love it.
- Cheese slices — Cut into thin strips and wrap with the dough for a cheesier version. (I tried this once—it was delicious but messy. Worth it.)
That’s it. Three main ingredients. I told you it was simple. The beauty of this recipe is that you can customize it with whatever you have on hand. I’ve made these with leftover pizza dough (stretched thin), puff pastry (flakier but more work), and even flour tortillas cut into strips (surprisingly good, but not as crispy).
One thing I learned the hard way: don’t use the low-fat crescent rolls. They don’t brown as nicely, and the texture is a bit rubbery. Stick with the full-fat version for that golden, flaky finish that makes these so irresistible.
Equipment Needed
You don’t need much for this recipe, which is another reason I love it. Here’s what you’ll need:
- Baking sheet — A standard half-sheet pan works perfectly. Line it with parchment paper for easy cleanup. (I forgot the parchment once and spent 20 minutes scrubbing. Learn from my mistakes.)
- Sharp knife or pizza cutter — For cutting the crescent dough into strips. A pizza cutter makes this job much easier and gives you cleaner edges.
- Cutting board — To protect your counter when cutting the dough and olives.
- Small bowl — For holding the olive “eyes” while you work.
- Pastry brush (optional) — If you want to brush the dough with egg wash for a shinier finish. I usually skip this, but it does give a beautiful golden color.
If you don’t have a pizza cutter, a sharp knife works fine. Just be patient and cut slowly. I’ve also used kitchen shears in a pinch—they actually work great for cutting the dough strips. As for the baking sheet, any rimmed pan will do. Just make sure it’s not too small, or your mummies will be crowded and won’t crisp up evenly.
Budget-friendly tip: You don’t need any fancy equipment for this. I’ve made these in a toaster oven before (just watch them closely—they cook faster) and even in an air fryer. The air fryer version takes about 8-10 minutes at 350°F and comes out extra crispy.
Preparation Method
Alright, let’s get to the fun part. I’ve broken this down step by step so you don’t miss anything. Trust me, I’ve made every mistake possible so you don’t have to.
- Preheat your oven to 375°F (190°C). Line a baking sheet with parchment paper. This is non-negotiable—unless you enjoy scrubbing baked-on dough. (I’ve been there. It’s not fun.)
- Unroll the crescent dough onto a cutting board. If you’re using the regular crescent rolls, press the perforations together to seal them. I’ve found that using the seamless sheets saves you this step, but either works. The dough should be in one flat rectangle.
- Cut the dough into thin strips. Using a pizza cutter or sharp knife, cut the dough lengthwise into strips about 1/2 inch wide. You should get about 8-10 strips per can. Don’t worry if they’re not perfectly even—it adds to the “mummy” look. (I tried making them perfect once. The uneven ones actually looked better.)
- Prepare your hot dogs. Pat them dry with a paper towel. This helps the dough stick better. If your hot dogs are very long, you can cut them in half crosswise to make mini mummies. I usually leave them whole for a more dramatic effect.
- Wrap the mummies. Take one strip of dough and wrap it around a hot dog, starting at one end and working your way to the other. Leave a small gap near the top for the eyes. Don’t wrap too tightly—the dough needs room to puff up. I like to overlap the strips slightly for a more “bandaged” look. (Mrs. Kowalski always said to leave a little space. She was right.)
- Place the wrapped hot dogs on the prepared baking sheet, seam side down. Leave about an inch between each mummy so they have room to expand.
- Bake for 10-12 minutes, or until the dough is golden brown and puffed. The hot dogs should be heated through. If you’re using an air fryer, cook at 350°F for 8-10 minutes.
- While they bake, prepare the “eyes.” Cut the olives in half lengthwise or use sliced olives. You’ll need two per mummy.
- Remove from the oven and let them cool for 2-3 minutes. This is important—the dough is hot and the olive eyes will slide right off if you try to put them on immediately. (I learned this the hard way. Hot olive oil on fingers is not fun.)
- Press the olive eyes into the exposed gap near the top of each mummy. Use a small dab of ketchup or mustard as “glue” if they’re not sticking. You can also use a toothpick to make a small indentation first.
- Serve immediately while they’re warm and the dough is still flaky. These are best fresh, but they’re still good at room temperature for about an hour.
A few sensory cues to watch for: The dough should look puffed and golden when it’s done. You’ll smell the hot dogs as they heat up—that familiar salty, smoky aroma. The olives should be shiny and dark against the golden dough. And when you bite into one, you should get that perfect contrast of flaky pastry and juicy hot dog.
Cooking Tips & Techniques
I’ve made these Easy Mummy Hot Dogs more times than I can count, and I’ve picked up a few tricks along the way. Here are the things I wish someone had told me the first time.
Don’t overwork the dough. Crescent roll dough is delicate. If you handle it too much, it gets tough. Just cut the strips and wrap them gently. The less you touch it, the flakier it’ll be.
Leave room for the eyes. I can’t stress this enough. If you wrap the dough all the way to the top, you’ll have nowhere to put the olive eyes. Leave about a half-inch gap. The mummies look better with a little “face” showing anyway.
Watch the baking time. Ovens vary, so start checking at 10 minutes. You want the dough to be golden brown, not dark brown. If the edges are browning too fast, tent the pan loosely with foil for the last few minutes.
Make ahead tip: You can assemble these up to 2 hours ahead and keep them in the fridge. Just add 2-3 minutes to the baking time. I’ve even frozen them (before baking) for up to a month. Just bake from frozen, adding about 5 minutes.
One of my biggest failures? I once used the wrong crescent roll dough—the kind with butter. It sounded good, but it melted everywhere and the mummies looked like they’d been in a fight. Stick with the regular version.
Another lesson: don’t crowd the pan. I tried to fit 10 mummies on one sheet once, and they came out pale and soggy. Give them space to breathe. Two batches are better than one sad, crowded pan.
And here’s a timing strategy: While the mummies bake, set out your dipping sauces and arrange the serving platter. That way, everything’s ready when they come out of the oven.
Variations & Adaptations
One of the best things about this recipe is how easy it is to customize. Here are some variations I’ve tried and loved.
Dietary Variations
- Gluten-Free: Use gluten-free crescent roll dough or gluten-free puff pastry. I’ve tried both, and they work surprisingly well. Just watch the baking time—gluten-free dough tends to brown faster.
- Vegetarian: Swap the hot dogs for vegetarian sausages or even cheese sticks. The cheese sticks version is amazing—the cheese gets melty and gooey inside the crispy dough.
- Low-Carb: Use thin slices of cheese or deli meat as the “wrap” instead of dough. It’s not the same, but it scratches the itch if you’re watching carbs.
Flavor Twists
- Cheesy Mummies: Before wrapping, cut a slit in the hot dog and stuff it with a strip of cheddar or mozzarella. The cheese oozes out as it bakes—it’s glorious.
- Spicy Mummies: Use spicy hot dogs or add a sprinkle of red pepper flakes to the dough. My husband loves these.
- Everything Mummies: Sprinkle everything bagel seasoning on the dough before baking. The sesame and garlic flavor is surprisingly good with the hot dog.
Customization Ideas
- Different “Eyes”: Use capers, peppercorns, or even small pieces of bell pepper instead of olives.
- Face Details: Use mustard or ketchup to draw little mouths or eyebrows on the mummies. My kids go crazy for this.
- Dip it: Serve with ranch dressing, BBQ sauce, or honey mustard. Each dip gives the mummies a completely different personality.
I once tried a “zombie” version where I used green food coloring in the dough. It looked… interesting. Let’s just say it was a learning experience. Stick with the classic golden mummy look.
Serving & Storage Suggestions
These Easy Mummy Hot Dogs are best served warm, right out of the oven. The dough is at its flakiest, and the hot dogs are perfectly juicy. But I’ve served them at room temperature too, and they’re still delicious.
Presentation ideas: Arrange them on a platter lined with black or orange napkins for a festive look. I like to put a small bowl of ketchup in the center (it looks like a “blood” dip, which the kids find hilarious). You can also arrange them on a bed of shredded lettuce to look like “grass.”
What to serve with them: These pair great with other Halloween snacks like popcorn balls, caramel apples, or pumpkin-shaped cookies. For a full meal, add a simple side salad or some veggie sticks. I’ve also served them alongside a bowl of chili for dipping—highly recommended.
Storage: Leftover mummies can be stored in an airtight container in the fridge for up to 3 days. The dough will soften, but they’re still tasty. To reheat, pop them in the oven at 350°F for 5-7 minutes, or in the air fryer for 3-4 minutes. The microwave works in a pinch, but the dough gets chewy.
Freezing: You can freeze the baked mummies for up to 2 months. Just wrap them tightly in foil and place in a freezer bag. Reheat from frozen at 350°F for 10-12 minutes. I’ve also frozen the unbaked mummies—just assemble, freeze on a baking sheet, then transfer to a bag. Bake from frozen, adding 5 minutes to the time.
One thing I’ve noticed: the flavors actually get a little better after a day in the fridge. Something about the dough absorbing the hot dog flavor. They’re never as crispy, but the taste is still spot on.
Nutritional Information & Benefits
Let’s be honest—these are a treat, not a health food. But here’s what you need to know.
| Nutrient | Amount per serving (2 mummies) |
|---|---|
| Calories | 280-320 |
| Total Fat | 18-22g |
| Saturated Fat | 7-9g |
| Cholesterol | 30-40mg |
| Sodium | 800-1000mg |
| Total Carbohydrates | 22-26g |
| Protein | 8-10g |
Note: Values are approximate and vary based on specific brands used.
On the plus side, hot dogs do provide some protein and iron. The olives offer healthy monounsaturated fats and a bit of vitamin E. And the crescent dough… well, it makes you happy. That counts for something, right?
If you’re watching sodium, look for low-sodium hot dogs. For a healthier twist, use turkey or chicken hot dogs, which have less fat. And if you’re serving kids, these are a great way to get them to eat something fun without a lot of fuss.
My personal philosophy? Halloween comes once a year. Enjoy the mummies. Balance it out with veggies the rest of the week.
Conclusion
These Easy Mummy Hot Dogs are more than just a recipe—they’re a little piece of Halloween magic that anyone can make. They’re silly, they’re delicious, and they bring people together in a way that only food can. Every time I make them, I think of Mrs. Kowalski and her flour-dusted apron, and I smile.
I hope you’ll try these for your next Halloween party, classroom celebration, or just a fun weeknight dinner. Don’t be afraid to make them your own—add cheese, change the eyes, experiment with different dips. That’s the beauty of a simple recipe. It’s a canvas for your creativity.
When you make them, I’d love to hear how they turned out. Did your kids love them? Did you try a crazy variation? Drop a comment below and let me know. And if you share them on social media, tag me—I want to see your mummy creations!
Happy Halloween, friends. Go make some mummies.
Frequently Asked Questions
Can I make these ahead of time?
Yes! You can assemble them up to 2 hours ahead and keep them in the fridge. Bake just before serving for the best texture.
Can I use puff pastry instead of crescent rolls?
Absolutely. Puff pastry gives a flakier, more buttery result. Just cut it into strips and wrap the same way. Bake at 400°F for 12-15 minutes.
How do I keep the olive eyes from falling off?
Press them in while the mummies are still warm but not hot. If they’re not sticking, use a tiny dab of ketchup or mustard as “glue.”
Can I make these in an air fryer?
Yes! Cook at 350°F for 8-10 minutes. Check them at 8 minutes—air fryers run hot and can brown the dough quickly.
What can I use instead of olives for the eyes?
Capers, peppercorns, small pieces of bell pepper, or even chocolate chips (for a sweet version) all work great. Get creative!
Pin This Recipe!

Easy Mummy Hot Dogs: Best Halloween Bite

These Easy Mummy Hot Dogs are a fun and simple Halloween treat made with hot dogs wrapped in crescent roll dough and topped with olive eyes. Ready in under 20 minutes, they’re perfect for parties and guaranteed to be a crowd-pleaser.
- Prep Time: 10 minutes
- Cook Time: 12 minutes
- Total Time: 22 minutes
- Yield: 8 servings 1x
- Category: Appetizer
- Cuisine: American
Ingredients
- 1 can (8 oz) refrigerated crescent roll dough
- 8 hot dogs (thick-cut recommended)
- 16 small pitted black olives (or sliced olives)
Instructions
- Preheat your oven to 375°F (190°C). Line a baking sheet with parchment paper.
- Unroll the crescent dough onto a cutting board. If using regular crescent rolls, press the perforations together to seal them into a flat rectangle.
- Using a pizza cutter or sharp knife, cut the dough lengthwise into strips about 1/2 inch wide (about 8-10 strips per can).
- Pat the hot dogs dry with a paper towel to help the dough stick.
- Take one strip of dough and wrap it around a hot dog, starting at one end and working to the other. Leave a small gap near the top for the eyes. Do not wrap too tightly; overlap strips slightly for a bandaged look.
- Place the wrapped hot dogs on the prepared baking sheet, seam side down, leaving about an inch between each.
- Bake for 10-12 minutes, or until the dough is golden brown and puffed, and the hot dogs are heated through.
- While baking, prepare the olive eyes by cutting olives in half lengthwise (you’ll need 2 per mummy).
- Remove from the oven and let cool for 2-3 minutes.
- Press the olive eyes into the exposed gap near the top of each mummy. Use a small dab of ketchup or mustard as glue if needed.
- Serve immediately while warm.
Notes
For best results, use thick-cut hot dogs like Nathan’s or Hebrew National. Let crescent dough sit at room temperature for 5 minutes before unrolling to prevent cracking. Don’t wrap dough too tightly—leave room for puffing. For air fryer, cook at 350°F for 8-10 minutes. Can be assembled up to 2 hours ahead and refrigerated. Freeze unbaked mummies for up to 1 month; bake from frozen adding 5 minutes.
Nutrition
- Serving Size: 2 mummies
- Calories: 300
- Sugar: 4
- Sodium: 900
- Fat: 20
- Saturated Fat: 8
- Carbohydrates: 24
- Fiber: 1
- Protein: 9
Keywords: Halloween, mummy hot dogs, easy Halloween recipe, crescent roll hot dogs, kid-friendly Halloween snack


