It was 10:47 PM on a Tuesday in late September, and a very specific craving hit me like a freight train. I wanted a warm, spiced donut—the kind that fills your whole kitchen with the smell of autumn—but I didn’t have the energy for deep-frying, and I certainly didn’t have a donut pan I trusted. What I had was a can of pumpkin puree that was about to expire, a bag of all-purpose flour, and the stubborn idea that there had to be a better way. So I stood there in my quiet kitchen, the only light coming from above the stove, and I started mixing things together in a bowl I’d forgotten to wash from breakfast. Honestly, I was half-convinced I was about to waste good ingredients on a late-night whim. But that’s the thing about cooking when no one’s watching—you take risks you wouldn’t dare try at a normal hour.
The first batch came out looking a bit lopsided, if I’m being totally honest. I’d used a muffin pan because that’s all I had, and the donuts looked more like little UFOs than the perfect rings I’d imagined. But then I rolled one in cinnamon sugar while it was still warm, and I took a bite. Let me tell you, I actually let out a little gasp. The outside had that delicate, sugary crunch, and the inside was so soft and tender it practically melted. The pumpkin flavor was there, but it wasn’t shouting—it was this warm, cozy background note that the cinnamon and nutmeg danced around. I ate three before I even thought to take a picture. Maybe you’ve been there, standing in your kitchen at a ridiculous hour, wondering if you’ve finally lost it, only to discover you’ve accidentally made something brilliant.
These easy baked pumpkin donuts with cinnamon sugar became my favorite fall recipe that very night. They are not fancy. They are not complicated. But they are exactly what a good donut should be: satisfying, comforting, and gone way too fast. I’ve made them at least a dozen times since that Tuesday, and they never fail to bring that same late-night magic to the table.
Why You’ll Love This Recipe
This isn’t just another pumpkin recipe you’ll make once and forget about. These baked pumpkin donuts have earned a permanent spot in my fall rotation, and here’s why they’ll do the same in yours:
- Quick & Easy: From mixing bowl to your plate in under 30 minutes. No yeast, no proofing, no deep-frying—just simple baking that anyone can pull off on a busy weekday.
- Simple Ingredients: You probably have most of these in your pantry right now. No fancy extracts or hard-to-find spices. Just real, honest ingredients that work together beautifully.
- Perfect for Family Mornings: These donuts are a lifesaver for hectic school mornings or lazy weekend brunches. They feel special without requiring you to wake up at dawn.
- Crowd-Pleaser: I’ve served these to picky toddlers, skeptical teenagers, and grown adults who “don’t really like pumpkin.” Every single one of them reached for a second donut.
- Unbelievably Delicious: The texture is what gets everyone. Baked donuts can sometimes be dry or dense, but these are incredibly moist and tender, with that perfect cinnamon sugar coating that adds just the right amount of crunch.
What makes this recipe different from the dozens of other pumpkin donut recipes out there? It’s the balance. I spent a few batches tweaking the ratios until the pumpkin flavor was present but not overwhelming, the spices were warm but not sharp, and the texture was cake-like but still light. It’s also the method—baking instead of frying means less mess, less guilt, and more time actually enjoying your donuts. This is comfort food at its finest: faster, simpler, but with all the soul-soothing satisfaction of a bakery treat.
What Ingredients You Will Need
This recipe uses simple, wholesome ingredients to deliver bold flavor and satisfying texture without any fuss. Most of these are pantry staples, which means you can whip up a batch whenever the craving strikes.
For the Donut Batter
- 1 ¾ cups all-purpose flour (spooned and leveled for accuracy)
- 1 ½ teaspoons baking powder (make sure it’s fresh for the best rise)
- 1 teaspoon pumpkin pie spice (I prefer the McCormick brand for its balanced blend, but homemade works great too)
- ½ teaspoon ground cinnamon (adds warmth and depth)
- ½ teaspoon salt (balances the sweetness and enhances the spices)
- ½ cup granulated sugar (provides structure and sweetness)
- ¼ cup light brown sugar, packed (adds moisture and a subtle molasses note)
- 1 large egg, at room temperature (room temperature ingredients blend more smoothly)
- ½ cup canned pumpkin puree (not pumpkin pie filling—look for 100% pure pumpkin. I usually grab Libby’s)
- ¼ cup vegetable oil (keeps the donuts tender; canola or melted coconut oil also work)
- ¼ cup milk (whole milk gives the richest texture, but 2% or oat milk are fine substitutes)
- 1 teaspoon vanilla extract (pure vanilla adds a lovely aromatic quality)
For the Cinnamon Sugar Coating
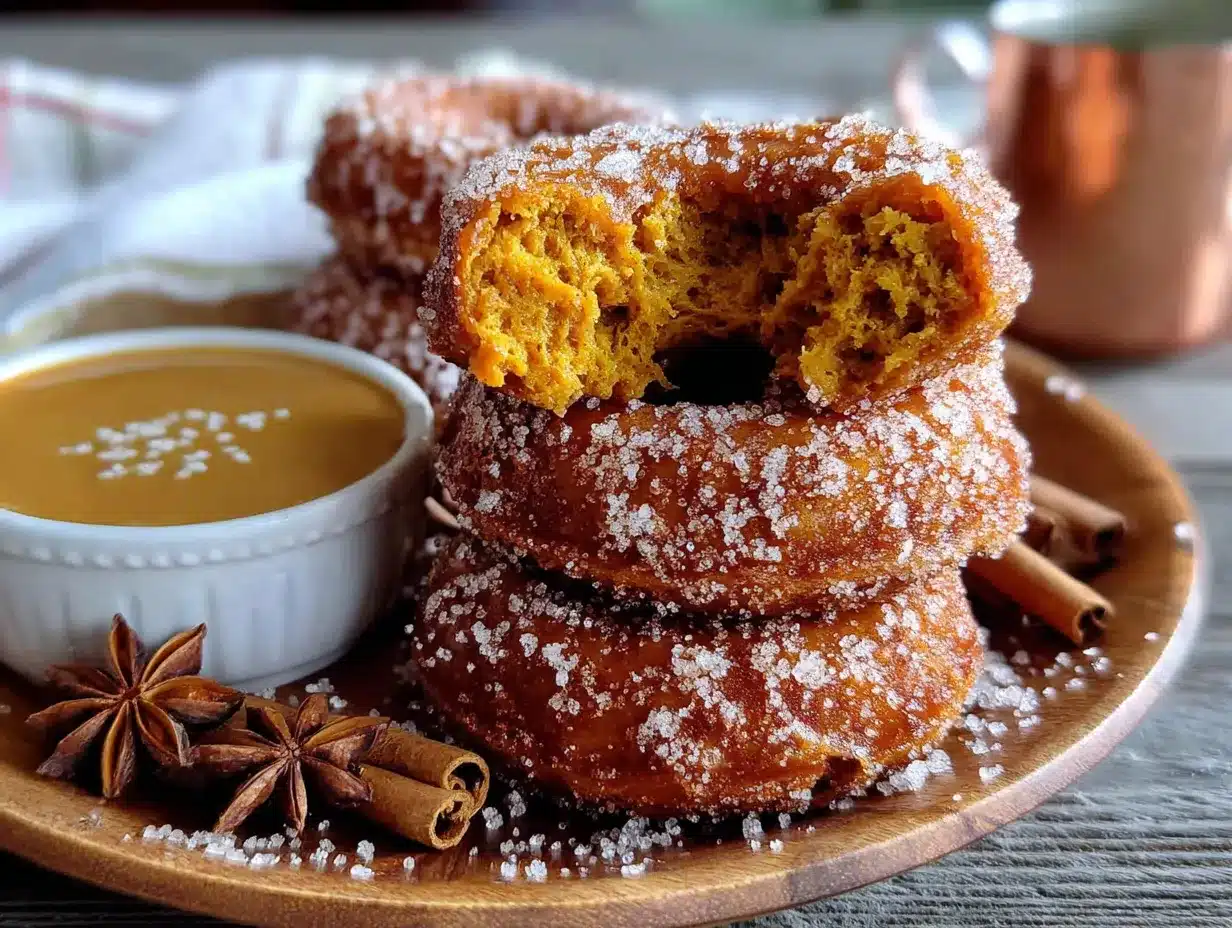
- ¼ cup unsalted butter, melted (this helps the coating stick and adds richness)
- ½ cup granulated sugar
- 1 ½ teaspoons ground cinnamon
Ingredient Selection Tips: When choosing pumpkin puree, shake the can before opening—if it sloshes too much, it might be watery. Look for a can that feels solid. For the spices, if you don’t have pumpkin pie spice, you can mix ½ teaspoon cinnamon, ¼ teaspoon nutmeg, ¼ teaspoon ginger, and a pinch of cloves. I’ve done this many times when my spice drawer was a mess, and it works perfectly.
Substitution Guidance: Need a dairy-free option? Use melted coconut oil instead of butter for the coating, and swap the milk for almond or oat milk. For a gluten-free version, use a 1:1 gluten-free baking flour blend—I’ve had good results with King Arthur Measure for Measure. The texture will be slightly different, but still delicious.
Equipment Needed
You don’t need a professional bakery setup for these donuts. Here’s what you’ll need:
- Donut pan: This is the most important tool. A standard 6-cavity donut pan works perfectly. If you don’t have one, you can use a mini muffin pan to make donut holes, or a regular muffin tin (just adjust the baking time). I bought my first donut pan for $8 at a discount store, and it’s still going strong.
- Mixing bowls: One medium bowl for dry ingredients, one large bowl for wet ingredients.
- Whisk: For combining everything smoothly.
- Rubber spatula: For scraping down the sides and folding the batter.
- Piping bag or zip-top bag: For filling the donut cavities neatly. A zip-top bag with the corner snipped off works like a charm and saves you from buying a piping bag.
- Cooling rack: Essential for letting the donuts cool evenly so the coating sticks properly.
- Pastry brush: For brushing the melted butter onto the donuts. A silicone brush is easy to clean.
- Shallow dish: For mixing the cinnamon sugar and rolling the donuts.
Budget-Friendly Tip: If you don’t have a donut pan, don’t let that stop you. I’ve made these in a mini muffin pan as “donut holes” and they were just as delicious. Just reduce the baking time to 8-10 minutes and keep an eye on them.
Preparation Method
Let me walk you through this step by step. I’ve made these donuts so many times that I could do it in my sleep, but I’ll share every little trick I’ve learned along the way.
- Preheat your oven to 350°F (175°C). Spray your donut pan generously with non-stick cooking spray. Don’t skimp here—baked donuts need that extra help to release cleanly. I learned this the hard way after my first batch stuck to the pan like glue.
- In a medium bowl, whisk together the flour, baking powder, pumpkin pie spice, cinnamon, and salt. Make sure there are no lumps. The baking powder should be evenly distributed so your donuts rise evenly. Set this bowl aside.
- In a large bowl, whisk together the granulated sugar, brown sugar, and egg. Whisk vigorously for about 30 seconds until the mixture looks lighter in color and slightly thickened. This little step helps create a tender crumb.
- Add the pumpkin puree, vegetable oil, milk, and vanilla extract to the sugar mixture. Whisk until everything is smooth and well combined. The batter will look a bit thin at this point—don’t worry, that’s exactly how it should look.
- Pour the dry ingredients into the wet ingredients. Use a rubber spatula to fold everything together gently. Stir just until you no longer see streaks of flour. A few small lumps are totally fine—overmixing will make your donuts tough. I usually count to about 15 stirs and stop.
- Transfer the batter to a piping bag or a zip-top bag with the corner snipped off. This makes filling the donut cavities so much easier and less messy than trying to spoon the batter in. Pipe the batter into each cavity, filling them about ¾ full. Don’t overfill, or the donuts will lose their hole.
- Bake for 10-12 minutes, or until a toothpick inserted into the center of a donut comes out clean. The donuts should be golden brown on top and spring back lightly when touched. My oven runs a bit hot, so I start checking at 9 minutes.
- Let the donuts cool in the pan for 2-3 minutes. This is crucial—if you try to remove them too soon, they’ll fall apart. After 3 minutes, gently turn the pan over onto a cooling rack. Tap the bottom of the pan if any donuts are stubborn. You should hear a soft thump as they release.
- While the donuts are still warm (but not hot), brush them all over with melted butter. I use a pastry brush and make sure every nook and cranny gets coated. The warmth of the donuts helps the butter soak in slightly, which makes the coating stick better.
- Immediately roll each buttered donut in the cinnamon sugar mixture. I use a shallow dish and gently press the donut into the sugar, turning it to coat all sides. Tap off any excess. The coating should be thick and fragrant.
- Place the coated donuts on the cooling rack to set. The sugar will harden slightly as they cool, creating that signature crunchy exterior. Let them cool completely if you can resist—I know it’s hard.
Sensory Cue: When you take the donuts out of the oven, your kitchen should smell like a fall candle shop. The tops should be a warm golden color, and if you tap one gently, it should feel springy, not dense.
Cooking Tips & Techniques
After making these baked pumpkin donuts more times than I can count, I’ve collected a few tricks that make a real difference.
Don’t overmix the batter. This is the number one mistake I see people make with baked donuts. Mix until the flour just disappears, then stop. Overmixing develops the gluten too much, and you’ll end up with donuts that are tough and rubbery instead of tender and cake-like. I once got distracted by my phone and kept stirring, and those donuts were a sad, dense mess.
Room temperature ingredients matter. I know it’s tempting to use cold eggs straight from the fridge, but taking an extra 15 minutes to let your egg and milk come to room temperature makes a noticeable difference. Cold ingredients don’t emulsify as well, which can lead to a slightly greasy texture. Just set them on the counter while you gather your other ingredients.
Use a light hand with the cinnamon sugar. It’s easy to get carried away and pile on the coating, but a thin, even layer is actually more satisfying. Too much sugar can overwhelm the delicate pumpkin flavor and make the donuts overly sweet. I aim for a coating that’s visible but not caked on.
Timing is everything for the coating. The butter needs to be brushed on while the donuts are still warm but not hot. If they’re too hot, the butter will melt and run off. If they’re too cool, the butter won’t soak in and the sugar won’t stick. I usually let the donuts rest on the cooling rack for about 5 minutes after they come out of the pan, then brush them.
Make ahead strategy: You can bake the donuts a day in advance and store them uncoated in an airtight container. When you’re ready to serve, warm them in a 300°F oven for 3-4 minutes, then brush with butter and coat with cinnamon sugar. They’ll taste freshly made.
Variations & Adaptations
One of the best things about this recipe is how easily it adapts to different tastes and dietary needs. Here are a few variations I’ve tried and loved:
1. Maple Glazed Pumpkin Donuts: Skip the cinnamon sugar coating and make a simple glaze instead. Whisk together 1 cup powdered sugar, 2 tablespoons maple syrup, and 1-2 tablespoons milk until smooth. Dip the tops of the cooled donuts in the glaze and let set. The maple flavor pairs beautifully with the pumpkin.
2. Chocolate Chip Pumpkin Donuts: Fold ½ cup mini chocolate chips into the batter before piping. The little pockets of melted chocolate add a wonderful richness. I made these for a Halloween party, and they disappeared before the savory snacks did.
3. Vegan Pumpkin Donuts: Replace the egg with a flax egg (1 tablespoon ground flaxseed mixed with 3 tablespoons water, let sit for 5 minutes). Use plant-based milk and melted coconut oil instead of butter. The texture is slightly denser but still delicious. My vegan friend couldn’t tell the difference.
4. Pumpkin Donut Holes: If you don’t have a donut pan, use a mini muffin pan. Fill each cavity about ¾ full and bake for 8-10 minutes. Roll the warm donut holes in cinnamon sugar for a poppable, kid-friendly treat.
5. Spiced Pumpkin Donuts with Chai Glaze: Add ½ teaspoon ground cardamom and ¼ teaspoon ground ginger to the dry ingredients. For the glaze, mix 1 cup powdered sugar with 2 tablespoons strong brewed chai tea and a pinch of cinnamon. It’s an elegant twist that feels fancy but is just as easy.
Serving & Storage Suggestions
These baked pumpkin donuts are best enjoyed the day they’re made, but they still have plenty of life after that.
Serving: I love serving these donuts slightly warm, when the cinnamon sugar coating is still a bit melty and the inside is soft. They’re perfect on their own with a cup of coffee or a glass of cold milk. For a more decadent presentation, arrange them on a pretty plate and dust with a little extra cinnamon. They also make a wonderful addition to a fall brunch spread alongside scrambled eggs and fresh fruit.
Storage: Store any leftover donuts in an airtight container at room temperature for up to 2 days. The coating will soften slightly, but they’ll still be delicious. If you want to keep them longer, store them in the refrigerator for up to 5 days. Just let them come to room temperature before serving, or warm them in the microwave for 10-15 seconds.
Freezing: These donuts freeze beautifully. Freeze them uncoated on a baking sheet until solid, then transfer to a freezer-safe bag for up to 3 months. When you’re ready to enjoy them, thaw at room temperature, warm in a 300°F oven for 5 minutes, then brush with butter and coat with cinnamon sugar. They taste freshly baked.
Reheating: The best way to reheat a single donut is in the microwave for 10-12 seconds. For a larger batch, pop them in a 300°F oven for 5-7 minutes. The coating will crisp up again slightly.
Flavor Development: Here’s something interesting—the pumpkin flavor actually deepens after a day. If you can resist eating them all immediately, the second-day donuts have a more pronounced, cozy pumpkin taste. The spices also meld together more harmoniously overnight.
Nutritional Information & Benefits
While these donuts are definitely a treat, they also offer some surprising nutritional perks thanks to the pumpkin.
Estimated Nutritional Values (per donut, based on 12 donuts):
- Calories: 210
- Fat: 9g
- Carbohydrates: 32g
- Fiber: 1g
- Sugar: 18g
- Protein: 3g
Health Benefits: Pumpkin puree is packed with vitamin A, which supports eye health and immune function. It’s also a good source of fiber and potassium. The cinnamon in the coating has anti-inflammatory properties and can help regulate blood sugar levels. So while these aren’t health food, they’re certainly not empty calories either.
Dietary Considerations: This recipe is vegetarian. For vegan and gluten-free options, see the variations section above. The donuts contain dairy (butter and milk) and gluten (flour), so they’re not suitable for those with related allergies unless modified.
My Perspective: I believe in balance. These donuts are a wonderful way to enjoy the flavors of fall without feeling deprived. One donut with a cup of coffee is a perfectly reasonable way to start a weekend morning. Life is too short to skip the cinnamon sugar coating.
Conclusion
These easy baked pumpkin donuts with cinnamon sugar are everything a fall recipe should be: simple, comforting, and absolutely delicious. They came to life on a random Tuesday night when I was just following a craving, and they’ve been a staple ever since. What I love most about this recipe is how approachable it is. You don’t need a deep fryer or any special skills. You just need a donut pan, some basic ingredients, and about 30 minutes.
I hope you give these donuts a try and make them your own. Maybe you’ll add a pinch of extra nutmeg, or skip the coating and go for a glaze instead. That’s the beauty of a good base recipe—it invites you to play. And if you do make them, I’d love to hear about it. Drop a comment below and tell me how they turned out, or share a photo of your donuts. There’s something special about knowing someone else is enjoying the same recipe in their own kitchen.
So go ahead, preheat that oven, and treat yourself to something warm and wonderful. You deserve it.
Frequently Asked Questions
1. Can I make these donuts without a donut pan?
Yes, absolutely! Use a mini muffin pan to make donut holes instead. Fill each cavity about ¾ full and bake for 8-10 minutes. You can also use a regular muffin tin, but you’ll need to increase the baking time to 15-18 minutes.
2. Why did my donuts stick to the pan?
This usually happens if the pan wasn’t greased well enough. Make sure to use a generous amount of non-stick spray, and let the donuts cool in the pan for exactly 2-3 minutes before trying to remove them. If they still stick, gently run a thin spatula around the edges.
3. Can I use pumpkin pie filling instead of pumpkin puree?
No, I wouldn’t recommend it. Pumpkin pie filling has added sugar and spices, which will throw off the balance of the recipe. Stick with 100% pure pumpkin puree for the best results.
4. How do I know when the donuts are done baking?
Insert a toothpick into the center of a donut. If it comes out clean or with just a few moist crumbs, they’re done. The tops should also be golden brown and spring back when lightly touched.
5. Can I freeze the coated donuts?
I don’t recommend freezing them after coating because the cinnamon sugar can get soggy during thawing. Instead, freeze the uncoated donuts, then thaw, warm, and coat them fresh. They’ll taste just like they came out of the oven.
Pin This Recipe!
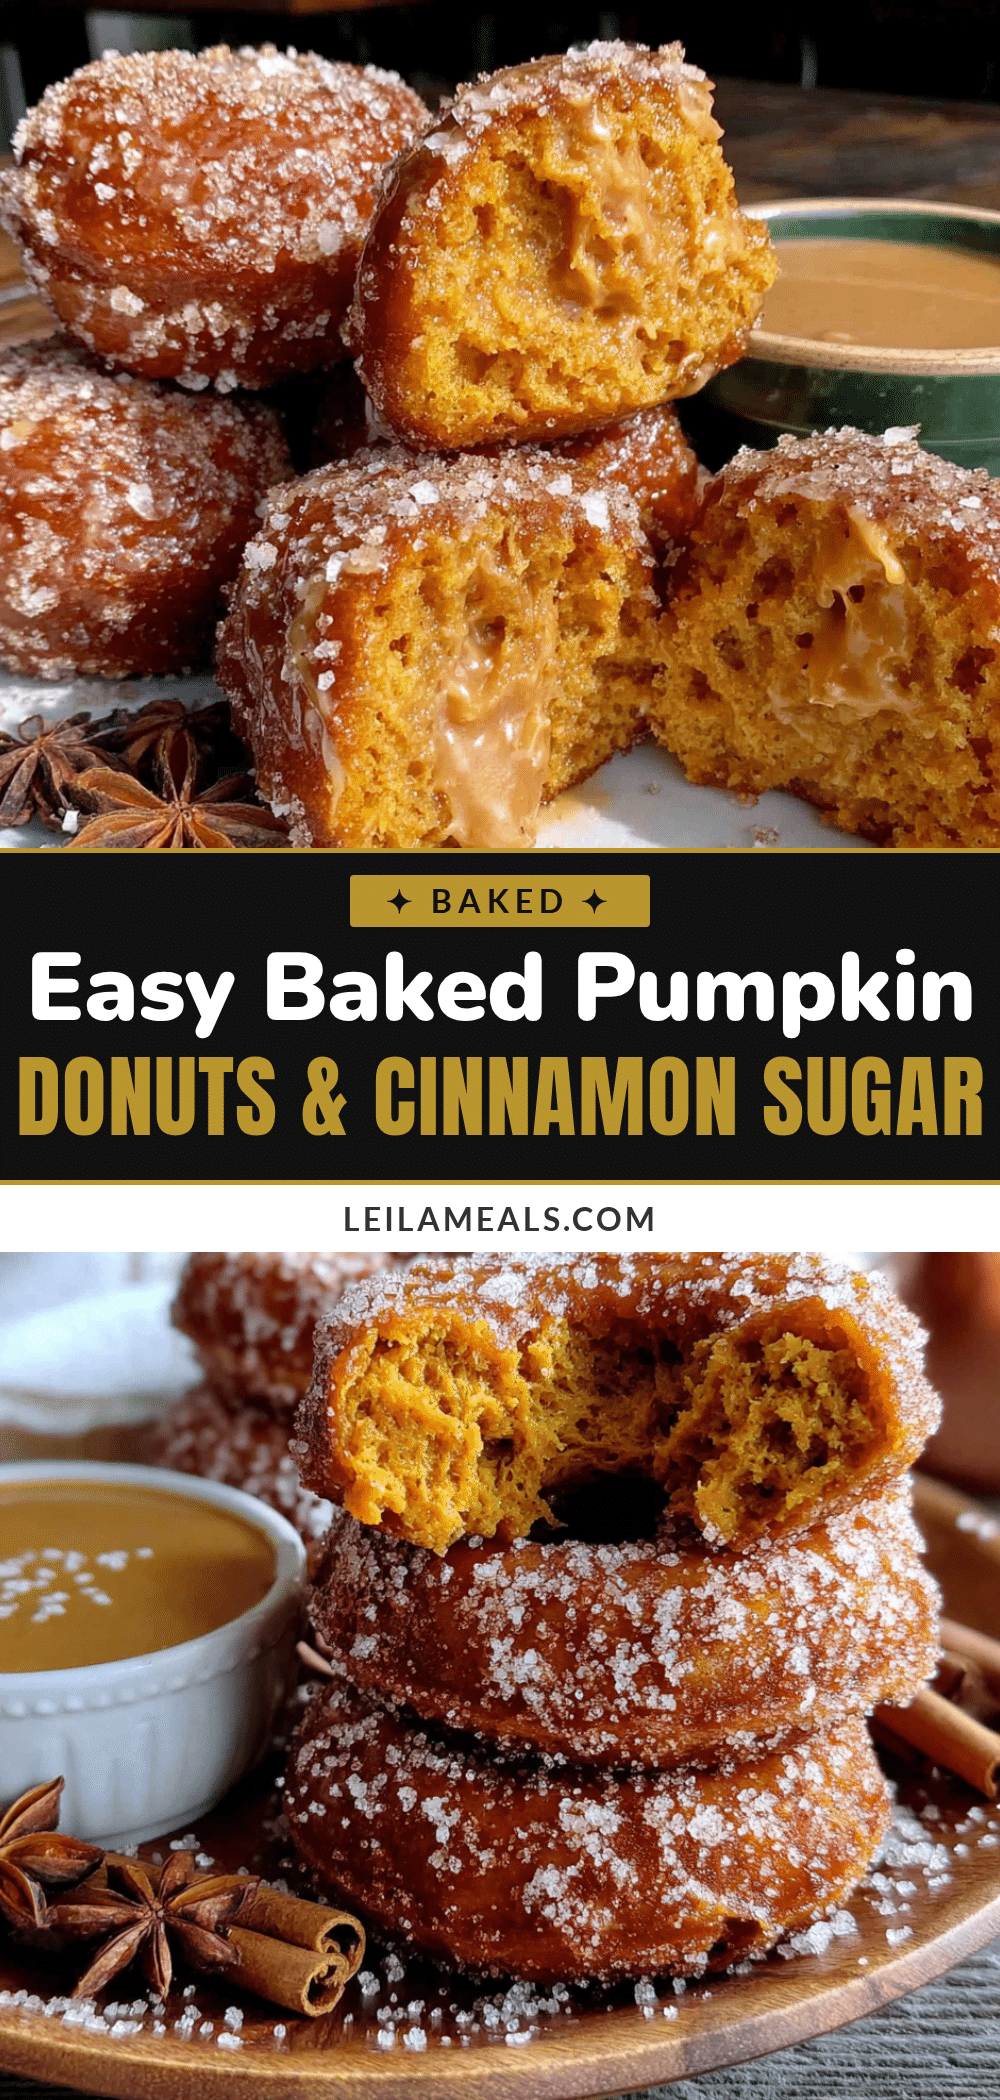
Best Easy Cinnamon Sugar Baked Pumpkin Donuts Recipe
These easy baked pumpkin donuts with cinnamon sugar are everything a fall recipe should be: simple, comforting, and absolutely delicious. They come together in under 30 minutes with simple pantry ingredients.
- Prep Time: 15 minutes
- Cook Time: 12 minutes
- Total Time: 27 minutes
- Yield: 12 donuts 1x
- Category: Dessert
- Cuisine: American
Ingredients
- 1 ¾ cups all-purpose flour (spooned and leveled)
- 1 ½ teaspoons baking powder
- 1 teaspoon pumpkin pie spice
- ½ teaspoon ground cinnamon
- ½ teaspoon salt
- ½ cup granulated sugar
- ¼ cup light brown sugar, packed
- 1 large egg, at room temperature
- ½ cup canned pumpkin puree (100% pure pumpkin)
- ¼ cup vegetable oil (or canola or melted coconut oil)
- ¼ cup milk (whole milk preferred, 2% or oat milk fine)
- 1 teaspoon vanilla extract
- ¼ cup unsalted butter, melted (for coating)
- ½ cup granulated sugar (for coating)
- 1 ½ teaspoons ground cinnamon (for coating)
Instructions
- Preheat oven to 350°F (175°C). Spray donut pan generously with non-stick cooking spray.
- In a medium bowl, whisk together flour, baking powder, pumpkin pie spice, cinnamon, and salt. Set aside.
- In a large bowl, whisk together granulated sugar, brown sugar, and egg for about 30 seconds until lighter and slightly thickened.
- Add pumpkin puree, vegetable oil, milk, and vanilla extract to the sugar mixture. Whisk until smooth.
- Pour dry ingredients into wet ingredients. Fold gently with a rubber spatula until just combined (a few lumps are fine). Do not overmix.
- Transfer batter to a piping bag or zip-top bag with corner snipped off. Pipe batter into donut cavities, filling each about ¾ full.
- Bake for 10-12 minutes, or until a toothpick inserted into the center comes out clean. Donuts should be golden and spring back when touched.
- Let donuts cool in pan for 2-3 minutes, then turn out onto a cooling rack.
- While donuts are still warm (but not hot), brush all over with melted butter.
- Immediately roll each buttered donut in the cinnamon sugar mixture (½ cup sugar + 1½ teaspoons cinnamon) until coated.
- Place coated donuts on cooling rack to set. Serve warm or at room temperature.
Notes
For best results, use room temperature ingredients. Do not overmix the batter. For a dairy-free version, use melted coconut oil instead of butter and plant-based milk. For gluten-free, use a 1:1 gluten-free baking flour blend. Donuts can be baked a day ahead and stored uncoated; warm and coat before serving.
Nutrition
- Serving Size: 1 donut
- Calories: 210
- Sugar: 18
- Sodium: 180
- Fat: 9
- Saturated Fat: 3
- Carbohydrates: 32
- Fiber: 1
- Protein: 3
Keywords: pumpkin donuts, baked donuts, cinnamon sugar donuts, fall recipe, easy donut recipe


