I had a very specific opinion about apple bread for years. It was dry. It was boring. And honestly, it always felt like a sad compromise when what you really wanted was a slice of warm apple fritter from the bakery. That was my position, and I held it firmly.
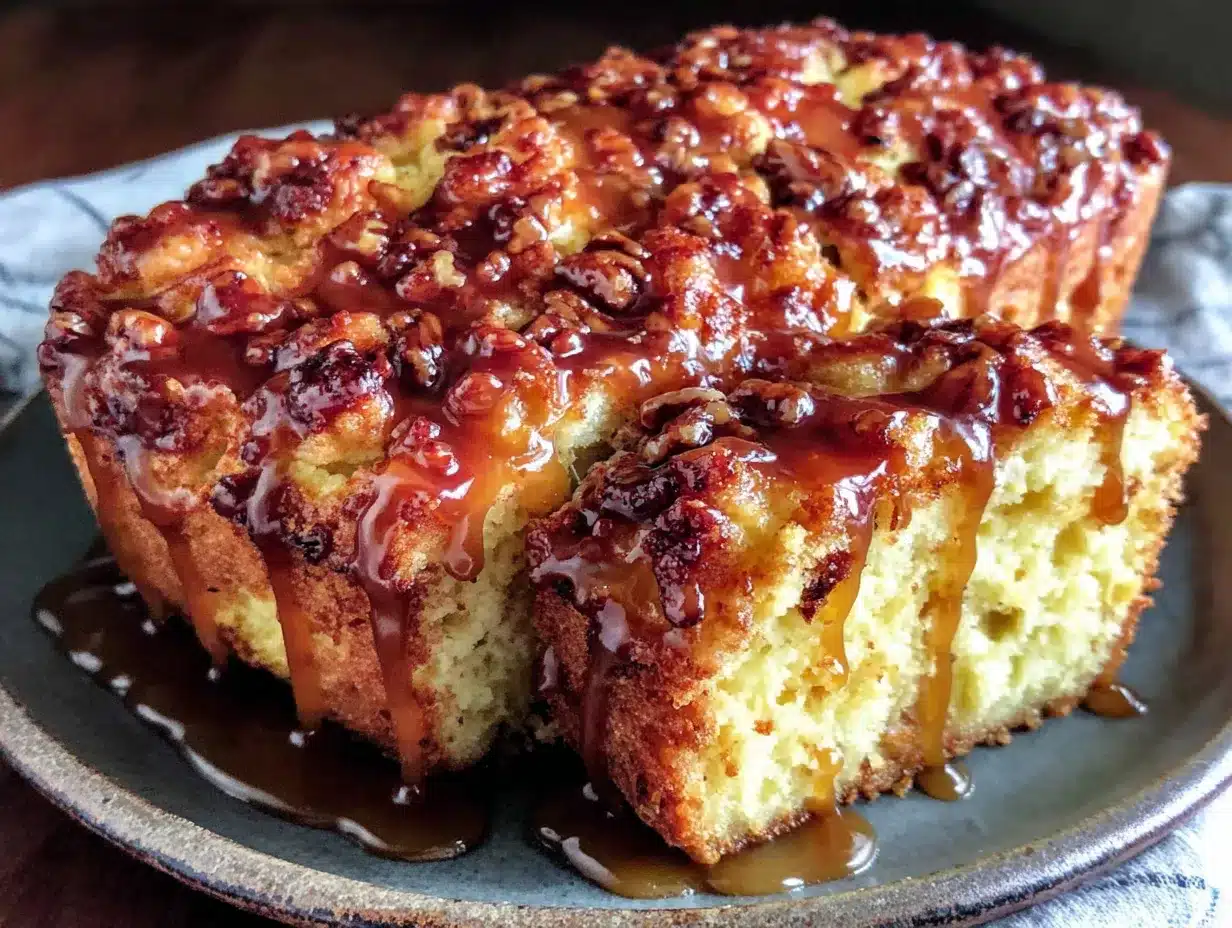
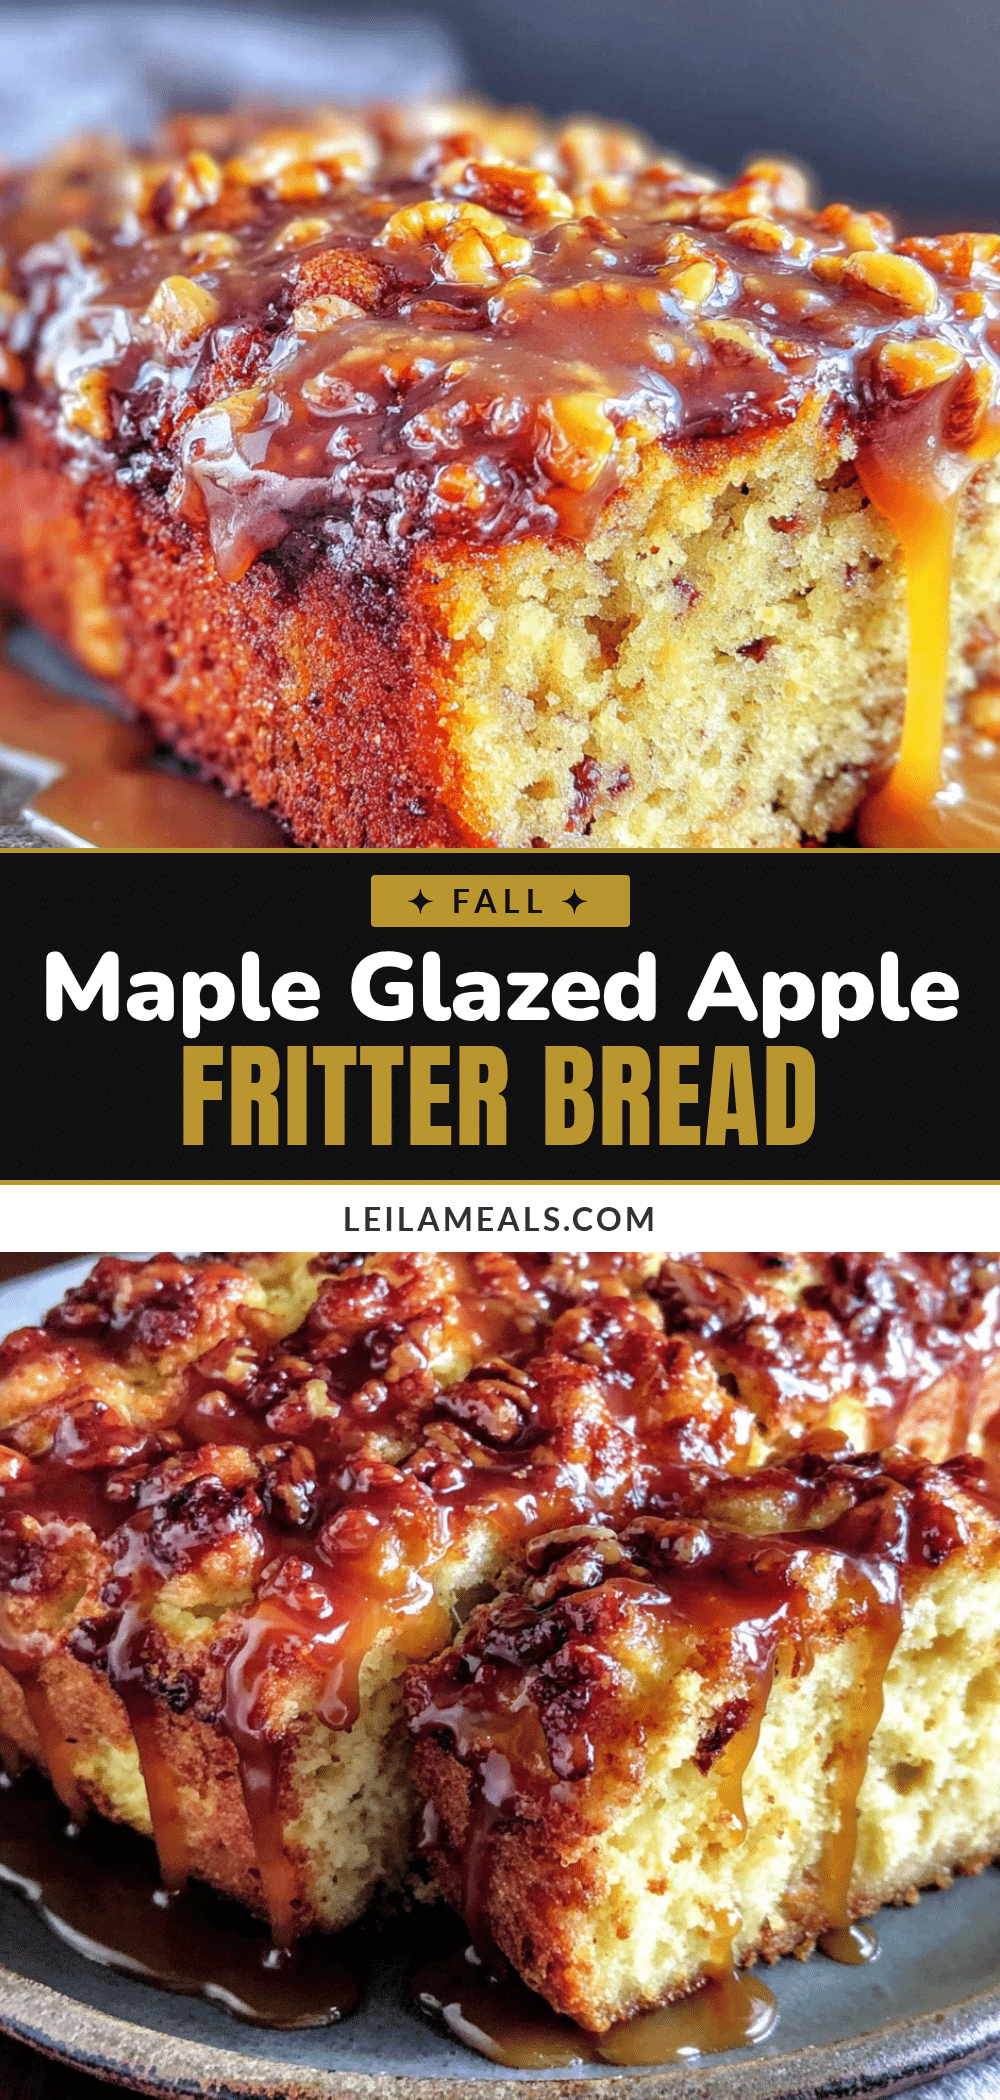
Then last September, my neighbor Carol knocked on my door holding a loaf wrapped in foil. “Just made this,” she said, pushing it into my hands. “It’s not really bread. It’s more like… well, just try it.” I thanked her, set it on the counter, and didn’t think much of it. Later that evening, I cut a slice out of pure politeness. The knife hit something that crackled. The inside was studded with soft, cinnamon-spiced apple chunks, and the top had this sticky, golden glaze that dripped down the sides. I ate that first slice standing over the kitchen sink. Then I cut another. Then I texted Carol for the recipe at 9 PM on a Tuesday. That was the moment I had to admit I was wrong about apple bread. This Maple Glazed Apple Fritter Bread is the recipe that changed my mind, and honestly, it might change yours too.
Maybe you’ve been there—you see a loaf of apple bread at a bake sale or a coffee shop and think, “That looks dry.” I get it. But this version is different. It captures everything you love about a classic apple fritter—the tender, almost-fried texture, the pockets of soft fruit, that signature crackly glaze—all in a simple loaf you can bake at home without a deep fryer. The maple glaze is the secret weapon here. It adds a deep, woodsy sweetness that pairs perfectly with tart apples, and it soaks into the warm bread just enough to make every bite feel special. Let me tell you, this bread has become my official fall baking project, and once you try it, you’ll see why I keep making it year after year.
Why You’ll Love This Recipe
This isn’t just another apple bread recipe. I’ve tested this Maple Glazed Apple Fritter Bread at least a dozen times to get the texture just right—not too dense, not too crumbly, with just the right amount of apple in every slice. My family has been my official taste-testing panel, and they’ve been very thorough in their research.
- Quick & Easy: From start to finish, this bread comes together in about an hour and fifteen minutes. Most of that is hands-off baking time, so you can get the rest of your dinner ready or just enjoy the smell of cinnamon and apples filling your kitchen.
- Simple Ingredients: You probably already have most of these in your pantry. Butter, sugar, flour, eggs, and your favorite baking apples. No weird specialty ingredients or trips to three different stores.
- Perfect for Fall Baking: This is the bread you bring to a potluck, bake for a Sunday morning breakfast, or wrap up as a hostess gift. It screams “autumn” without being fussy.
- Crowd-Pleaser: My kids, who usually pick around fruit in baked goods, actually fight over the end pieces with the most glaze. My husband, who claims he doesn’t have a sweet tooth, ate half a loaf in one sitting. It’s that good.
- Unbelievably Delicious: The texture is the real star here. It’s tender and moist, with pockets of soft, cinnamon-spiced apple that almost melt into the bread. And that maple glaze? It’s not just a drizzle—it’s a generous, crackly layer that makes every bite taste like a bakery treat.
What makes this recipe different from the rest is the technique. By layering the apples and the batter, you get those beautiful ribbons of fruit throughout the loaf instead of just a few sad chunks at the bottom. The maple glaze isn’t an afterthought—it’s brushed on while the bread is still warm, so it seeps into the top and creates that signature fritter-like crust. This is comfort food reimagined: faster than a trip to the bakery, cheaper than a fancy coffee shop pastry, and with the same soul-soothing satisfaction that makes you close your eyes after the first bite.
What Ingredients You Will Need
This recipe uses simple, wholesome ingredients to deliver bold flavor and satisfying texture without the fuss. Most of these are pantry staples, so you can whip this up on a whim when the fall baking mood strikes.
For the Bread:
- Unsalted butter, ½ cup (1 stick), softened – I always use unsalted so I can control the salt level. Let it sit out for 30 minutes before you start.
- Granulated sugar, ⅔ cup – Adds sweetness and helps create that tender crumb.
- Large eggs, 2, room temperature – Room-temperature eggs incorporate more air into the batter, making the bread lighter.
- Vanilla extract, 1½ teaspoons – Pure vanilla is best, but imitation works in a pinch.
- All-purpose flour, 1½ cups – Spoon and level your flour for the most accurate measurement.
- Baking powder, 1½ teaspoons – Make sure it’s fresh—test it by dropping a bit in hot water; if it fizzes, it’s good.
- Salt, ½ teaspoon – Balances the sweetness and enhances the apple flavor.
- Milk, ½ cup – Whole milk gives the richest texture, but 2% works fine too.
For the Apple Filling:
- Apples, 2 medium, peeled and diced into ½-inch cubes – I recommend Honeycrisp, Granny Smith, or Braeburn. You want an apple that holds its shape during baking but softens nicely. Gala and Fuji work too, but they’ll be a bit softer.
- Brown sugar, ¼ cup, packed – Adds a deep, molasses-like sweetness that pairs beautifully with the apples.
- Ground cinnamon, 1 teaspoon – The essential fall spice. I buy mine from a local spice shop, but any good-quality cinnamon will do.
- Lemon juice, 1 tablespoon – Prevents the apples from browning and brightens the flavor.
For the Maple Glaze:
- Powdered sugar, 1 cup – Sift it if it’s lumpy for a smoother glaze.
- Pure maple syrup, 2 tablespoons – Please use real maple syrup, not pancake syrup. The flavor is noticeably richer and more complex. I prefer Grade A Dark Amber for a stronger maple taste.
- Milk, 1-2 tablespoons – Start with 1 tablespoon and add more if needed to reach a drizzling consistency.
- Vanilla extract, ½ teaspoon – A little extra vanilla never hurts.
Ingredient Selection Tips: For the best texture, look for firm apples without any soft spots. If you’re using a very tart apple like Granny Smith, you might want to add an extra tablespoon of brown sugar to the filling. I personally prefer using organic apples since you’re eating the peel in some variations, but conventional apples work perfectly fine after a good wash.
Equipment Needed
You don’t need a fancy bakery setup to make this Maple Glazed Apple Fritter Bread. Here’s what you’ll need:
- 9×5-inch loaf pan – A metal or glass pan works best. Dark metal pans will brown the crust faster, so keep an eye on it. I’ve used both, and I slightly prefer glass because I can see the browning on the sides.
- Parchment paper – This is non-negotiable for easy removal. Cut a strip long enough to hang over the two long sides of the pan.
- Large mixing bowls (2) – One for the dry ingredients, one for the wet ingredients.
- Whisk and rubber spatula – A whisk for the dry ingredients and a spatula for folding everything together.
- Electric hand mixer or stand mixer – You can cream the butter and sugar by hand if you have strong arms, but a mixer makes it much easier and faster.
- Sharp knife and cutting board – For dicing the apples. A vegetable peeler helps too.
- Small saucepan or microwave-safe bowl – For making the glaze. I use a small saucepan because I like to warm the maple syrup slightly to help it mix.
- Cooling rack – Essential for letting the bread cool evenly. If you don’t have one, you can use the rack from your oven, just make sure it’s clean.
Budget-Friendly Tip: If you don’t have a loaf pan, you can use an 8×8 square pan and adjust the baking time by about 10 minutes. The slices will be shorter and wider, but it tastes just as good.
Preparation Method
Let’s get baking. This Maple Glazed Apple Fritter Bread comes together in a few simple steps. Take your time with the apple layer—it’s the heart of this recipe.
Step 1: Prep Your Pan and Apples
Preheat your oven to 350°F (175°C). Line your 9×5-inch loaf pan with parchment paper, leaving a 2-inch overhang on the two long sides. This will make lifting the bread out later a breeze. Lightly grease the parchment with non-stick spray or a little butter.
Peel and dice your apples into ½-inch cubes. You want them small enough to distribute evenly through the batter but big enough to give you a nice chunk in every bite. Toss the diced apples with the brown sugar, cinnamon, and lemon juice in a small bowl. Set them aside while you make the batter. This lets the apples start releasing their juices, which will create little pockets of flavor in the bread.
Step 2: Cream the Butter and Sugar
In a large mixing bowl, beat the softened butter and granulated sugar together until light and fluffy. This takes about 3-4 minutes with an electric mixer on medium speed. You want the mixture to look pale and airy. Scrape down the sides of the bowl halfway through.
Add the eggs one at a time, beating well after each addition. Stir in the vanilla extract. Don’t worry if the mixture looks a little curdled at this point—that’s normal, especially if your eggs were cold. It will come together when you add the flour.
Step 3: Combine the Dry Ingredients
In a separate bowl, whisk together the all-purpose flour, baking powder, and salt. Whisking aerates the flour and ensures the baking powder is evenly distributed. No one wants a pocket of baking powder in their slice.
Step 4: Alternate Adding Dry Ingredients and Milk
With the mixer on low speed, add about a third of the flour mixture to the butter mixture, mixing just until combined. Then add half of the milk, mixing again. Repeat with another third of the flour, the remaining milk, and finally the last of the flour. Mix just until you no longer see streaks of flour. Overmixing at this stage will make your bread tough, so stop as soon as it comes together.
Step 5: Layer the Batter and Apples
Here’s where the magic happens. Pour half of the batter into your prepared loaf pan and spread it into an even layer. It will be thick, so use your spatula to coax it into the corners. Sprinkle half of the cinnamon-sugar apple mixture evenly over the batter. Drop the remaining batter in spoonfuls over the apples, then gently spread it to cover them as best you can. It’s okay if some apples peek through—they’ll caramelize on top. Finish by scattering the remaining apples over the top of the batter.
Take a butter knife and gently swirl it through the batter a few times. This creates those beautiful ribbons of apple throughout the loaf. Don’t over-swirl or you’ll lose the distinct layers.
Step 6: Bake
Bake for 50-60 minutes, or until a toothpick inserted into the center comes out clean or with just a few moist crumbs. If the top is browning too quickly (around the 40-minute mark), tent the pan loosely with aluminum foil. My oven runs a little hot, so I usually start checking at 50 minutes.
The bread should be golden brown, and your kitchen will smell like a fall candle factory. Let the bread cool in the pan for 15 minutes. This is important—if you try to remove it too soon, it might fall apart. After 15 minutes, use the parchment paper to lift the bread out of the pan and transfer it to a cooling rack.
Step 7: Make the Maple Glaze
While the bread is still warm (but not hot), make the glaze. In a small bowl, whisk together the powdered sugar, maple syrup, vanilla extract, and 1 tablespoon of milk. If the glaze is too thick, add another tablespoon of milk. You want it to be thick but pourable—think the consistency of honey.
Place the cooling rack over a sheet of parchment paper or a baking sheet to catch the drips. Drizzle the glaze generously over the warm bread. Let it set for about 10 minutes before slicing. The glaze will harden slightly, creating that signature fritter-like crust.
Cooking Tips & Techniques
I’ve made this Maple Glazed Apple Fritter Bread enough times to learn a few things the hard way. Here are my best tips for success.
Don’t Overmix the Batter. I cannot stress this enough. Mix just until the flour disappears. Overmixing develops the gluten, which will make your bread tough and dense instead of tender and fluffy. I once got distracted by a phone call and kept mixing—the result was a bread that could have doubled as a doorstop.
Use Room Temperature Ingredients. Cold eggs and cold milk won’t cream properly with the butter, and you’ll end up with a lumpy batter. Take your eggs and milk out of the fridge 30 minutes before you start baking. If you forget, place the eggs in a bowl of warm water for 5 minutes and microwave the milk for 10 seconds.
Choose the Right Apple. This is a big one. You want an apple that holds its shape during baking but softens enough to be tender. Granny Smith is my top pick because its tartness balances the sweet maple glaze. Honeycrisp is a close second. Avoid Red Delicious—they turn into mush and don’t have much flavor.
Check for Doneness Properly. Insert your toothpick into the center of the bread, not near the edge. If it comes out with wet batter, it needs more time. If it comes out with a few moist crumbs, it’s perfect. If it comes out completely dry, you’ve overbaked it slightly. Every oven is different, so start checking at the 50-minute mark.
Glaze While Warm. This is the secret to that crackly fritter top. If you wait until the bread is completely cool, the glaze will just sit on top and not soak in. If the bread is too hot, the glaze will melt and run off completely. The sweet spot is about 15-20 minutes after it comes out of the oven—warm to the touch but not hot.
Variations & Adaptations
One of the best things about this Maple Glazed Apple Fritter Bread is how adaptable it is. Here are a few ways to make it your own.
Gluten-Free Version: Substitute the all-purpose flour with a 1:1 gluten-free baking flour blend. I’ve used Bob’s Red Mill with great success. Add an extra tablespoon of milk to the batter since gluten-free flours tend to absorb more moisture. The texture will be slightly more crumbly, but the flavor is still fantastic.
Dairy-Free Adaptation: Use vegan butter or coconut oil in place of the butter, and swap the milk for oat milk or almond milk. For the glaze, use a dairy-free milk alternative. Coconut milk adds a nice richness. I made this version for a friend with a dairy allergy, and she said it was the best thing she’d eaten all fall.
Spiced-Up Version: Add ½ teaspoon of ground nutmeg and ¼ teaspoon of ground ginger to the apple filling for a warmer, more complex spice profile. You can also add a pinch of cardamom, which pairs beautifully with the maple glaze.
Nutty Addition: Fold ½ cup of chopped pecans or walnuts into the batter along with the apples. Toast them first for extra flavor. The crunch adds a lovely contrast to the soft bread and tender apples.
Caramel Apple Twist: Instead of the maple glaze, make a quick caramel sauce by melting ¼ cup of butter with ½ cup of brown sugar and 2 tablespoons of cream. Drizzle it over the warm bread. It’s a little more indulgent, but sometimes that’s exactly what you need.
I once tried a version with pears instead of apples when I had a surplus from my neighbor’s tree. It was surprisingly good—the pears were softer, so the texture was a bit different, but the maple glaze worked beautifully with them. Don’t be afraid to experiment with what you have on hand.
Serving & Storage Suggestions
This Maple Glazed Apple Fritter Bread is best served slightly warm, when the glaze is still a little soft and the apple chunks are tender. Here’s how to make the most of it.
Serving Temperature: I love it warm from the oven, but it’s also delicious at room temperature. If you’re serving it the next day, pop individual slices in the microwave for 10-15 seconds to soften the glaze and warm the apples.
Presentation Ideas: For a pretty presentation, dust the top with a little extra cinnamon before serving. You can also drizzle a little extra maple syrup over each slice. Serve it on a wooden board with a few apple slices and a cup of hot coffee or spiced tea.
Complementary Dishes: This bread is wonderful on its own, but it also pairs beautifully with a scoop of vanilla ice cream or a dollop of whipped cream. For a fall brunch, serve it alongside a pumpkin spice latte or a mug of hot apple cider.
Storage Instructions: Store the bread in an airtight container at room temperature for up to 3 days. The glaze may soften over time, but the flavor will still be great. If you live in a humid climate, the glaze might get sticky—that’s normal.
Freezer Tips: This bread freezes beautifully. Wrap the cooled, unglazed loaf tightly in plastic wrap, then in a layer of aluminum foil. Freeze for up to 3 months. When you’re ready to serve, thaw it overnight in the refrigerator, then warm it in a 300°F oven for 10 minutes before glazing. I always bake an extra loaf to freeze for Thanksgiving weekend.
How Flavors Develop: Honestly, this bread is even better on the second day. The flavors meld together, and the apples have a chance to soften further. The glaze might not be as crackly, but the taste is deeper and more complex. If you can resist eating it all on day one, you’re in for a treat on day two.
Nutritional Information & Benefits
Let’s be real—this is a treat. But there are a few redeeming qualities hidden in that delicious maple glaze.
Estimated Nutritional Values (per slice, based on 10 slices):
- Calories: 290
- Total Fat: 12g
- Saturated Fat: 7g
- Cholesterol: 65mg
- Sodium: 210mg
- Total Carbohydrates: 44g
- Dietary Fiber: 2g
- Sugars: 28g
- Protein: 4g
Health Benefits of Key Ingredients: Apples are a good source of fiber and vitamin C, especially if you leave the peel on (try it in the variation above). Cinnamon has anti-inflammatory properties and can help regulate blood sugar. Maple syrup contains antioxidants and minerals like zinc and manganese.
Dietary Considerations: This recipe contains gluten, dairy, and eggs. For a gluten-free version, see the variations section. For a dairy-free version, use plant-based alternatives. It is not suitable for a vegan diet as written, but you could experiment with flax eggs and vegan butter.
My Personal Perspective: I believe in balance. This bread is a celebration of fall flavors, and I don’t think you need to apologize for enjoying a slice (or two). Pair it with a protein-rich breakfast or a salad for lunch, and you’ve got a well-rounded day. Life is too short to skip the maple glaze.
Conclusion
This Maple Glazed Apple Fritter Bread is the recipe that made me eat my words about apple bread. It’s tender, it’s packed with real apple chunks, and that maple glaze is everything you want it to be—sweet, slightly woodsy, and just a little bit crackly. It captures the spirit of a classic apple fritter without the mess of deep frying, and it comes together with ingredients you probably already have in your kitchen.
I love that this bread feels special enough for a holiday brunch but simple enough for a random Tuesday baking project. It’s the kind of recipe that makes your house smell amazing and your family gather in the kitchen asking, “Is it ready yet?” I’ve made it for fall potlucks, for lazy Sunday mornings, and for no reason at all except that I wanted a slice of something warm and comforting.
Now I want to hear from you. Have you tried this Maple Glazed Apple Fritter Bread? Did you make any substitutions or add your own twist? Drop a comment below and let me know how it turned out. And if you loved it as much as I do, share this recipe with a friend who needs a little fall baking in their life. Happy baking, friends—your kitchen is about to smell incredible.
Frequently Asked Questions
Can I use a different type of apple for this bread?
Absolutely. Granny Smith, Honeycrisp, and Braeburn are my top picks because they hold their shape well and offer a nice balance of sweet and tart. You can use Gala or Fuji, but they’ll be softer. Avoid Red Delicious, which tends to turn mushy.
Can I make this bread without the maple glaze?
You can, but you’ll be missing out on the best part! The maple glaze is what gives this bread its signature fritter-like crust and deep flavor. If you need a dairy-free option, use a plant-based milk in the glaze. If you’re out of maple syrup, you can substitute with honey, though the flavor will be different.
How do I know when the bread is done baking?
Insert a toothpick into the center of the bread. If it comes out clean or with just a few moist crumbs, it’s done. If it comes out with wet batter, bake for another 5-10 minutes. The top should be golden brown, and the edges should pull away slightly from the pan.
Can I freeze this bread?
Yes, and it freezes beautifully. Wrap the cooled, unglazed loaf tightly in plastic wrap and then in aluminum foil. Freeze for up to 3 months. When you’re ready to serve, thaw overnight in the refrigerator, warm in a 300°F oven for 10 minutes, then glaze while still warm.
Why did my bread turn out dense and heavy?
This usually happens from overmixing the batter. Mix just until the flour disappears—no more. Another culprit could be using cold ingredients. Make sure your butter, eggs, and milk are at room temperature before you start. Finally, check that your baking powder is fresh; old baking powder won’t give the bread enough lift.
Pin This Recipe!
Easy Maple Glazed Apple Fritter Bread Recipe for Fall
This Maple Glazed Apple Fritter Bread captures everything you love about a classic apple fritter—the tender, almost-fried texture, pockets of soft fruit, and a signature crackly glaze—all in a simple loaf you can bake at home without a deep fryer. The maple glaze adds a deep, woodsy sweetness that pairs perfectly with tart apples.
- Prep Time: 15 minutes
- Cook Time: 55 minutes
- Total Time: 1 hour 15 minutes
- Yield: 10 servings 1x
- Category: Dessert
- Cuisine: American
Ingredients
- For the Bread:
- ½ cup (1 stick) unsalted butter, softened
- ⅔ cup granulated sugar
- 2 large eggs, room temperature
- 1½ teaspoons vanilla extract
- 1½ cups all-purpose flour
- 1½ teaspoons baking powder
- ½ teaspoon salt
- ½ cup milk (whole or 2%)
- For the Apple Filling:
- 2 medium apples (Honeycrisp, Granny Smith, or Braeburn), peeled and diced into ½-inch cubes
- ¼ cup packed brown sugar
- 1 teaspoon ground cinnamon
- 1 tablespoon lemon juice
- For the Maple Glaze:
- 1 cup powdered sugar, sifted if lumpy
- 2 tablespoons pure maple syrup (Grade A Dark Amber preferred)
- 1–2 tablespoons milk
- ½ teaspoon vanilla extract
Instructions
- Preheat oven to 350°F (175°C). Line a 9×5-inch loaf pan with parchment paper, leaving a 2-inch overhang on the two long sides. Lightly grease the parchment.
- Peel and dice apples into ½-inch cubes. Toss with brown sugar, cinnamon, and lemon juice in a small bowl. Set aside.
- In a large mixing bowl, beat softened butter and granulated sugar together until light and fluffy, about 3-4 minutes. Add eggs one at a time, beating well after each. Stir in vanilla extract.
- In a separate bowl, whisk together flour, baking powder, and salt.
- With mixer on low, add about one-third of the flour mixture to the butter mixture, mixing just until combined. Add half the milk, mixing again. Repeat with another third of flour, remaining milk, and final third of flour. Mix just until no streaks of flour remain.
- Pour half the batter into the prepared loaf pan and spread evenly. Sprinkle half the apple mixture over the batter. Drop remaining batter in spoonfuls over apples, then gently spread to cover. Top with remaining apples. Gently swirl a butter knife through the batter a few times.
- Bake for 50-60 minutes, until a toothpick inserted in the center comes out clean or with a few moist crumbs. If top browns too quickly, tent with foil at 40 minutes. Cool in pan for 15 minutes, then lift out using parchment and transfer to a cooling rack.
- While bread is still warm, make the glaze: whisk together powdered sugar, maple syrup, vanilla, and 1 tablespoon milk. Add more milk if needed for a pourable consistency. Drizzle generously over warm bread. Let set for 10 minutes before slicing.
Notes
Don’t overmix the batter—mix just until flour disappears. Use room temperature ingredients for best results. Choose apples that hold their shape like Granny Smith or Honeycrisp. Glaze while bread is warm (not hot) for that crackly fritter top. Bread is even better on the second day as flavors meld.
Nutrition
- Serving Size: 1 slice
- Calories: 290
- Sugar: 28
- Sodium: 210
- Fat: 12
- Saturated Fat: 7
- Carbohydrates: 44
- Fiber: 2
- Protein: 4
Keywords: apple fritter bread, maple glaze, fall baking, apple bread, easy apple recipe, quick bread, cinnamon apple bread