This was supposed to be a layered chocolate mousse cake. I had the heavy cream chilling, the good chocolate chopped, and a whole afternoon set aside to temper eggs and fold everything just so. But the power flickered around 2 PM — just long enough for my electric mixer to become a very expensive paperweight, and for me to stand in my kitchen holding a whisk and feeling sorry for myself. I was already committed to bringing dessert to a dinner party that night, and the store-bought option felt like surrender. So I grabbed a box of graham crackers I’d bought for some other abandoned plan, a bag of marshmallows that were probably for hot chocolate, and the chocolate I’d already chopped. I layered them in a loaf pan with what cold cream I could still whip by hand, stuck the whole thing in the fridge, and crossed my fingers. Honestly, I didn’t even taste it before I left. I just wrapped it up and hoped nobody would notice it wasn’t what I’d promised. You know that feeling when you bring a dish to a gathering and you’re already apologizing for it before anyone takes a bite? That was me. But then people started asking for the recipe, and I had to admit — I didn’t really have one. This no-bake s’mores icebox cake was born from a happy kitchen failure, and it’s been my go-to ever since. It’s lighter than you’d expect from something with “s’mores” in the name, and it comes together with zero oven time and zero stress. Maybe you’ve been there — a plan that falls apart and something better takes its place.
Why You’ll Love This Recipe
Let me tell you why this particular no-bake s’mores icebox cake has earned a permanent spot in my dessert rotation. I’ve tested it at least a dozen times — for birthdays, potlucks, and those nights when you just need a cold, creamy spoonful of something good.
- No Oven Required: In the middle of summer, or when your oven is otherwise occupied, this is your dessert hero. No baking, no sweating, no problem.
- Simple Ingredients: You probably have most of these in your pantry right now. Graham crackers, marshmallows, chocolate — that’s the backbone. No fancy grocery store runs needed.
- Make-Ahead Magic: This cake actually gets better after a day in the fridge. The layers soften and meld together into something that tastes like you worked much harder than you did.
- Crowd-Pleaser: I’ve served this to kids, adults, and that one friend who claims they don’t like sweets. It disappears every single time.
- Light & Creamy: Unlike some icebox cakes that can feel heavy, this version uses a whipped cream and marshmallow base that stays airy. You can have a slice and not feel like you need a nap afterward.
What makes this recipe different from the countless other s’mores desserts out there? It’s the texture. The graham crackers soften into a cake-like layer, the marshmallows melt into the cream, and the chocolate stays in distinct, rich pockets. I’ve played with the ratios until the balance was just right — not too sweet, not too rich, just perfectly s’mores-y. It’s the kind of dessert that makes you close your eyes after the first bite, honestly. Comfort food reimagined for warm weather and busy schedules.
What Ingredients You Will Need
This recipe uses simple, wholesome ingredients to deliver that classic s’mores flavor without the campfire. Most of these are pantry staples, and I’ve included notes on substitutions where they work well.
- Graham crackers (about 2 full sleeves) — You’ll need the full sheets, not the crumbs. I prefer Honey Maid for their sturdy texture, but any brand works. For a gluten-free option, use gluten-free graham crackers — just check that they’re sturdy enough to hold up.
- Heavy whipping cream (2 cups / 480 ml) — This is the base of our creamy filling. Cold cream whips up much better, so stick it in the fridge for at least 30 minutes before you start. You can substitute with full-fat coconut cream for a dairy-free version, but the texture will be slightly denser.
- Marshmallows (3 cups / about 150g) — Mini marshmallows work best here because they distribute evenly. I’ve used both store-brand and Jet-Puffed, and they both work. For a fun twist, try flavored marshmallows like vanilla bean or toasted coconut.
- Semi-sweet chocolate (8 oz / 225g) — Chopped finely or use chocolate chips. I recommend Ghirardelli or Guittard for a smooth melt. Dark chocolate (60-70%) works beautifully if you want a less sweet result. Milk chocolate makes it sweeter, which some folks prefer.
- Powdered sugar (¼ cup / 30g) — Just a touch to stabilize the whipped cream. You can skip this if you’re watching sugar, but the cream will be less stable.
- Vanilla extract (1 teaspoon) — Pure vanilla makes a difference here. Imitation works in a pinch, but the flavor won’t be as warm and round.
- Salt (a pinch) — Don’t skip this! It balances the sweetness and makes the chocolate pop.
For the topping (optional but recommended):
- Additional graham crackers (crushed, about ½ cup)
- Mini marshmallows (a handful for garnish)
- Chocolate shavings (use a vegetable peeler on your chocolate bar)
I usually grab a few extra graham crackers because I inevitably snack on them while assembling. You’ve been warned.
Equipment Needed
You don’t need much for this no-bake s’mores icebox cake, which is part of its charm. Here’s what you’ll want to have on hand:
- 9×5 inch loaf pan — This is the perfect size for a tall, sliceable cake. You can also use an 8×8 square pan for a shorter, wider dessert. If you only have a round cake pan, that works too — just adjust the layering.
- Electric mixer or whisk — An electric hand mixer makes quick work of whipping the cream. A stand mixer works too. If you’re feeling ambitious, a whisk and some elbow grease will get the job done, but give yourself an extra 5-7 minutes.
- Large mixing bowl — For whipping the cream. Make sure it’s chilled if you’re whipping by hand.
- Small saucepan or microwave-safe bowl — For melting the chocolate. I prefer a double boiler for gentle melting, but the microwave works in a pinch. Just go in 20-second bursts and stir between each.
- Spatula — For spreading the cream mixture evenly. A rubber spatula is ideal.
- Plastic wrap or parchment paper — To line the pan for easy removal. Parchment paper with overhang makes lifting the cake out a breeze.
- Measuring cups and spoons — Standard set for the cream, sugar, and vanilla.
I’ve made this with just a bowl, a whisk, and a loaf pan when I was camping (yes, really). It’s forgiving. Don’t let the equipment list intimidate you.
Preparation Method
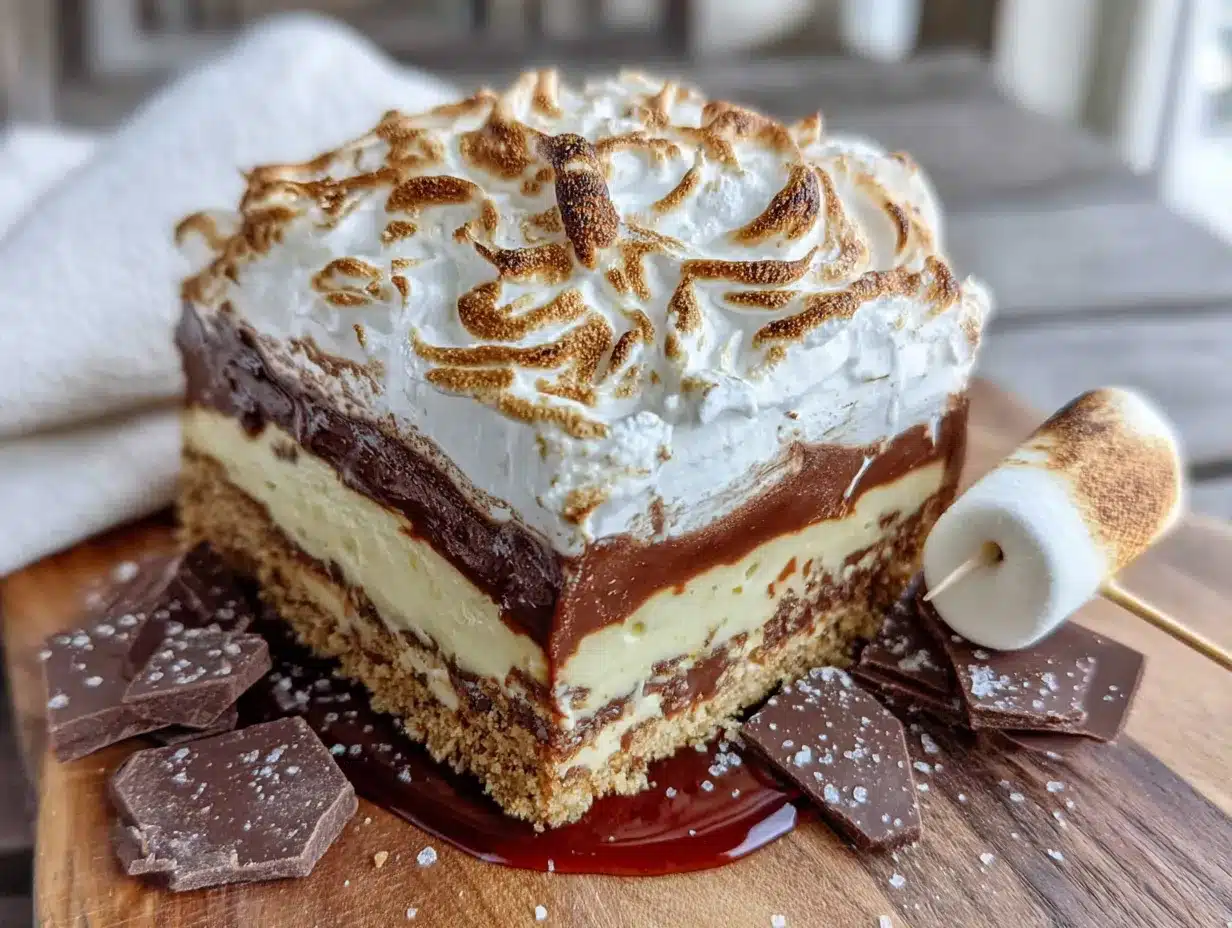
Let’s get to the good part. This no-bake s’mores icebox cake comes together in about 30 minutes of active time, plus at least 6 hours of chilling. The waiting is the hardest part.
- Prepare your pan. Line a 9×5 inch loaf pan with parchment paper, leaving about 2 inches of overhang on the long sides. This will help you lift the cake out later. If you don’t have parchment, plastic wrap works — just press it into the corners.
- Whip the cream. In a large chilled bowl, combine 2 cups of cold heavy whipping cream, ¼ cup powdered sugar, 1 teaspoon vanilla extract, and a pinch of salt. Beat on medium-high speed until soft peaks form — about 3-4 minutes with an electric mixer. You want the cream to hold its shape but still be silky. Stop before it turns into butter. I’ve made that mistake before, and it’s a sad day.
- Fold in the marshmallows. Gently fold 2 cups of the mini marshmallows into the whipped cream using a spatula. Do this slowly and carefully — you want to keep as much air in the cream as possible. The marshmallows will stay mostly whole, which is exactly what we want. Set the remaining 1 cup of marshmallows aside for later.
- Melt the chocolate. Chop 8 oz of semi-sweet chocolate into small pieces. Place in a microwave-safe bowl and heat in 20-second bursts, stirring after each, until smooth. Or use a double boiler if you prefer. Let it cool for 2-3 minutes — you don’t want it hot when it hits the cream, or you’ll get soup.
- Layer the cake. Spread a thin layer of the cream mixture on the bottom of the prepared pan — just enough to coat it. This helps the first layer of graham crackers stick. Arrange a single layer of graham crackers on top, breaking them to fit as needed. I usually need about 4-5 full sheets per layer. Don’t worry if they don’t cover perfectly; gaps are fine.
- Add the chocolate. Drizzle about one-third of the melted chocolate over the graham crackers. Then spread about one-third of the remaining cream mixture on top. Repeat the layers: graham crackers, chocolate, cream. You should get about 3 full layers, ending with cream on top. Reserve a little chocolate for drizzling on the very top.
- Finish with marshmallows. Sprinkle the reserved 1 cup of mini marshmallows over the top layer of cream. Drizzle the remaining melted chocolate over everything. If you want, crush a few extra graham crackers and sprinkle them on top too.
- Chill. Cover the pan with plastic wrap and refrigerate for at least 6 hours, but overnight is better. The graham crackers need time to soften into that cake-like texture. I know it’s tempting to dig in early, but trust me — the magic happens in the fridge.
- Serve. When you’re ready to serve, lift the cake out of the pan using the parchment overhang. Place it on a cutting board, slice with a sharp knife, and enjoy. Wipe the knife clean between slices for neat edges.
One note: The cake will be quite soft after 6 hours. If you want cleaner slices, chill it for a full 24 hours. The texture firms up beautifully.
Cooking Tips & Techniques
I’ve made this no-bake s’mores icebox cake more times than I can count, and I’ve learned a few things along the way. Here are my best tips for getting it right every time.
Chill your bowl and beaters. If you’re whipping cream by hand or with a hand mixer, pop the bowl and beaters in the freezer for 10 minutes before you start. Cold cream whips faster and holds its shape better. I learned this after a particularly frustrating session where my cream refused to stiffen on a hot August afternoon.
Don’t over-whip the cream. Stop when you see soft peaks that hold their shape but still look silky. If you go too far, you’ll end up with butter. And while homemade butter is lovely, it’s not what we’re going for here. The cream should be thick enough to spread but not stiff.
Let the chocolate cool. I know you’re excited, but hot chocolate will melt your cream into a sad puddle. Let it cool for 2-3 minutes after melting. It should still be liquid but not hot to the touch. If it seizes up and gets grainy, you’ve cooled it too much — just reheat gently.
Press the graham crackers gently. When you lay them down, press them lightly into the cream so they stick. But don’t push too hard or you’ll squish the cream out the sides. A gentle pat is all you need.
Be patient with chilling. This is the hardest part, I know. But 6 hours is the minimum. The graham crackers need time to absorb moisture from the cream and soften into a cake-like texture. If you cut into it too early, you’ll have crunchy crackers and runny cream. Give it time.
Use a sharp knife for slicing. A serrated knife works best. Run it under hot water, wipe it dry, then slice. Clean the knife between cuts for those Instagram-worthy slices.
Variations & Adaptations
This no-bake s’mores icebox cake is wonderfully adaptable. Here are some variations I’ve tried and loved.
Peanut Butter S’mores: Swirl ⅓ cup of creamy peanut butter into the whipped cream before layering. The peanut butter adds a savory note that balances the sweetness beautifully. I did this on a whim one night and now it’s my husband’s favorite version.
Berry S’mores: Add a layer of fresh raspberries or sliced strawberries between the graham cracker layers. The tartness cuts through the richness and adds a pop of color. This is especially good in summer when berries are at their peak.
Vegan Version: Use full-fat coconut cream (chilled overnight) instead of heavy cream, dairy-free graham crackers, and vegan chocolate chips. The texture will be slightly different — a bit denser — but it’s still delicious. I’ve served this to vegan friends and they’ve asked for the recipe.
Mint S’mores: Add ½ teaspoon of peppermint extract to the whipped cream. The mint and chocolate combination is classic for a reason. Top with crushed peppermint candies for a holiday twist.
Gluten-Free Option: Use gluten-free graham crackers. Most brands work well, just check that they’re sturdy enough to hold up during chilling. I’ve used Schar brand with good results.
Individual Servings: Instead of a loaf pan, layer everything in small mason jars or glasses. This is perfect for parties or portion control. You’ll need about 6-8 jars depending on size.
Feel free to mix and match these ideas. The base recipe is so forgiving that you can really make it your own.
Serving & Storage Suggestions
This no-bake s’mores icebox cake is best served cold, straight from the fridge. The texture is at its peak when the graham crackers have softened but the cream is still firm.
Serving: Slice the cake with a sharp knife, wiping it clean between cuts. Serve on plates with a little extra chocolate drizzle or a sprinkle of flaky sea salt if you’re feeling fancy. A dollop of whipped cream on top never hurts. The cake serves about 8-10 people, depending on how generous you are with slices.
Pairings: This dessert pairs beautifully with a cup of strong coffee or a cold glass of milk. For a grown-up twist, try it with a dark stout beer or a bourbon-spiked hot chocolate. The richness of the cake stands up well to bold flavors.
Storage: The cake keeps well in the refrigerator for up to 4 days. Cover it tightly with plastic wrap to prevent it from absorbing other odors. The texture will continue to soften over time, so day 2 is actually my favorite — the layers have fully melded together.
Freezing: You can freeze this cake for up to 2 months. Wrap it tightly in plastic wrap and then foil. Thaw in the refrigerator overnight before serving. The texture will be slightly softer after freezing, but it’s still delicious.
Reheating: This is a cold dessert, so no reheating needed. But if you want a warm s’mores experience, microwave individual slices for 10-15 seconds. The marshmallows get gooey and the chocolate softens. It’s a different experience, but a good one.
One thing I’ve noticed: the flavors really develop after a day in the fridge. The chocolate and marshmallow meld together, and the graham crackers become almost cake-like. If you can plan ahead, make this a day before you need it.
Nutritional Information & Benefits
Let’s be real — this is a dessert, and it’s meant to be enjoyed. But I’ve made some choices that keep it on the lighter side compared to traditional icebox cakes.
Estimated nutrition per serving (based on 10 servings):
- Calories: 320
- Fat: 22g
- Saturated Fat: 13g
- Carbohydrates: 30g
- Sugar: 18g
- Protein: 4g
- Fiber: 2g
- Sodium: 180mg
Health highlights: The heavy cream provides calcium and vitamin A, while the dark chocolate offers antioxidants and a small amount of iron. The graham crackers add a bit of whole grain fiber. It’s not a health food, but it’s a dessert you can feel good about serving.
Dietary considerations: This recipe is vegetarian. For gluten-free, vegan, or dairy-free options, see the variations section. The cake contains dairy, gluten, and sugar.
My personal take? This is a dessert for real life. It’s not about deprivation or superfoods. It’s about sharing something delicious with people you love, and that has its own kind of nutritional value.
FAQs
Can I use store-bought whipped topping instead of whipping cream?
Yes, you can substitute 4 cups of thawed whipped topping (like Cool Whip) for the homemade whipped cream. The texture will be slightly different — a bit airier and less rich — but it’s a fine shortcut. Just fold the marshmallows into the whipped topping gently.
Why did my cream turn into butter?
You over-whipped it. It happens to the best of us. If you’re using an electric mixer, watch closely and stop as soon as you see soft peaks. If you do accidentally make butter, don’t throw it away — you’ve got homemade butter! Just start over with fresh cream for the cake.
Can I use milk chocolate instead of semi-sweet?
Absolutely. The cake will be sweeter and milder in chocolate flavor. I recommend using a good quality milk chocolate, like Ghirardelli or Lindt, for the best texture. Avoid chocolate chips that contain stabilizers, as they don’t melt as smoothly.
How do I get clean slices?
Use a sharp serrated knife and run it under hot water before each cut. Wipe the blade dry, slice, then repeat. Chilling the cake for a full 24 hours also helps the layers hold together better. Patience is key here.
Can I make this in a different pan?
Yes! An 8×8 square pan works well for a shorter, wider cake. A 9-inch round cake pan gives you a round cake. Just adjust the layering to fit your pan size. The chilling time remains the same.
Conclusion
This no-bake s’mores icebox cake is proof that the best recipes often come from happy accidents. It’s simple enough for a weekday treat but impressive enough for a dinner party. The layers of creamy marshmallow, rich chocolate, and softened graham crackers come together in a way that feels both nostalgic and new.
I love this recipe because it reminds me that you don’t need a perfect plan to create something wonderful. Sometimes you just need a little improvisation, a few pantry staples, and the willingness to try something different. Whether you’re making it for a summer barbecue, a holiday gathering, or just because you deserve a cold, creamy slice of happiness, this cake delivers.
I’d love to hear how yours turns out. Did you try a variation? Did you add something unexpected that worked? Drop a comment below and share your version. And if you loved it, share it with a friend who needs a no-fuss dessert in their life. Happy no-baking!
Pin This Recipe!
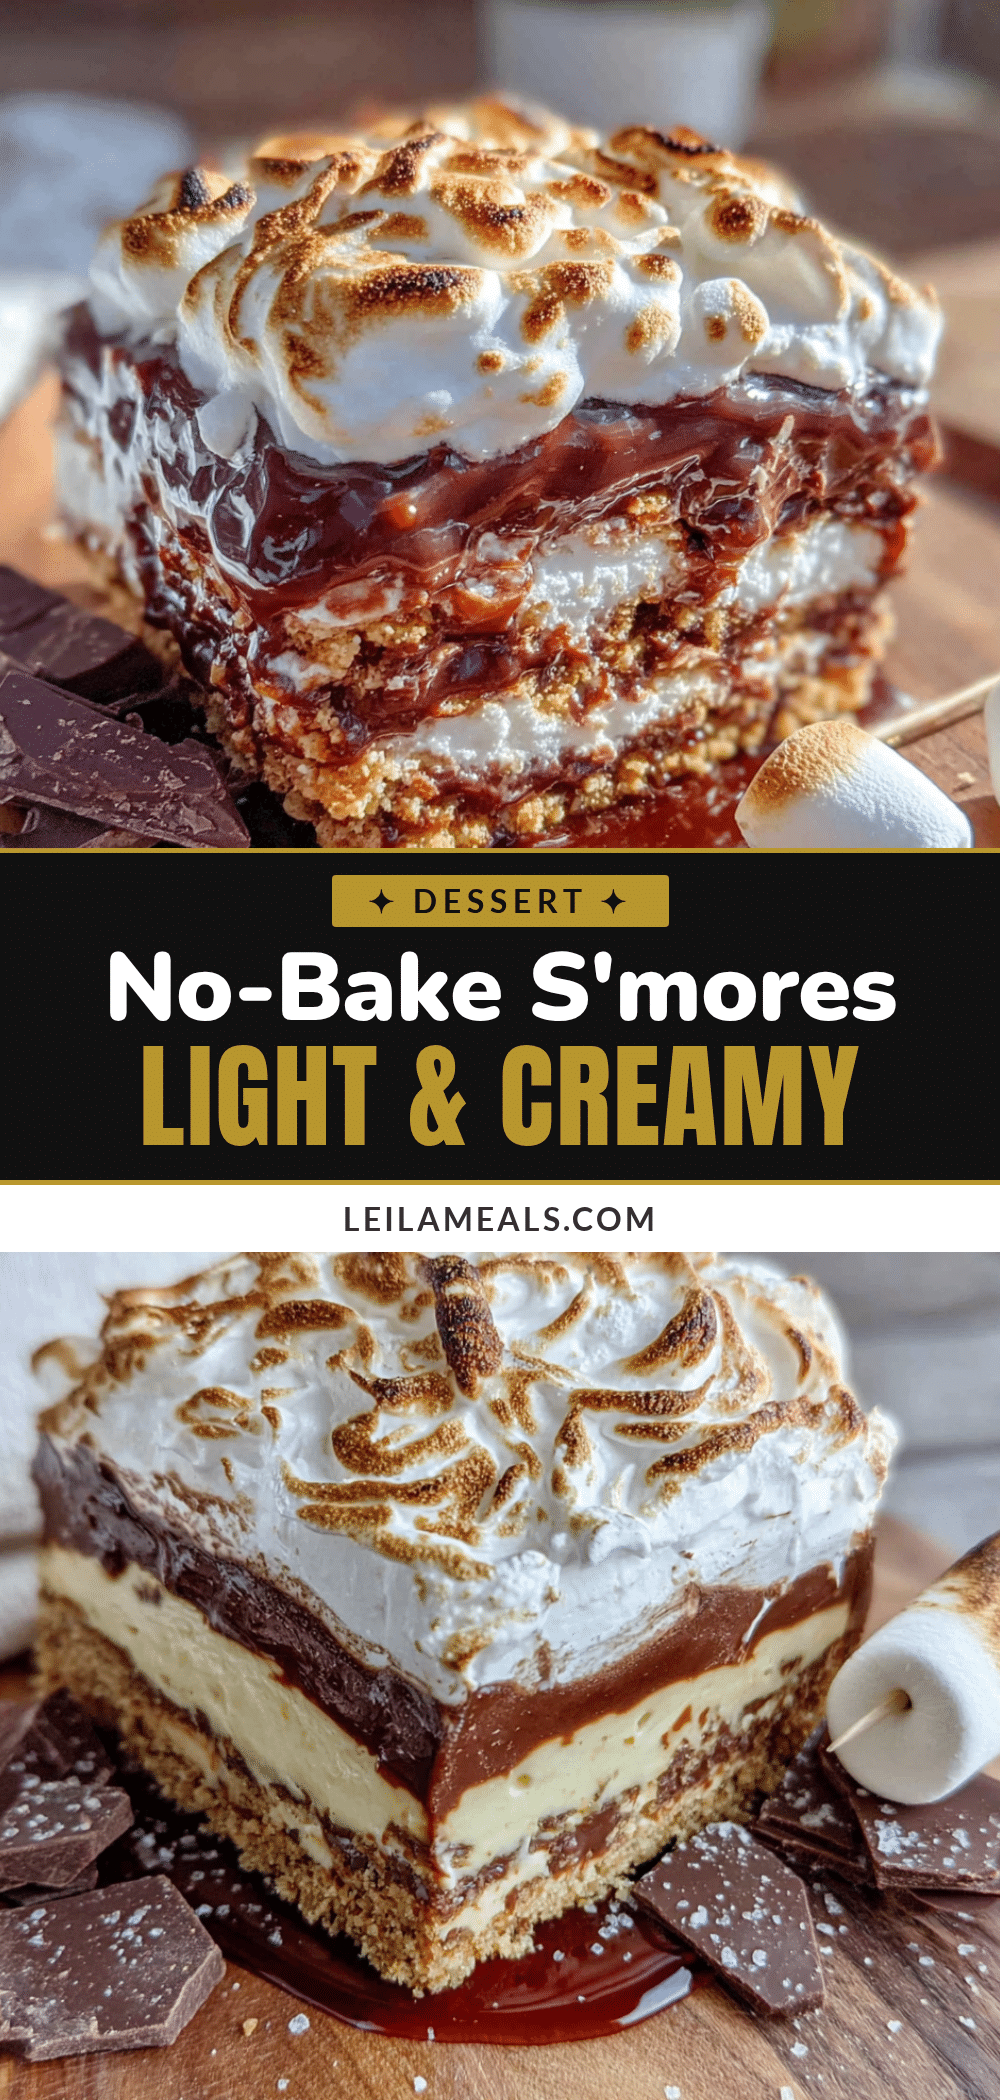
No-Bake S’mores Icebox Cake – Easy Creamy Dessert
A no-bake s’mores icebox cake made with layers of graham crackers, whipped cream, marshmallows, and chocolate. This easy, make-ahead dessert is perfect for summer and requires no oven time.
- Prep Time: 30 minutes
- Cook Time: 0 minutes
- Total Time: 6 hours 30 minutes (includes chilling)
- Yield: 8-10 servings
- Category: Dessert
- Cuisine: American
Ingredients
- Graham crackers (about 2 full sleeves)
- Heavy whipping cream (2 cups / 480 ml)
- Marshmallows (3 cups / about 150g), mini
- Semi-sweet chocolate (8 oz / 225g), chopped
- Powdered sugar (¼ cup / 30g)
- Vanilla extract (1 teaspoon)
- Salt (a pinch)
- Additional graham crackers (crushed, about ½ cup) for topping (optional)
- Mini marshmallows (a handful) for garnish (optional)
- Chocolate shavings for garnish (optional)
Instructions
- Line a 9×5 inch loaf pan with parchment paper, leaving about 2 inches of overhang on the long sides.
- In a large chilled bowl, combine 2 cups of cold heavy whipping cream, ¼ cup powdered sugar, 1 teaspoon vanilla extract, and a pinch of salt. Beat on medium-high speed until soft peaks form, about 3-4 minutes.
- Gently fold 2 cups of the mini marshmallows into the whipped cream using a spatula. Set the remaining 1 cup of marshmallows aside.
- Chop 8 oz of semi-sweet chocolate into small pieces. Melt in a microwave-safe bowl in 20-second bursts, stirring after each, until smooth. Let cool for 2-3 minutes.
- Spread a thin layer of the cream mixture on the bottom of the prepared pan. Arrange a single layer of graham crackers on top, breaking to fit as needed.
- Drizzle about one-third of the melted chocolate over the graham crackers. Then spread about one-third of the remaining cream mixture on top.
- Repeat the layers: graham crackers, chocolate, cream. You should get about 3 full layers, ending with cream on top. Reserve a little chocolate for drizzling on the very top.
- Sprinkle the reserved 1 cup of mini marshmallows over the top layer of cream. Drizzle the remaining melted chocolate over everything. Optionally, sprinkle crushed graham crackers on top.
- Cover the pan with plastic wrap and refrigerate for at least 6 hours, but overnight is better.
- When ready to serve, lift the cake out of the pan using the parchment overhang. Place on a cutting board, slice with a sharp knife, and serve.
Notes
The cake will be quite soft after 6 hours. For cleaner slices, chill it for a full 24 hours. The texture firms up beautifully. You can substitute store-bought whipped topping (4 cups thawed) for the homemade whipped cream. For a gluten-free option, use gluten-free graham crackers. For a dairy-free version, use full-fat coconut cream.
Nutrition
- Serving Size: 1 slice (based on 10
- Calories: 320
- Sugar: 18
- Sodium: 180
- Fat: 22
- Saturated Fat: 13
- Carbohydrates: 30
- Fiber: 2
- Protein: 4
Keywords: no-bake s'mores icebox cake, easy dessert, no oven dessert, s'mores cake, icebox cake, summer dessert, make-ahead dessert


