“So, is it actually crispy?” my brother-in-law asked, eyeing the baking sheet like I was trying to pull a fast one on him. He had every right to be skeptical—we’d both been burned before by baked chicken recipes that promised crunch but delivered sad, soggy disappointment. I just shrugged and said, “Give it ten minutes.”
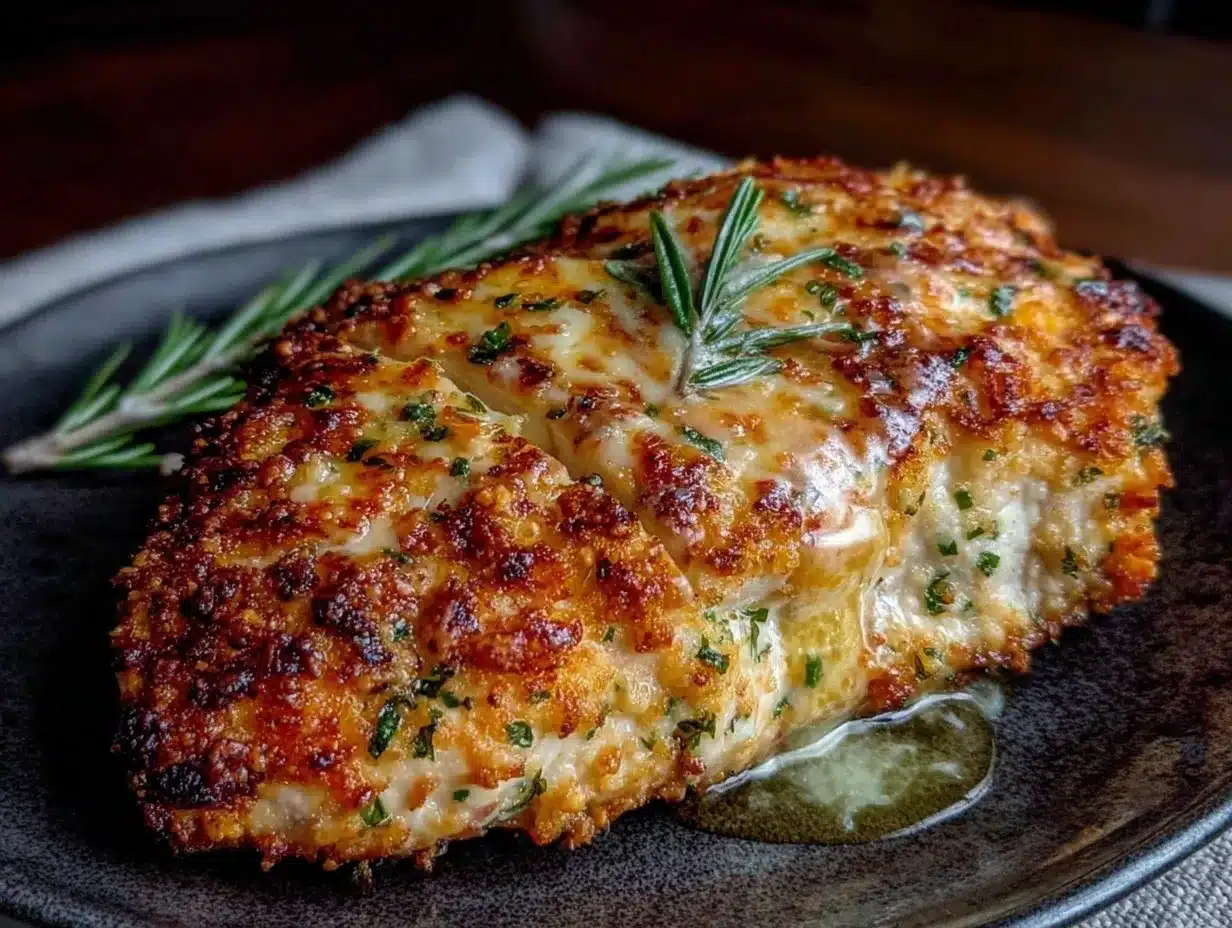
He took a bite. Then another. And then he asked for the recipe before he even finished chewing. That moment is exactly why I’m writing this post today. This crispy baked parmesan crusted chicken breast isn’t just another weeknight dinner—it’s the one that finally delivers on the promise of a crunchy, golden crust without needing a deep fryer or a vat of oil.
I spent way too many nights convinced that baking chicken meant sacrificing texture. You know the drill—you bread it, you bake it, and somehow the coating ends up tasting more like damp sand than anything worth eating. But after some serious trial and error (and a few batches I’d rather forget), I figured out the secret. It’s not complicated, honestly. It just takes a few smart tricks and a little patience. And now? This is the only chicken recipe my family actually requests by name.
Why You’ll Love This Recipe
Let me tell you why this one’s different. I’ve tested this method more times than I can count, tweaking temperatures, coatings, and timing until everything clicked. Here is what makes it stand out:
- Actually Crispy : The coating stays crunchy from the first bite to the last—no sogginess, no disappointment. The secret is a combo of panko and parmesan that bakes up like a dream.
- Simple Pantry Ingredients : You probably already have everything you need. No weird specialty items or expensive cuts of meat.
- Family Favorite : Kids love it, adults love it, and even picky eaters clean their plates. I’ve served it to guests who asked for seconds before I sat down.
- Ready in Under 30 Minutes : Perfect for busy weeknights when you need something fast but still want it to feel special.
- Healthier Than Fried : All the crunch of fried chicken without the oil bath. You get that satisfying texture without the guilt.
What really sets this apart is the crust itself. Most recipes use just breadcrumbs, but I mix in finely grated parmesan and a touch of garlic powder. The cheese melts and crisps up into this golden, savory shell that’s impossibly good. It’s the kind of meal that makes you close your eyes after that first bite—and honestly, that’s the whole point.
What Ingredients You Will Need
This recipe uses simple, everyday ingredients to create something genuinely special. The magic is in how they work together, not in complicated shopping lists. Here is what you will need:
For the Chicken
- 4 boneless, skinless chicken breasts (about 6 ounces each; look for even thickness so they cook uniformly)
- 1 teaspoon salt (I use kosher salt for better flavor distribution)
- ½ teaspoon black pepper (freshly ground if you have it)
- ½ teaspoon garlic powder (adds depth without being overpowering)
- ½ teaspoon onion powder (optional but recommended)
For the Coating
- 1 cup panko breadcrumbs (these are non-negotiable for crunch; regular breadcrumbs won’t give you the same texture)
- ½ cup finely grated parmesan cheese (the kind in the green can works fine, but freshly grated is even better)
- 1 teaspoon dried Italian seasoning (or a mix of oregano, basil, and thyme)
- ½ teaspoon smoked paprika (adds color and a subtle smokiness)
- ¼ teaspoon cayenne pepper (optional, for a little heat)
For the Binding
- ¼ cup mayonnaise (trust me on this—it keeps the chicken moist and helps the coating stick better than egg wash)
- 2 tablespoons Dijon mustard (adds tang and helps the coating adhere)
- 1 tablespoon olive oil (for drizzling on top before baking)
- Fresh parsley (for garnish, optional but pretty)
One thing I learned the hard way: don’t skip the mayonnaise mixture. At first, I thought it sounded weird, but it’s the secret to keeping the chicken tender while the crust gets crazy crispy. If you’re dairy-free, use a vegan parmesan alternative and it still works beautifully.
Equipment Needed
You don’t need a fancy kitchen for this one. Here is what you will need:
- Baking sheet (a rimmed half-sheet pan works best)
- Wire rack (this is key for air circulation—it prevents the bottom from getting soggy)
- Three shallow bowls (for the coating station)
- Tongs (for handling the chicken without making a mess)
- Meat thermometer (I cannot stress this enough—it saves you from overcooked chicken)
- Chef’s knife and cutting board (for prepping the chicken)
- Parchment paper or aluminum foil (for easy cleanup)
If you don’t have a wire rack, you can place the chicken directly on a parchment-lined baking sheet. Just flip them halfway through cooking so the bottom gets some direct heat. It’s not quite as crispy on the bottom, but it still works in a pinch.
Preparation Method
- Preheat your oven to 425°F (220°C). Place a wire rack inside a rimmed baking sheet and spray it lightly with cooking spray. This prevents sticking and lets hot air circulate around the chicken.
- Prep the chicken. Place each chicken breast between two pieces of plastic wrap or parchment paper. Use a rolling pin or the flat side of a meat mallet to gently pound them to an even thickness—about ½ inch thick. This ensures they cook evenly and stay juicy. Season both sides with salt, pepper, garlic powder, and onion powder.
- Set up your coating station. In a shallow bowl, mix together the panko breadcrumbs, grated parmesan, Italian seasoning, smoked paprika, and cayenne if using. In a second small bowl, whisk together the mayonnaise and Dijon mustard until smooth.
- Coat the chicken. Using a brush or your fingers (I use a silicone brush for less mess), spread a thin, even layer of the mayonnaise mixture over each chicken breast. Don’t go overboard—you want just enough to help the coating stick. Then press each breast into the panko-parmesan mixture, coating both sides evenly. Shake off any excess.
- Arrange on the rack. Place the coated chicken breasts on the prepared wire rack, leaving a little space between each piece for air to circulate. Drizzle a tiny bit of olive oil over the top of each breast—this helps the crust brown beautifully.
- Bake for 18-22 minutes. The exact time depends on the thickness of your chicken. At 20 minutes, I start checking with my meat thermometer. You are looking for an internal temperature of 165°F (74°C) in the thickest part. The crust should be deep golden brown and feel firm to the touch.
- Rest before serving. Let the chicken rest on the rack for 5 minutes. This is important—it lets the juices redistribute so the meat stays moist. If you cut into it right away, all those good juices will run out onto the plate.
One thing I always tell people: don’t crowd the pan. If you try to bake six chicken breasts on one rack, they’ll steam instead of crisp. Use two pans if you need to, or work in batches. Trust me, it makes a difference.
Cooking Tips & Techniques
After making this recipe more times than I can count, here are the tricks I wish someone had told me from the start:
Pound the chicken evenly. This is probably the most important step. If your chicken is thicker in the middle and thin at the edges, the thin parts will dry out before the middle is cooked through. A uniform thickness means everything finishes at the same time.
Use panko, not regular breadcrumbs. Regular breadcrumbs are too fine and dense—they absorb moisture and turn soft. Panko is flaky and light, which means it stays crunchy even after baking. I’ve tried both, and panko wins every single time.
Don’t skip the wire rack. I made this recipe on a bare baking sheet once, and the bottom of the chicken turned into a soggy mess. The wire rack lets air flow underneath, so the coating crisps up on all sides. It’s a small thing that makes a huge difference.
Check temperature early. Ovens vary wildly. My old oven ran hot, and I burned a batch before I learned to start checking at 18 minutes. A meat thermometer is your best friend here—it takes the guesswork out completely.
Let it rest. I know it’s tempting to dig in right away, but those five minutes of resting are crucial. The chicken stays hot, the crust stays crispy, and the inside stays juicy. Patience pays off.
One mistake I made early on was using too much mayonnaise mixture. It made the coating slide right off during baking. A thin, even layer is all you need—think of it as glue, not a sauce.
Variations & Adaptations
This recipe is super flexible. Here are some ways to switch it up:
- Spicy Version : Add an extra teaspoon of cayenne pepper to the panko mixture, or drizzle the finished chicken with hot honey. I’ve done this for game day and it disappeared fast.
- Gluten-Free Option : Use gluten-free panko breadcrumbs (they’re available at most grocery stores) and double-check your Dijon mustard label. Everything else is naturally gluten-free.
- Herb-Crusted : Mix in 2 tablespoons of fresh chopped herbs like parsley, thyme, or rosemary with the panko. It adds a fresh, bright flavor that’s perfect for spring.
- Cheese Variation : Swap half the parmesan for finely grated pecorino romano. It’s saltier and sharper, which gives the crust a different kind of savory punch.
- Air Fryer Method : Cook at 375°F (190°C) for 12-15 minutes, flipping halfway through. The air fryer makes the crust even crispier, honestly.
I once tried a version with almond flour instead of panko for a low-carb friend. It worked okay, but the texture wasn’t quite the same—definitely stick with panko if you can.
Serving & Storage Suggestions
This crispy chicken is incredibly versatile. Here are some of my favorite ways to serve it:
- With a side salad : A simple arugula salad with lemon vinaigrette cuts through the richness perfectly.
- Alongside roasted veggies : Try it with the crispy sheet pan lemon herb chicken approach—roast asparagus and potatoes while the chicken bakes for a complete meal.
- Over pasta : Slice the chicken and serve it over creamy vodka sauce rigatoni. Trust me, it’s a match made in heaven. Check out this creamy vodka sauce rigatoni recipe for inspiration.
- On a sandwich : Layer sliced chicken on a toasted brioche bun with lettuce, tomato, and a smear of garlic aioli. It makes an incredible lunch.
- With mashed potatoes : Creamy mashed potatoes and crispy chicken is comfort food at its finest.
Storage: Leftover chicken keeps in an airtight container in the fridge for up to 4 days. The crust will soften a bit, but it’s still delicious.
Reheating: The best way to bring back the crunch is in the oven or air fryer. Pop it in a 375°F (190°C) oven for 5-7 minutes, or in the air fryer at 350°F (175°C) for 3-4 minutes. The microwave works in a pinch, but the crust will be soft.
Freezing: You can freeze the cooked chicken for up to 3 months. Wrap each piece individually in plastic wrap, then place them in a freezer bag. Thaw in the fridge overnight and reheat in the oven.
Nutritional Information & Benefits
Here is the approximate nutritional breakdown for one serving (one chicken breast):
- Calories: 385
- Protein: 42g
- Fat: 18g
- Carbohydrates: 14g
- Fiber: 1g
- Sugar: 1g
- Sodium: 680mg
Chicken breast is an excellent source of lean protein, which helps with muscle repair and keeps you feeling full. Parmesan cheese adds calcium and a little healthy fat, while the panko provides quick energy. This recipe is naturally low in sugar and can be made gluten-free with a simple swap. If you’re watching your sodium, reduce the salt in the seasoning and use low-sodium parmesan.
Honestly, this is one of those meals that feels indulgent but fits into a balanced diet pretty easily. It’s comfort food you can feel good about.
Conclusion
This crispy baked parmesan crusted chicken breast is proof that you don’t need a deep fryer to get that perfect crunch. It’s fast, it’s simple, and it delivers every single time. Whether you’re feeding a hungry family on a Tuesday night or impressing guests at a dinner party, this recipe has your back.
I love how forgiving this recipe is—even on days when I’m rushing or distracted, it still comes out amazing. That’s the kind of recipe worth keeping in your back pocket. So go ahead, give it a try. Play around with the seasonings, add your favorite sides, and make it your own. And when you do, come back and let me know how it turned out. I’d love to hear about your crispy chicken adventures!
Frequently Asked Questions
Can I use chicken thighs instead of breasts?
Absolutely! Boneless, skinless chicken thighs work great with this recipe. Just adjust the cooking time to about 20-25 minutes, depending on thickness. The thighs will be even juicier than breasts, which is never a bad thing.
Why is my coating falling off?
This usually happens for two reasons: either you used too much mayonnaise mixture, or you didn’t press the coating firmly enough into the chicken. A thin, even layer of the mayo-mustard binder is all you need, and really press that panko mixture into the chicken so it sticks.
Can I prepare this ahead of time?
You can coat the chicken up to 2 hours ahead and keep it in the fridge on the wire rack. Just don’t let it sit too long, or the coating can get soggy. For best results, bake it right after coating.
How do I know when the chicken is fully cooked?
A meat thermometer is the most reliable method. Insert it into the thickest part of the breast—you’re looking for 165°F (74°C). If you don’t have a thermometer, cut into the thickest part and check that the juices run clear and there’s no pink in the center.
Can I double this recipe for a crowd?
Yes, just make sure not to crowd the pan. Use two baking sheets with wire racks if needed, and rotate them halfway through baking for even cooking. The recipe scales up beautifully for parties or meal prep.
Pin This Recipe!
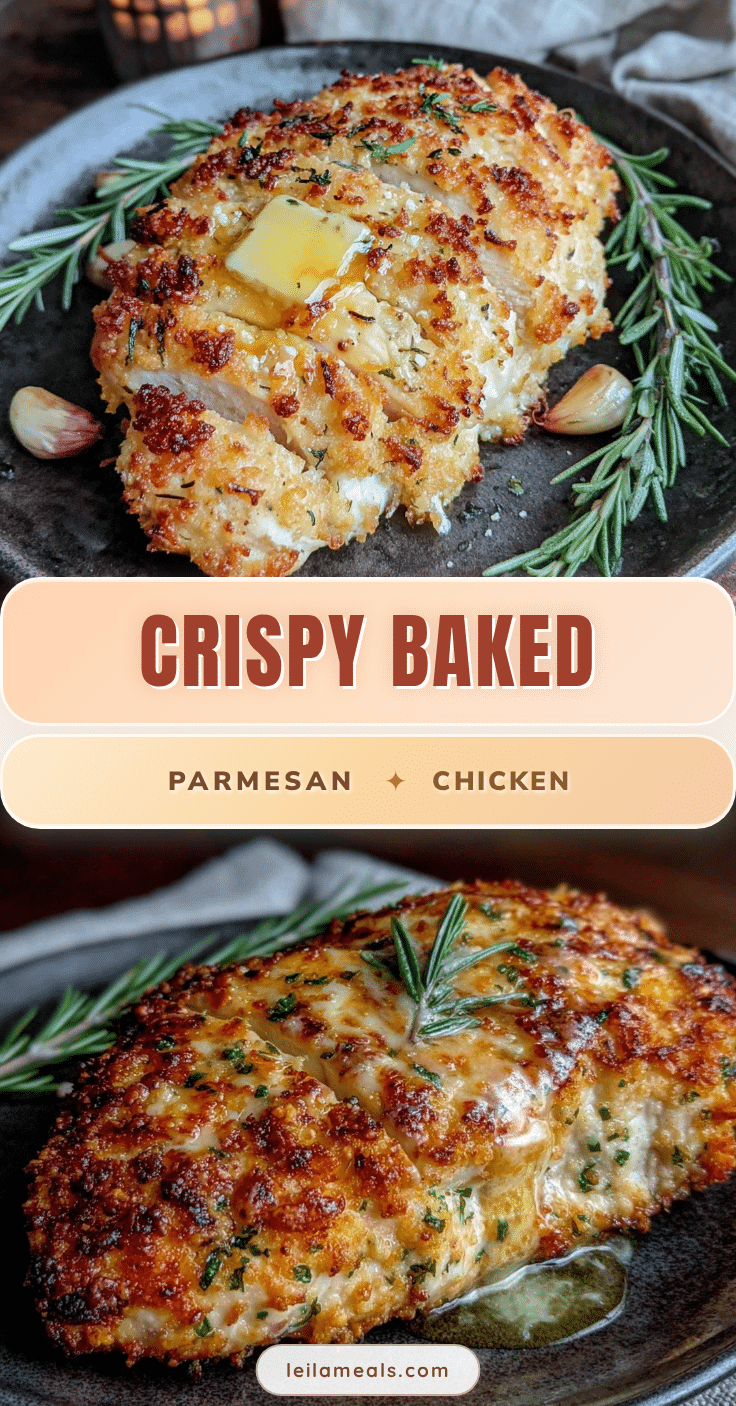
Best Crispy Parmesan Crusted Chicken Breast Recipe (Easy!)

This crispy baked parmesan crusted chicken breast delivers a crunchy, golden crust without needing a deep fryer or a vat of oil. It’s a family favorite that’s ready in under 30 minutes and uses simple pantry ingredients.
- Prep Time: 10 minutes
- Cook Time: 20 minutes
- Total Time: 30 minutes
- Yield: 4 servings 1x
- Category: Main Course
- Cuisine: American
Ingredients
- 4 boneless, skinless chicken breasts (about 6 ounces each)
- 1 teaspoon kosher salt
- ½ teaspoon black pepper (freshly ground)
- ½ teaspoon garlic powder
- ½ teaspoon onion powder (optional)
- 1 cup panko breadcrumbs
- ½ cup finely grated parmesan cheese
- 1 teaspoon dried Italian seasoning
- ½ teaspoon smoked paprika
- ¼ teaspoon cayenne pepper (optional)
- ¼ cup mayonnaise
- 2 tablespoons Dijon mustard
- 1 tablespoon olive oil
- Fresh parsley (for garnish, optional)
Instructions
- Preheat your oven to 425°F (220°C). Place a wire rack inside a rimmed baking sheet and spray it lightly with cooking spray.
- Place each chicken breast between two pieces of plastic wrap or parchment paper. Use a rolling pin or the flat side of a meat mallet to gently pound them to an even thickness—about ½ inch thick. Season both sides with salt, pepper, garlic powder, and onion powder.
- In a shallow bowl, mix together the panko breadcrumbs, grated parmesan, Italian seasoning, smoked paprika, and cayenne if using. In a second small bowl, whisk together the mayonnaise and Dijon mustard until smooth.
- Using a brush or your fingers, spread a thin, even layer of the mayonnaise mixture over each chicken breast. Then press each breast into the panko-parmesan mixture, coating both sides evenly. Shake off any excess.
- Place the coated chicken breasts on the prepared wire rack, leaving a little space between each piece. Drizzle a tiny bit of olive oil over the top of each breast.
- Bake for 18-22 minutes, until the internal temperature reaches 165°F (74°C) in the thickest part and the crust is deep golden brown.
- Let the chicken rest on the rack for 5 minutes before serving.
Notes
Don’t crowd the pan; use two pans if needed. For best results, use panko breadcrumbs and a wire rack. Let the chicken rest for 5 minutes before cutting.
Nutrition
- Serving Size: 1 chicken breast
- Calories: 385
- Sugar: 1
- Sodium: 680
- Fat: 18
- Carbohydrates: 14
- Fiber: 1
- Protein: 42
Keywords: crispy parmesan crusted chicken, baked chicken breast, easy chicken recipe, weeknight dinner, crispy chicken


