The chicken thighs were already thawed—that much I knew. What I didn’t know was that I’d be staring at them twenty minutes before my husband walked through the door with his boss in tow. “Just a quick hello,” he’d texted. I knew what that meant. Casual conversation that somehow turns into “why don’t you stay for dinner?” So there I was, rice in the pantry, garlic cloves on the counter, and a half-used stick of butter staring back at me from the fridge. No time for complicated steps or a sink full of dishes. This Easy One-Pan Garlic Butter Chicken and Rice basically wrote itself in that moment of pure kitchen panic.
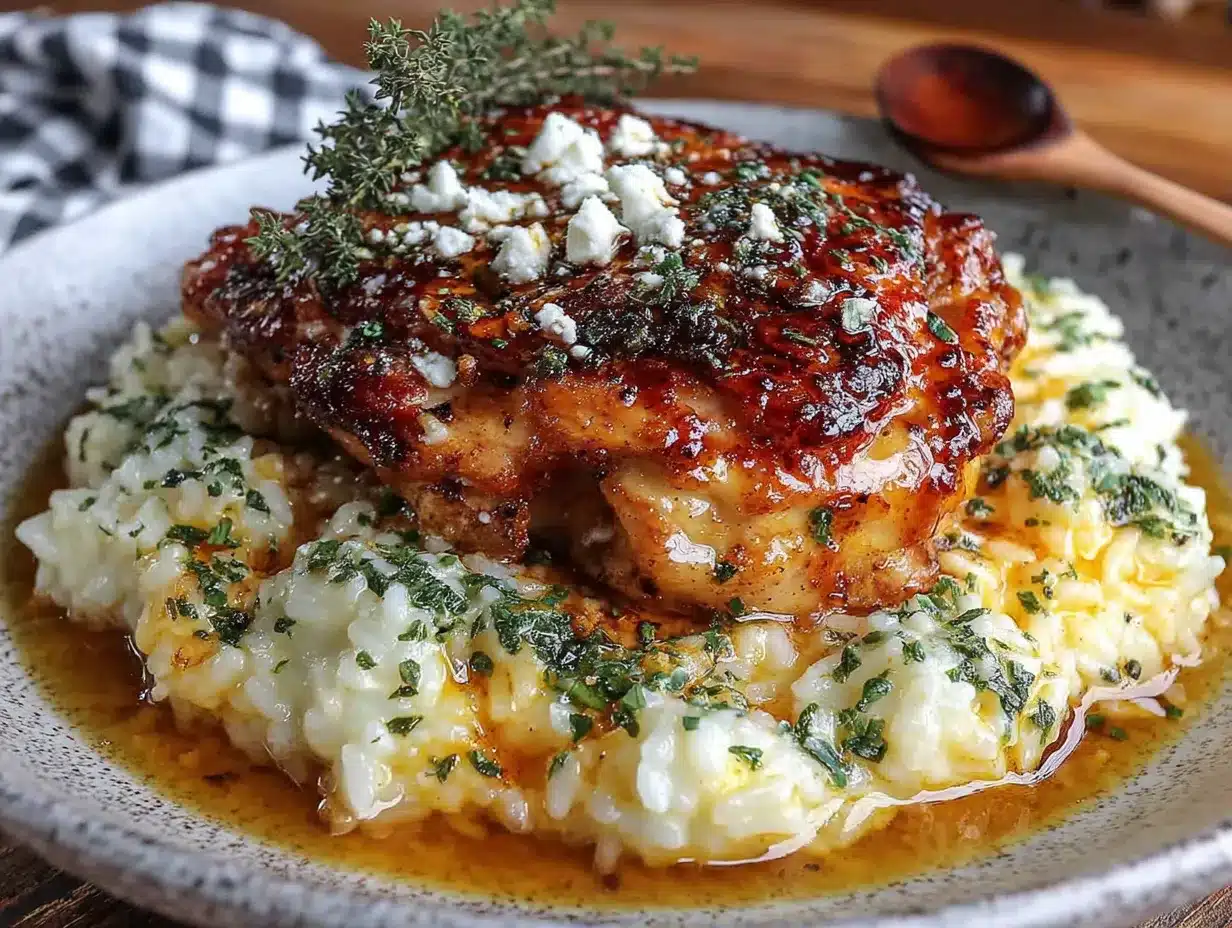
The smell—oh, the smell. Garlic hitting hot butter, chicken skin crisping up, rice soaking in all that golden goodness. It filled the house so fast that his boss actually asked what restaurant we ordered from. I just smiled and said nothing. That’s the thing about this dish. It looks like you spent hours, tastes like you know what you’re doing, but really it’s just one pan doing all the heavy lifting while you pour yourself a glass of wine. I’ve made this Easy One-Pan Garlic Butter Chicken and Rice at least a dozen times since that night, and it never gets old.
Some recipes become your go-to because they’re fast. Others because they’re forgiving. This one sticks around because it’s both. And honestly? It made me look like a hero on a Tuesday night when I was just trying not to burn the house down.
Why You’ll Love This Recipe
Let me tell you why this Easy One-Pan Garlic Butter Chicken and Rice has earned a permanent spot in my weekly rotation. I’ve tested this more times than I care to admit—through burnt bottoms, undercooked rice, and one particularly sad attempt where I forgot the salt entirely. But I got it right, and now you get the payoff.
- One Pan, Minimal Mess : Everything cooks in a single skillet or Dutch oven. No juggling pots, no extra baking dishes. Dinner and cleanup in under an hour.
- Simple Pantry Ingredients : Chicken, rice, garlic, butter, broth, and a few seasonings. You probably have most of this already. No specialty grocery runs needed.
- Perfect for Busy Weeknights : From start to table in about 45 minutes. Active time is maybe 15 minutes—the oven does the rest.
- Crowd-Pleaser Status : Juicy chicken thighs, fluffy rice soaked in garlic butter, and that golden crust on top. Kids ask for seconds. Adults ask for the recipe.
- Built-In Flexibility : Swap chicken breasts for thighs, use brown rice, add vegetables—this recipe handles changes without falling apart.
What makes this version different from every other garlic chicken and rice recipe out there? It’s the technique. I sear the chicken first to build that deep, browned flavor, then let the rice finish cooking in the same pan, absorbing all those delicious drippings. The garlic gets a moment in the hot butter before anything else touches the pan—that little step makes a huge difference. It’s not just another recipe. It’s the one that’ll save you on a Tuesday when you have nothing planned and everything to prove.
What Ingredients You Will Need
This recipe keeps things simple without sacrificing flavor. Every ingredient here does its job, and together they create something that tastes way more complicated than it actually is. Here’s what you’ll need:
For the Chicken
- 4 bone-in, skin-on chicken thighs (about 1.5 pounds)—the skin gets beautifully crispy in the pan, and the bone keeps the meat juicy. You can use boneless thighs, just reduce cooking time by about 10 minutes.
- 1 teaspoon salt—I use kosher salt. If you’re using table salt, cut it back to ¾ teaspoon.
- ½ teaspoon black pepper—freshly ground if you can. It makes a difference.
- ½ teaspoon paprika—adds color and a subtle smoky sweetness. Smoked paprika works great here too.
- ½ teaspoon garlic powder—yes, we’re using fresh garlic later too. Double garlic is never a mistake.
For the Rice and Base
- 2 tablespoons unsalted butter—I prefer Kerrygold for the richness, but any good quality butter works. Don’t use margarine here.
- 5 cloves garlic, minced—fresh garlic only. The jarred stuff won’t give you that same aromatic punch.
- 1 cup long-grain white rice—basmati or jasmine both work beautifully. Avoid short-grain rice as it gets too sticky.
- 2 cups low-sodium chicken broth—homemade is great if you have it, but store-bought works perfectly. Low-sodium lets you control the salt level.
- ½ cup water—helps the rice cook evenly without drying out.
- 1 small yellow onion, finely diced—about ¾ cup. Sweet onion works too. Skip red onion here; it’s too sharp.
- ½ teaspoon dried thyme—or 1 teaspoon fresh thyme leaves if you have them.
- ¼ teaspoon red pepper flakes (optional)—adds a tiny kick without making it spicy.
For Garnish
- 2 tablespoons fresh parsley, chopped—flat-leaf or curly, both work. Adds freshness and color.
- Fresh lemon wedges—a squeeze of lemon right before serving brightens everything up. Don’t skip this.
A quick note on the rice: I’ve tested this with jasmine rice and standard long-grain white rice, and both turn out fluffy and tender. If you want to use brown rice, parboil it for 15 minutes before adding it to the pan, or increase the liquid by ½ cup and bake for an extra 20 minutes. I’ve also made this with basmati rice—the aroma is incredible, and the grains stay beautifully separate.
For the chicken broth, I’m partial to Swanson or Kitchen Basics. They have a clean flavor that doesn’t overpower the dish. If you’re watching your sodium, the low-sodium versions work perfectly here.
Equipment Needed
You don’t need a fancy kitchen to pull this off. Here’s what you’ll need:
- A large oven-safe skillet or Dutch oven—I use a 12-inch cast iron skillet. It holds heat beautifully and gives the chicken that perfect golden crust. A stainless steel skillet with an oven-safe handle works too. If you don’t have an oven-safe skillet, you can transfer everything to a baking dish after searing.
- Tongs—for flipping the chicken without piercing the skin. Trust me, this matters more than you think.
- A sharp knife and cutting board—for mincing garlic and dicing onion. A microplane works great for garlic if you want it extra fine.
- Measuring cups and spoons—rice-to-liquid ratios matter here. Eyeballing it can lead to mushy or undercooked rice.
- Aluminum foil—for covering the pan while the rice finishes cooking. A tight seal is key.
If you’re using a Dutch oven, Le Creuset or Staub are wonderful, but honestly, a Lodge cast iron skillet is more affordable and works just as well. I’ve been using mine for years, and it’s never let me down. Just make sure whatever you use has a tight-fitting lid or you’re covering it tightly with foil.
Preparation Method
Let’s get cooking. This Easy One-Pan Garlic Butter Chicken and Rice comes together in about 45 minutes, and most of that is hands-off oven time. Follow these steps, and you’ll have dinner that looks like you fussed when you really didn’t.
- Preheat your oven to 375°F. Position the rack in the middle. While it’s heating, pat the chicken thighs dry with paper towels. This is crucial for crispy skin. Season both sides generously with salt, pepper, paprika, and garlic powder. Let them sit at room temperature for 10 minutes.
- Heat your oven-safe skillet over medium-high heat for about 2 minutes. Add 1 tablespoon of the butter and let it melt until it stops foaming. Place the chicken thighs skin-side down in the hot pan. Don’t crowd them—leave a little space between each piece. Cook without moving them for 5-6 minutes, until the skin is deep golden brown and crispy. Flip and cook for another 3 minutes on the other side. Transfer the chicken to a plate and set aside. The pan should have some browned bits stuck to the bottom—that’s flavor gold.
- Reduce the heat to medium and add the remaining 1 tablespoon of butter. Once it melts, add the diced onion. Cook for 3-4 minutes, stirring occasionally, until the onion is soft and translucent. Scrape up those browned bits from the bottom of the pan as you stir. Add the minced garlic and cook for 30 seconds—just until fragrant. Don’t let it burn, or it’ll turn bitter.
- Add the rice to the pan and stir to coat it in the buttery garlic mixture. Toast the rice for 1-2 minutes, stirring constantly. This step adds a nutty depth to the final dish. You’ll notice the rice starts to smell slightly toasty.
- Pour in the chicken broth, water, dried thyme, and red pepper flakes (if using). Stir everything together, scraping any remaining bits from the bottom of the pan. Bring the liquid to a gentle simmer. Taste the broth and adjust seasoning if needed—remember, the rice will absorb some of the salt.
- Nestle the chicken thighs back into the pan, skin-side up, pressing them gently into the rice mixture. The rice should be mostly submerged in the liquid. If it looks dry, add a splash more broth or water.
- Cover the pan tightly with a lid or aluminum foil and transfer to the preheated oven. Bake for 30-35 minutes, until the rice is tender and has absorbed most of the liquid. The chicken should reach an internal temperature of 165°F. If the rice still looks wet after 35 minutes, uncover and bake for 5 more minutes.
- Remove from the oven and let it rest, covered, for 5 minutes. This allows the rice to finish absorbing any remaining steam. Uncover carefully—hot steam will escape. Fluff the rice gently with a fork, being careful not to break up the chicken. Sprinkle with fresh parsley and serve with lemon wedges on the side.
A few things I’ve learned the hard way: If your rice is still crunchy after the recommended time, add ¼ cup of hot broth, cover, and bake for another 10 minutes. Don’t lift the lid during the first 25 minutes of baking—steam is what cooks the rice evenly. And if you’re using a darker pan, check the rice a few minutes early since dark cookware absorbs more heat.
Cooking Tips & Techniques
I’ve made this Easy One-Pan Garlic Butter Chicken and Rice more times than I can count, and I’ve definitely made my share of mistakes. Here’s what I’ve learned so you don’t have to repeat them:
Don’t rush the sear. That golden-brown crust on the chicken isn’t just for looks—it adds deep, savory flavor to the entire dish. Let the chicken cook undisturbed for the full 5-6 minutes on the first side. If you try to flip it too early, the skin will stick to the pan and tear. You’ll know it’s ready when it releases easily from the pan.
Toast the rice. This is a step a lot of recipes skip, but it makes a noticeable difference. That 1-2 minutes of toasting gives the rice a nutty flavor and helps it hold its shape better during baking. Stir constantly so it doesn’t burn.
Watch your heat with the garlic. Garlic burns fast. Once you add it to the pan, you have about 30 seconds before it goes from fragrant to bitter. If you’re multitasking, add the garlic right before you pour in the broth—that liquid will stop it from burning.
Use a meat thermometer. Chicken thighs are forgiving, but you still want to hit that 165°F mark. I’ve pulled chicken out too early and had to rush it back in the oven. A simple instant-read thermometer saves the guesswork.
Let it rest. That 5-minute rest after baking isn’t optional. The rice continues to absorb moisture during this time, and the chicken juices redistribute. Cut into it too soon, and you’ll have dry chicken and wet rice.
One mistake I made early on was using a pan that was too small. Everything got crowded, the chicken steamed instead of searing, and the rice cooked unevenly. Use at least a 12-inch skillet or a 5-quart Dutch oven. Give everything room to breathe.
Variations & Adaptations
This recipe is built to be flexible. Here are some ways I’ve adapted it over the years:
Swap the protein. Boneless chicken thighs work great—just reduce the initial sear time to 4 minutes per side and the baking time to 25 minutes. Chicken breasts work too, but they can dry out. Pound them to even thickness and check temperature early. I’ve even made this with Italian sausage links—brown them whole, slice into rounds, and nestle into the rice before baking. If you love one-pan meals with sausage, you’ll also enjoy this Easy One-Pan Sausage and Apple Stuffed Acorn Squash for a cozy fall twist.
Add vegetables. Throw in a cup of frozen peas and carrots during the last 10 minutes of baking. Or add sliced mushrooms along with the onions—they soak up all that garlic butter goodness. For a greener version, stir in a handful of fresh spinach right before covering the pan. It wilts down beautifully.
Make it creamy. Stir in ¼ cup of heavy cream or half-and-half along with the broth for a richer, almost risotto-like texture. You can also add ¼ cup of grated Parmesan cheese at the end—it melts into the rice and adds a savory umami kick.
Go gluten-free. This recipe is naturally gluten-free as written, as long as you use gluten-free chicken broth. Double-check your broth label—some brands add wheat-based flavorings.
Try different rice. Brown rice needs more liquid and time. Use 2 ½ cups of broth instead of 2, and bake for 50-55 minutes. Parboiling the brown rice for 15 minutes beforehand helps it cook more evenly. For a lower-carb option, use cauliflower rice—but reduce the liquid to 1 cup and bake for only 15-20 minutes.
Spice it up. Add a diced jalapeño along with the onions, or stir in ½ teaspoon of smoked paprika and a pinch of cayenne. For a Mediterranean twist, add a teaspoon of dried oregano and some sliced kalamata olives before baking. If you’re in the mood for something creamy and comforting, this Creamy Marry Me Chicken Tortellini has a similar weeknight-dinner energy but with tortellini and sun-dried tomatoes.
Serving & Storage Suggestions
This dish is a complete meal on its own, but a few simple sides can round it out beautifully.
Serving temperature: Serve hot, straight from the oven. The rice should be steaming, and the chicken skin should still have a little crispness. A squeeze of fresh lemon juice right before eating brightens all the flavors—don’t skip it.
What to serve with it: A simple green salad with a lemon vinaigrette cuts through the richness perfectly. Steamed green beans or roasted asparagus are also great choices. If you want something heartier, this Crispy Sheet Pan Lemon Herb Chicken has a similar vibe but with roasted potatoes and asparagus on the side.
Storage: Let the dish cool completely before storing. Transfer to an airtight container and refrigerate for up to 4 days. The rice will absorb more liquid as it sits, so don’t be surprised if it’s slightly softer the next day.
Freezing: This freezes well for up to 3 months. Portion into freezer-safe containers, leaving a little room for expansion. Thaw overnight in the refrigerator before reheating.
Reheating: The best way to reheat is in a covered skillet over medium-low heat with a splash of chicken broth or water. This brings back moisture without making the rice mushy. You can also microwave individual portions—cover with a damp paper towel and heat in 30-second bursts, stirring between each. The chicken skin won’t be as crispy after reheating, but the flavor is still there.
The flavors actually deepen after a day in the fridge. I sometimes make this specifically for leftovers—it’s that good the next day for lunch.
Nutritional Information & Benefits
Here’s an estimated nutritional breakdown for one serving (based on 4 servings, using chicken thighs with skin, white rice, and butter):
| Nutrient | Amount per Serving |
|---|---|
| Calories | 485 |
| Protein | 32g |
| Fat | 22g |
| Saturated Fat | 8g |
| Carbohydrates | 38g |
| Fiber | 1g |
| Sugar | 2g |
| Sodium | 720mg |
This dish offers a solid balance of protein, carbs, and healthy fats. Chicken thighs provide more iron and zinc than chicken breasts, plus they stay juicier during cooking. Garlic brings allicin, a compound linked to immune support and heart health. The butter adds vitamin A and a touch of healthy saturated fat that helps your body absorb fat-soluble nutrients from any vegetables you add.
If you’re watching your sodium, use low-sodium broth and skip the added salt during the initial seasoning. You can always add more at the table. For a lighter version, remove the chicken skin before eating—you’ll save about 50 calories and 5 grams of fat per serving.
This isn’t a diet food, but it’s real food made from simple ingredients. And honestly? That’s a win in my book.
Conclusion
This Easy One-Pan Garlic Butter Chicken and Rice has saved me more times than I can count. It’s the recipe I turn to when I’m tired, when I’m busy, and when I need to impress without stressing. The garlic butter aroma that fills your kitchen, the perfectly cooked rice, the juicy chicken with its crispy skin—it all comes together in one pan with minimal fuss.
What I love most about this dish is how forgiving it is. You can swap ingredients, adjust seasonings, add whatever vegetables you have lying around, and it still turns out delicious. It’s not precious or finicky. It’s just good, honest food that works.
I’d love to hear how this turns out for you. Did you add your own twist? Use a different protein? Throw in some extra veggies? Drop a comment below and let me know. And if you loved it, share it with a friend who needs a weeknight win. Happy cooking!
Frequently Asked Questions
Can I use chicken breasts instead of thighs?
Yes, but keep an eye on them. Boneless, skinless chicken breasts cook faster and can dry out. Pound them to even thickness, sear for 3-4 minutes per side, and reduce the baking time to 20-25 minutes. Check the internal temperature early—165°F is your target.
Why is my rice still crunchy after baking?
This usually means there wasn’t enough liquid or the lid wasn’t tight enough. Add ¼ cup of hot broth, cover tightly, and bake for another 10 minutes. Next time, make sure the liquid just covers the rice before baking, and check that your lid or foil is sealed well.
Can I make this in a slow cooker?
You can, but the texture will be different. Sear the chicken first, then transfer everything to a slow cooker. Cook on low for 4-5 hours. The rice will be softer and more porridge-like, and you won’t get that crispy skin. It’s still tasty, just not the same dish.
How do I prevent the rice from burning on the bottom?
Use a heavy-bottomed pan and make sure there’s enough liquid. If your oven runs hot, check the dish at 25 minutes instead of 30. You can also place the pan on a baking sheet to diffuse the heat from the bottom.
Can I double this recipe?
Absolutely, but you’ll need a larger pan or divide it between two pans. Don’t overcrowd the chicken during searing—work in batches if needed. Increase the baking time by about 10 minutes, and check the rice for doneness before serving.
Pin This Recipe!
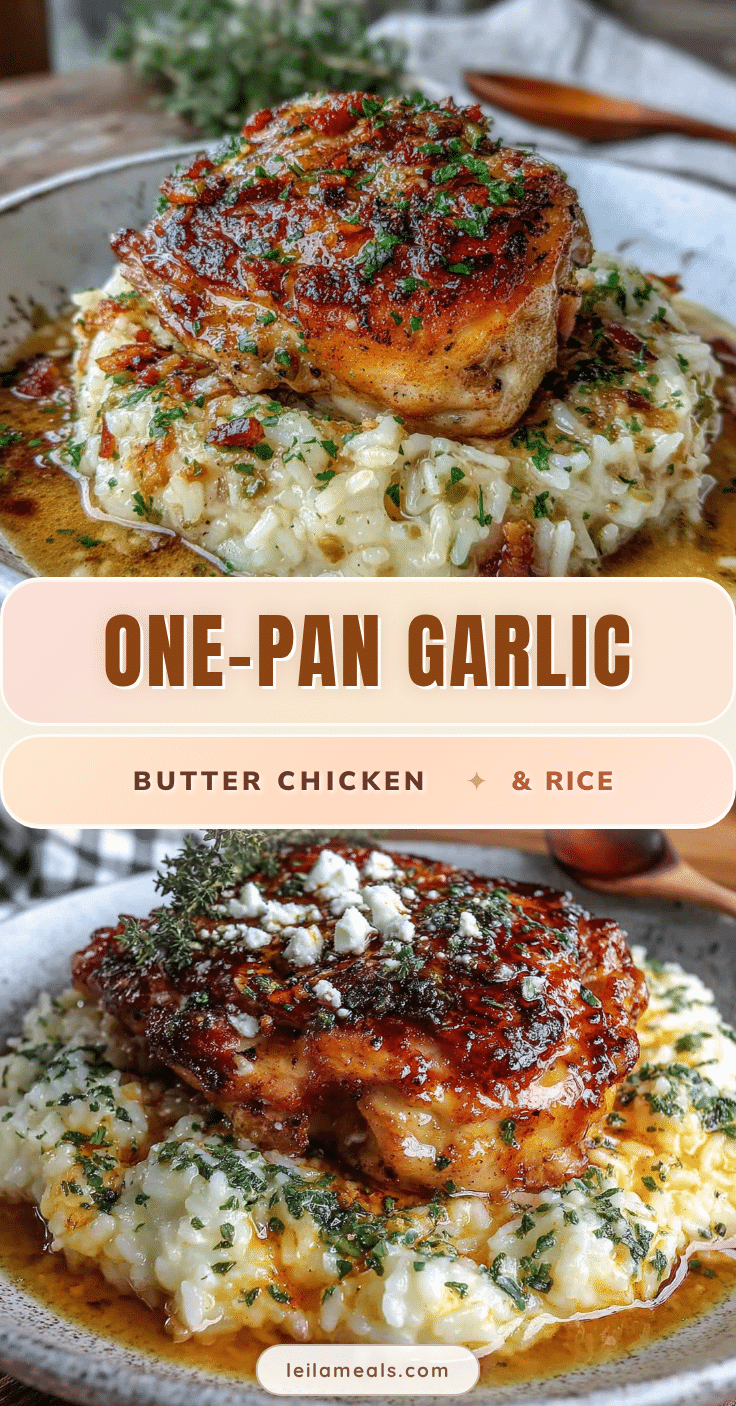
Easy One-Pan Garlic Butter Chicken and Rice

Juicy chicken thighs and fluffy rice cooked in a single skillet with garlic butter, perfect for busy weeknights. This forgiving recipe delivers impressive flavor with minimal cleanup.
- Prep Time: 15 minutes
- Cook Time: 30 minutes
- Total Time: 45 minutes
- Yield: 4 servings 1x
- Category: Main Course
- Cuisine: American
Ingredients
- 4 bone-in, skin-on chicken thighs (about 1.5 pounds)
- 1 teaspoon kosher salt
- ½ teaspoon black pepper, freshly ground
- ½ teaspoon paprika
- ½ teaspoon garlic powder
- 2 tablespoons unsalted butter
- 5 cloves garlic, minced
- 1 cup long-grain white rice (basmati or jasmine)
- 2 cups low-sodium chicken broth
- ½ cup water
- 1 small yellow onion, finely diced (about ¾ cup)
- ½ teaspoon dried thyme
- ¼ teaspoon red pepper flakes (optional)
- 2 tablespoons fresh parsley, chopped
- Fresh lemon wedges for serving
Instructions
- Preheat your oven to 375°F. Pat the chicken thighs dry with paper towels. Season both sides generously with salt, pepper, paprika, and garlic powder. Let them sit at room temperature for 10 minutes.
- Heat an oven-safe skillet over medium-high heat for about 2 minutes. Add 1 tablespoon of butter and let it melt until it stops foaming. Place the chicken thighs skin-side down in the hot pan. Cook without moving them for 5-6 minutes, until the skin is deep golden brown and crispy. Flip and cook for another 3 minutes on the other side. Transfer the chicken to a plate and set aside.
- Reduce the heat to medium and add the remaining 1 tablespoon of butter. Once it melts, add the diced onion. Cook for 3-4 minutes, stirring occasionally, until the onion is soft and translucent. Add the minced garlic and cook for 30 seconds until fragrant.
- Add the rice to the pan and stir to coat it in the buttery garlic mixture. Toast the rice for 1-2 minutes, stirring constantly.
- Pour in the chicken broth, water, dried thyme, and red pepper flakes (if using). Stir everything together, scraping any remaining bits from the bottom of the pan. Bring the liquid to a gentle simmer. Taste and adjust seasoning if needed.
- Nestle the chicken thighs back into the pan, skin-side up, pressing them gently into the rice mixture.
- Cover the pan tightly with a lid or aluminum foil and transfer to the preheated oven. Bake for 30-35 minutes, until the rice is tender and has absorbed most of the liquid. The chicken should reach an internal temperature of 165°F.
- Remove from the oven and let it rest, covered, for 5 minutes. Uncover carefully, fluff the rice gently with a fork, and sprinkle with fresh parsley. Serve with lemon wedges on the side.
Notes
Don’t rush the sear; let the chicken cook undisturbed for 5-6 minutes for crispy skin. Toast the rice for nutty flavor. Watch the garlic carefully to avoid burning. Use a meat thermometer to ensure chicken reaches 165°F. Let the dish rest for 5 minutes after baking. If rice is still crunchy, add ¼ cup hot broth and bake for another 10 minutes. Do not lift the lid during the first 25 minutes of baking.
Nutrition
- Serving Size: 1 serving
- Calories: 485
- Sugar: 2
- Sodium: 720
- Fat: 22
- Saturated Fat: 8
- Carbohydrates: 38
- Fiber: 1
- Protein: 32
Keywords: one-pan chicken and rice, garlic butter chicken, easy weeknight dinner, skillet chicken and rice, one pot meal


