I was elbow-deep in flour and butter one Saturday afternoon, testing a batch of witch finger shortbread cookies, when my phone buzzed. My sister, the queen of last-minute Halloween parties, was panicking. She had twenty people coming in three hours, a fridge full of basic appetizers, and zero “wow” factor. “Can you just… make something that looks scary but tastes normal?” she begged. I hung up, looked at the half-dozen eggs I had boiling for a different project, and the idea hit me like a cartoon anvil. Spiders. Deviled eggs. Spooky, easy, and honestly, kind of adorable.
That first batch was a mess, if I’m being honest. The olive legs kept falling off, and my paprika “dusting” looked more like a crime scene than a garnish. But by the time I brought a platter of them to her party, they were gone in ten minutes. People were taking photos before they even said hello. And the best part? They’re stupidly simple to make. No special equipment, no weird ingredients, just classic deviled eggs with a creepy-cute makeover.
These Easy Spooky Spider Deviled Eggs have become my non-negotiable Halloween party contribution. They’re the appetizer that gets people talking, the one that makes kids giggle and adults do a double-take. And they taste exactly like the deviled eggs your grandma made, which is the whole point. You want something that looks like it crawled out of a haunted house but tastes like a potluck classic. That’s this recipe.
Why You’ll Love This Recipe
I’ve tested this recipe at four different Halloween parties now, and it never fails. Here’s why it works so well:
- Quick & Easy : From start to finish, you’re looking at about 30 minutes of active work. The eggs do most of the heavy lifting while they boil.
- Simple Ingredients : Eggs, mayo, mustard, vinegar, and olives. That’s it. You probably have everything except the olives in your fridge right now.
- Perfect for Halloween Parties : Whether it’s a kids’ costume party or a grown-up cocktail hour, these fit right in. They’re spooky without being gross.
- Crowd-Pleaser : I’ve watched picky eaters, health-conscious friends, and kids all go back for seconds. The spider design is just a bonus.
- Unbelievably Delicious : The filling is creamy, tangy, and perfectly seasoned. The olive spiders add a briny pop that balances the richness.
What makes these different from other Halloween deviled eggs? It’s the little details. I use black olives for the spider bodies because they contrast beautifully with the yellow filling. I cut the legs at a specific angle so they actually look like they’re crawling. And I add a tiny pinch of smoked paprika on top that makes the whole thing feel finished, not just thrown together.
This isn’t just another Halloween appetizer. It’s the kind that makes people stop mid-conversation and say, “Wait, did you make those?” And when they taste them, they’re genuinely surprised at how good they are. That’s the magic right there.
What Ingredients You Will Need
This recipe uses simple, everyday ingredients to create something that looks like it took hours. The key is in the preparation, not the grocery list.
- Large eggs (12) – The foundation of everything. Use large, not extra-large, for the best yolk-to-white ratio. Room temperature eggs are easier to peel, so pull them out of the fridge 15 minutes before boiling.
- Mayonnaise (1/3 cup) – I prefer Duke’s or Hellmann’s for that classic tangy flavor. Don’t use Miracle Whip unless you know you love it. The sweetness doesn’t play well with the olives.
- Yellow mustard (1 tablespoon) – Adds a gentle heat and that signature yellow color. You can use Dijon for a sharper flavor, but it will change the color slightly.
- White vinegar (1 teaspoon) – A little acidity wakes up the filling. Apple cider vinegar works too, but white keeps the flavor neutral.
- Salt (1/4 teaspoon) – Fine sea salt dissolves better. Don’t skip it; the filling needs salt to balance the fat.
- Black pepper (1/8 teaspoon) – Freshly ground is best. It adds a subtle warmth that complements the mustard.
- Smoked paprika (1/2 teaspoon, plus more for garnish) – This is my secret weapon. It adds a smoky depth that regular paprika doesn’t. The garnish on top makes the spiders look like they’re crawling through a dusty attic.
- Large black olives (1 can, about 12-15 olives) – You need whole pitted black olives. The big ones work best because you can slice them into spider bodies and legs. Do not use sliced olives; they won’t hold their shape.
Ingredient Tips from Personal Experience: The first time I made these, I used cheap olives and they fell apart when I tried to cut the legs. Spend an extra dollar on good quality black olives. They’re firmer and hold their shape better. Also, if you can find jumbo olives, even better. They make more convincing spider bodies.
For the eggs, I’ve learned that older eggs peel easier than fresh ones. If your eggs are super fresh, steam them instead of boiling. It makes a huge difference. I’ll cover that in the preparation section.
Equipment Needed
You don’t need anything fancy for these. Here’s what you’ll need:
- Medium saucepan – For boiling the eggs. Any size works, but make sure the eggs fit in a single layer.
- Large bowl of ice water – This stops the cooking process and helps the eggs peel cleanly.
- Sharp knife and cutting board – A dull knife will smash the olives instead of slicing them cleanly.
- Small paring knife – This is my favorite tool for cutting the olive legs. The small blade gives you more control.
- Mixing bowl – For the filling. Any medium bowl works.
- Fork or potato masher – To mash the yolks. A fork works fine, but a potato masher makes it faster.
- Piping bag or zip-top bag – For filling the egg whites neatly. A zip-top bag with the corner snipped off works perfectly.
- Small spoon – For scooping out the yolks and for placing the spider legs.
- Platter or serving plate – Something dark colored makes the spiders pop. A black or orange plate is ideal for Halloween.
Budget Tip: If you don’t have a piping bag, don’t buy one. A sturdy zip-top bag works just as well. Just make sure it’s not the cheap kind that splits open when you squeeze. I learned that the hard way, and let me tell you, cleaning deviled egg filling out of a drawer is not fun.
Preparation Method
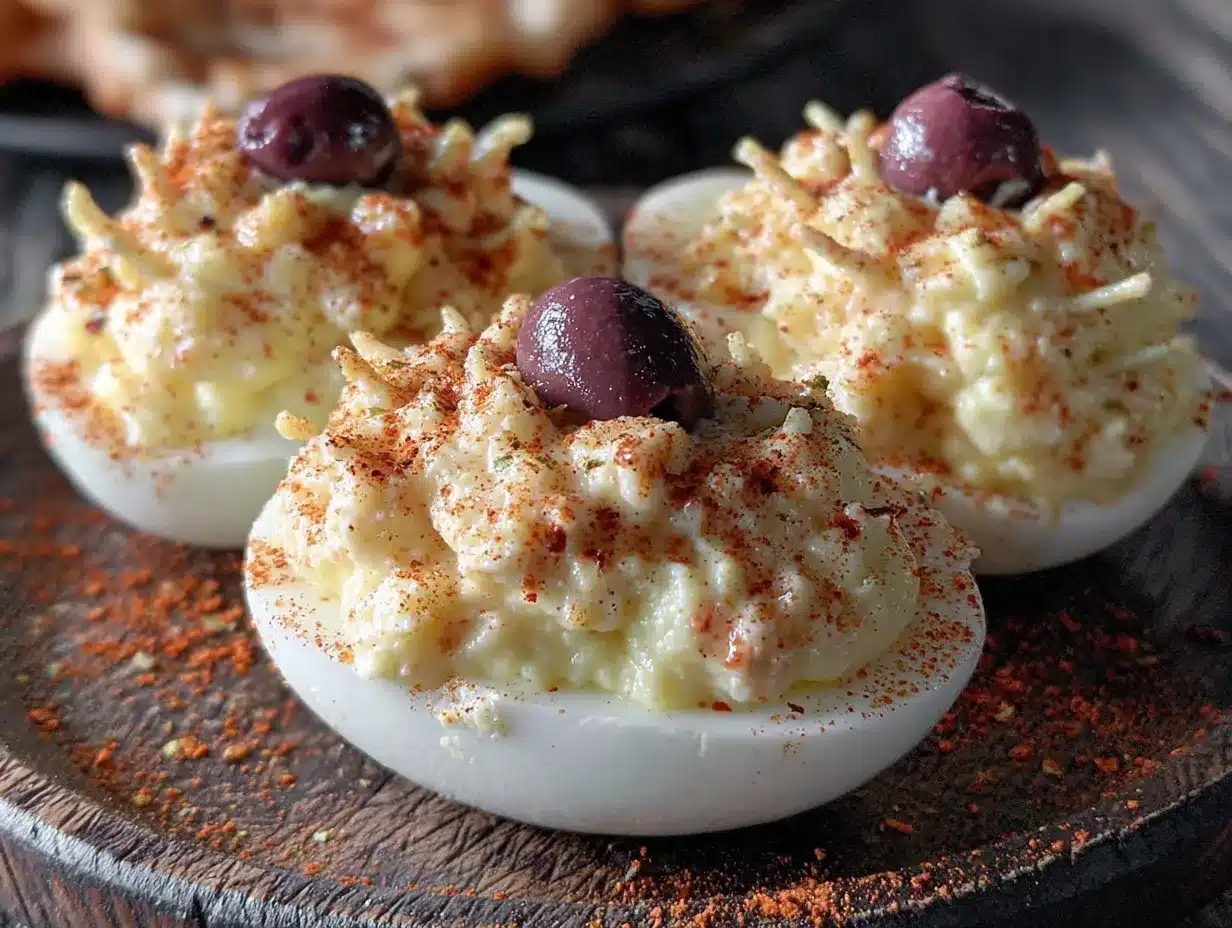
Let’s get to the fun part. I’ll walk you through every step so you get perfect spiders every time.
- Boil the eggs (10 minutes) – Place the eggs in a single layer in your saucepan. Cover them with cold water by about an inch. Bring to a rolling boil over high heat. Once boiling, cover the pot, turn off the heat, and let them sit for exactly 10 minutes. This is the foolproof method. No green rings, no undercooked yolks.
- Ice bath (5 minutes) – While the eggs are sitting, fill a large bowl with ice and cold water. When the timer goes off, transfer the eggs to the ice bath using a slotted spoon. Let them cool for at least 5 minutes. This shocks the shells and makes peeling so much easier.
- Peel the eggs – Gently tap each egg on the counter to crack the shell all over. Start peeling from the wider end where the air pocket is. Run the egg under cold water as you peel to help remove any stubborn shell bits. Pat them dry with a paper towel.
- Cut the eggs – Slice each egg in half lengthwise. Wipe your knife clean between cuts to keep the edges neat. Gently pop out the yolks into your mixing bowl. Place the white halves on your serving platter, cut side up.
- Make the filling – Mash the yolks with a fork until they’re crumbly with no large chunks. Add the mayonnaise, yellow mustard, white vinegar, salt, black pepper, and smoked paprika. Mix until smooth and creamy. Taste it. Adjust the salt or mustard to your liking. This is your moment to customize.
- Fill the egg whites – Spoon the filling into a piping bag or a zip-top bag with the corner snipped off. Pipe the filling into each egg white half, mounding it slightly. You want it to look generous, not flat. If you don’t have a bag, use a small spoon to carefully fill each one.
- Prepare the spider bodies – Drain the olives and pat them dry with a paper towel. Using your sharp paring knife, slice each olive in half crosswise. You’ll use one half for the spider body and the other half for the legs. For the legs, cut thin strips from the remaining half. You want 8 small strips per spider. Yes, it’s fiddly, but it’s worth it.
- Assemble the spiders – Take one olive half (the spider body) and place it on top of the filling, slightly off-center. Take 8 olive leg strips and arrange them around the body, 4 on each side, pressing them gently into the filling so they stay put. The legs should curve outward like a real spider. Repeat for each egg.
- Garnish and serve – Lightly dust the entire platter with a pinch of smoked paprika. This gives the illusion of dirt or dust, which makes the spiders look even creepier. Serve immediately or refrigerate until ready.
Pro Tip: If you’re making these ahead of time, assemble the spiders on the eggs just before serving. The olive legs can dry out and curl up if they sit too long. I prep the filling and cut the olives a day ahead, then assemble everything an hour before guests arrive.
Cooking Tips & Techniques
I’ve made these about a dozen times now, and I’ve collected a few tricks that make the process smoother.
Perfect peeling every time: The number one complaint I hear about deviled eggs is the peeling disaster. Here’s my trick: after the ice bath, gently roll the egg on the counter to crack the shell all over. Then start peeling from the wide end under running water. The water gets under the shell and helps it slide off. I’ve never had a mangled egg white since I started doing this.
Olive cutting strategy: The first time I made these, I tried to cut the olive legs with a butter knife. Disaster. Use a sharp paring knife and cut the olives on a cutting board, not in your hand. Slice the olive in half first, then cut thin strips from one half. The strips should be about 1/4 inch wide and 1 inch long. They’ll curl slightly as they sit, which actually makes them look more realistic.
Filling consistency: If your filling is too thick, add a teaspoon of pickle juice or a splash of milk. If it’s too thin, add another yolk or a tablespoon of mayo. You want it to hold its shape when piped but still be creamy. I’ve had batches that were too runny and they just slid off the egg white. Not cute.
Timing strategy: I always boil the eggs first, then prep the olives while they’re cooling. That way, I’m not standing around waiting. Multitasking is your friend here. You can also boil the eggs up to 5 days ahead and keep them in the fridge unpeeled. Peel them right before you make the filling for the best texture.
My biggest failure: I once tried to use green olives instead of black because that’s what I had. The spiders looked like alien creatures, and not in a good way. Stick with black olives. The contrast is what makes the design work.
Variations & Adaptations
This recipe is flexible, and I’ve tried a few different versions over the years.
- Spicy Spider Eggs: Add 1/2 teaspoon of cayenne pepper or a tablespoon of sriracha to the filling. The heat contrasts nicely with the cool olive bodies. I made these for a grown-up Halloween party and they were a hit.
- Avocado Deviled Spider Eggs: Replace half the mayo with mashed avocado. The green filling looks even creepier with the black spiders, and it’s a healthier option. Just add a squeeze of lime juice to keep the avocado from browning.
- Bacon Spider Eggs: Crumble crispy bacon over the top of the filling before adding the spider body. The smoky, salty crunch is amazing. I did this for a Halloween brunch and people lost their minds.
- Gluten-Free Option: This recipe is naturally gluten-free, so no changes needed. Just double-check your mustard and mayo labels to be safe.
- Dairy-Free Adaptation: Use vegan mayo and skip any dairy-based garnishes. The recipe works perfectly without any dairy at all.
- Kid-Friendly Version: If the olive spiders are too creepy for little ones, use sliced black olives as “eyes” instead of full spider bodies. Or make ghost deviled eggs by cutting the olive into a ghost shape. Kids love that.
My personal favorite variation is the spicy version. I add a dash of hot sauce and a sprinkle of chili flakes on top. The heat cuts through the richness of the yolk and mayo perfectly. It’s become my go-to for adult parties.
Serving & Storage Suggestions
These are best served cold, straight from the fridge. The filling firms up as it chills, which helps the spider legs stay in place.
Presentation: Arrange the eggs on a dark-colored platter for maximum visual impact. A black slate board or a dark orange plate makes the spiders pop. I like to scatter a few extra olive “legs” around the platter like the spiders have been crawling around. It’s a little touch that always gets a laugh.
Complementary dishes: These pair beautifully with other Halloween appetizers. Serve them alongside mummy brownie bites for a sweet and savory balance. They also work great with a smoky blackberry bourbon sangria for an adult gathering. For a full spread, add some pepperoni pizza dip and you’ve got a party.
Storage: Store any leftover deviled eggs in an airtight container in the refrigerator for up to 2 days. The olive legs may soften slightly, but they’ll still look good. Do not freeze them. The texture of the egg whites becomes rubbery and unappealing.
Reheating: Don’t. These are served cold. If you’ve refrigerated them, just pull them out 10 minutes before serving to take the chill off. The flavors actually improve after a few hours in the fridge as the filling sets and the ingredients meld together.
Flavor development: I actually prefer these after they’ve sat in the fridge for a few hours. The filling gets firmer and the flavors become more cohesive. The olive legs might look a little sad after a day, but the taste is still spot on.
Nutritional Information & Benefits
Here’s the approximate nutritional breakdown for one spider deviled egg (based on 24 servings):
| Nutrient | Amount per serving |
|---|---|
| Calories | 62 |
| Total Fat | 5g |
| Saturated Fat | 1g |
| Cholesterol | 95mg |
| Sodium | 95mg |
| Total Carbohydrates | 1g |
| Protein | 4g |
Health Benefits: Eggs are a fantastic source of high-quality protein and essential nutrients like choline, which supports brain health. The olives provide healthy monounsaturated fats and antioxidants. This is a relatively low-carb appetizer, making it suitable for keto and low-carb diets. Just watch your portion sizes if you’re watching your cholesterol or sodium intake.
Dietary Considerations: This recipe is naturally gluten-free, low-carb, and vegetarian. It contains eggs and may contain dairy depending on your mayo choice. For a vegan version, use silken tofu and vegan mayo to create a similar filling, though the texture will be different.
Personal Wellness Perspective: I love that this recipe feels indulgent without being over-the-top. It’s a protein-packed appetizer that doesn’t leave you feeling heavy. For a Halloween party where you might be grazing all night, these are a smart choice. You get the satisfaction of a creamy, savory bite without the sugar crash that comes with candy.
Conclusion
These Easy Spooky Spider Deviled Eggs are proof that Halloween food doesn’t have to be complicated to be impressive. They look like they took hours of careful sculpting, but really, it’s just boiled eggs, a little mayo, and some clever olive cutting. The best recipes are the ones that make you look like a hero without actually working that hard, you know?
I love these because they remind me of that first panicked phone call from my sister. What started as a last-minute favor turned into a tradition. Now, every Halloween, I make a double batch because I know they’ll disappear before anything else on the table. There’s something deeply satisfying about watching people’s faces go from “oh, deviled eggs” to “OH, SPIDER DEVILED EGGS!” in a split second.
I’d love to see your versions! Tag me in your photos or leave a comment below telling me how they turned out. Did you add your own twist? Did your kids help with the olive legs? I want to hear all about it. And if you’re looking for more Halloween inspiration, check out my black velvet Halloween layer cake for the perfect sweet finish to your spooky spread.
Happy Halloween, and happy cooking!
Frequently Asked Questions
Can I make these spider deviled eggs a day ahead?
Yes, but with one caveat. You can boil the eggs, make the filling, and cut the olives up to 24 hours in advance. Store the filling in a piping bag in the fridge, the olive pieces in an airtight container, and the egg whites in a covered container with a damp paper towel on top. Assemble the spiders on the eggs about an hour before serving for the best presentation.
How do I keep the olive legs from falling off?
Press the legs gently but firmly into the filling. The filling acts like glue. If your filling is too stiff, the legs won’t stick. Make sure your filling is creamy enough to hold them. You can also use a tiny dab of mayonnaise on the end of each leg to help it adhere.
Can I use a different type of olive?
Black olives work best because of their color and firm texture. Green olives are too soft and the color doesn’t contrast well with the yellow filling. Kalamata olives are too oily and will stain the filling. Stick with large, pitted black olives for the best results.
How long do these stay fresh at a party?
Deviled eggs should not sit out at room temperature for more than 2 hours. If you’re serving them at a party, put the platter on ice or serve them in small batches, replacing them from the fridge as needed. They’re best within the first hour of being assembled.
Can I make these without a piping bag?
Absolutely. Use a small spoon to carefully fill each egg white half. It won’t look as polished, but it will taste the same. You can also use a butter knife to spread the filling, though it’s harder to get that nice mound. The spiders will still look great either way.
Pin This Recipe!
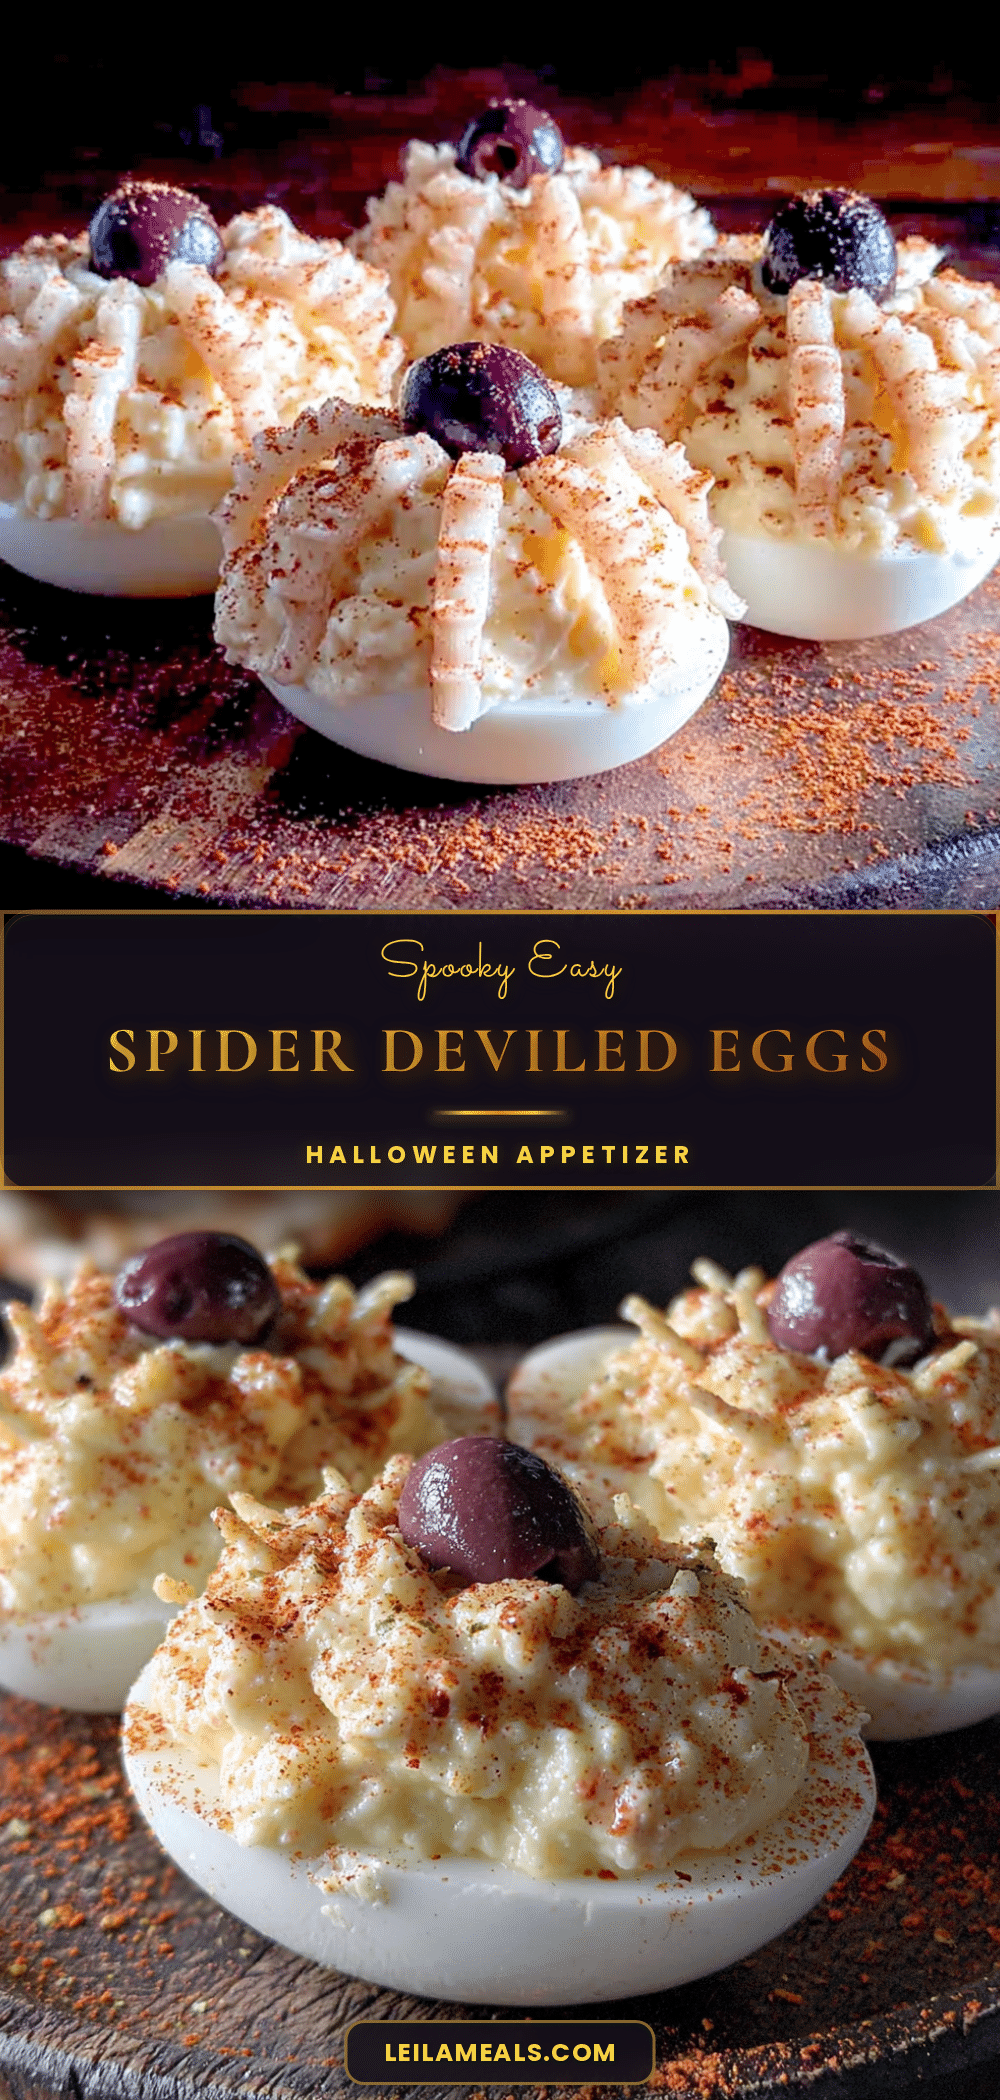
Easy Spooky Spider Deviled Eggs: Best Halloween Appetizer
These Easy Spooky Spider Deviled Eggs are the perfect Halloween appetizer that looks creepy but tastes like a classic potluck favorite. Made with simple ingredients like eggs, mayo, and black olives, they’re quick to prepare and guaranteed to be a crowd-pleaser at any Halloween party.
- Prep Time: 20 minutes
- Cook Time: 10 minutes
- Total Time: 30 minutes
- Yield: 24 servings 1x
- Category: Appetizer
- Cuisine: American
Ingredients
- 12 large eggs
- 1/3 cup mayonnaise (preferably Duke’s or Hellmann’s)
- 1 tablespoon yellow mustard
- 1 teaspoon white vinegar
- 1/4 teaspoon fine sea salt
- 1/8 teaspoon freshly ground black pepper
- 1/2 teaspoon smoked paprika, plus more for garnish
- 1 can (about 12–15) large pitted black olives
Instructions
- Place the eggs in a single layer in a medium saucepan. Cover with cold water by about an inch. Bring to a rolling boil over high heat. Once boiling, cover the pot, turn off the heat, and let sit for exactly 10 minutes.
- While the eggs are sitting, fill a large bowl with ice and cold water. When the timer goes off, transfer the eggs to the ice bath using a slotted spoon. Let cool for at least 5 minutes.
- Gently tap each egg on the counter to crack the shell all over. Start peeling from the wider end where the air pocket is. Run the egg under cold water as you peel to help remove stubborn shell bits. Pat dry with a paper towel.
- Slice each egg in half lengthwise. Wipe your knife clean between cuts to keep the edges neat. Gently pop out the yolks into a mixing bowl. Place the white halves on a serving platter, cut side up.
- Mash the yolks with a fork until crumbly with no large chunks. Add the mayonnaise, yellow mustard, white vinegar, salt, black pepper, and smoked paprika. Mix until smooth and creamy. Taste and adjust seasoning if needed.
- Spoon the filling into a piping bag or a zip-top bag with the corner snipped off. Pipe the filling into each egg white half, mounding it slightly. Alternatively, use a small spoon to carefully fill each one.
- Drain the olives and pat dry with a paper towel. Using a sharp paring knife, slice each olive in half crosswise. Use one half for the spider body and the other half for the legs. For the legs, cut thin strips from the remaining half, aiming for 8 small strips per spider.
- Take one olive half (the spider body) and place it on top of the filling, slightly off-center. Take 8 olive leg strips and arrange them around the body, 4 on each side, pressing them gently into the filling so they stay put. The legs should curve outward like a real spider. Repeat for each egg.
- Lightly dust the entire platter with a pinch of smoked paprika. Serve immediately or refrigerate until ready.
Notes
For best results, use older eggs as they peel easier. If eggs are very fresh, steam them instead of boiling. The olive legs can dry out if assembled too far in advance; prep filling and cut olives a day ahead, then assemble spiders about an hour before serving. Store leftovers in an airtight container in the refrigerator for up to 2 days. Do not freeze.
Nutrition
- Serving Size: 1 spider deviled egg
- Calories: 62
- Sodium: 95
- Fat: 5
- Saturated Fat: 1
- Carbohydrates: 1
- Protein: 4
Keywords: Halloween appetizer, spider deviled eggs, easy deviled eggs, spooky eggs, Halloween party food, deviled eggs recipe, black olive spiders


