It was the third or fourth time I’d stood in front of the freezer at a party, spoon in hand, staring at a half-melted tub of store-bought sorbet that tasted more like sugar and food coloring than actual fruit. The kind where you take one bite and think, “Why did I even bother?” I wanted something that tasted like a slice of cold, sweet watermelon on the hottest day of the year—something that didn’t require an ice cream maker or a degree in pastry arts. For a while, I just accepted that homemade sorbet was going to be either a grainy, icy mess or a complicated science project. But this Easy No-Churn Watermelon Sorbet? It changed everything. No churning, no special equipment, no weird ingredients. Just pure, honest watermelon flavor that freezes into something dangerously good. And honestly, it’s the kind of dessert that makes you wonder why you ever settled for anything less.
Why You’ll Love This Recipe
Let’s be real—most homemade sorbets require an ice cream maker, a lot of patience, and a fair bit of luck. This one doesn’t. It’s the kind of recipe that feels almost too easy to be true, but I promise you, it works every single time. Here’s why this Easy No-Churn Watermelon Sorbet is about to become your go-to for Labor Day and beyond:
- No Ice Cream Maker Needed: Seriously, zero special equipment. Just a blender, a bowl, and a freezer.
- Only 4 Ingredients: Watermelon, sugar, lemon juice, and a pinch of salt. That’s it. You probably have most of them already.
- Perfect for Labor Day: It’s light, refreshing, and the ultimate way to end a barbecue without feeling stuffed. Plus, it’s naturally dairy-free and vegan.
- Crowd-Pleaser: Kids love it, adults love it, and it’s always the first thing to disappear from the dessert table. I’ve seen people go back for thirds.
- Unbelievably Refreshing: The texture is smooth and creamy (thanks to a little trick I’ll share), and the flavor is pure, concentrated watermelon. It’s like summer in a bowl.
What makes this sorbet different from the rest is the simple technique of blending the watermelon with a simple syrup and a touch of lemon juice. The lemon juice isn’t just for flavor—it helps balance the sweetness and keeps the sorbet from freezing into a solid block of ice. And the secret to that creamy texture? A little bit of patience and a fork. I’ll explain everything below.
This isn’t just a dessert. It’s the kind of thing that makes you close your eyes after the first spoonful and think, “Wow, I made this.” It’s comfort food for a hot day—light, bright, and absolutely soul-soothing. Perfect for impressing guests without any stress, or for turning a simple Labor Day cookout into something memorable.
What Ingredients You Will Need
This recipe uses simple, wholesome ingredients to deliver bold, refreshing flavor without any fuss. Most of these are pantry staples, and the star of the show is, of course, the watermelon.
- Watermelon (about 6 cups, cubed and seeded): The foundation of the sorbet. Use a ripe, sweet watermelon for the best flavor. I prefer seedless for convenience, but you can use seeded and just pick out the seeds. The deeper the red, the sweeter the sorbet.
- Granulated Sugar (1/2 cup): This helps create a smooth texture and prevents the sorbet from freezing rock-hard. You can adjust the amount slightly depending on the sweetness of your watermelon, but don’t skip it entirely. I’ve tried honey and agave, but granulated sugar gives the cleanest, most neutral sweetness.
- Water (1/4 cup): Used to make a simple syrup. This ensures the sugar dissolves completely before being added to the watermelon, which prevents a grainy texture.
- Fresh Lemon Juice (2 tablespoons): This is a game-changer. It brightens the flavor, balances the sweetness, and helps lower the freezing point of the sorbet, making it scoopable instead of icy. Use fresh-squeezed—the bottled stuff just doesn’t compare.
- Pinch of Salt (about 1/8 teaspoon): Don’t skip this. Salt enhances the sweetness of the watermelon and rounds out the flavor. You won’t taste it, but you’ll notice if it’s missing.
Ingredient Selection Tip: For the best results, look for a watermelon that feels heavy for its size and has a creamy yellow spot on the bottom—that’s where it rested on the ground and ripened in the sun. If you’re using a particularly sweet watermelon, you can reduce the sugar to 1/3 cup. And if you want a more intense watermelon flavor, add a tablespoon of watermelon juice concentrate (if you can find it) or just use a really ripe melon.
Substitution Guidance: For a lower-sugar option, you can use a sugar substitute like allulose or monk fruit sweetener, but the texture may be slightly icier. You can also swap the lemon juice for lime juice for a different twist. And if you’re feeling adventurous, try adding a splash of vodka (about 1 tablespoon) to the mixture—it won’t make the sorbet boozy, but it will help keep it softer in the freezer.
Equipment Needed
You don’t need much for this recipe, which is part of its charm. Here’s what you’ll need:
- Blender or Food Processor: A high-speed blender works best for achieving a smooth puree. If you’re using a food processor, just make sure it’s large enough to hold the watermelon cubes.
- Fine-Mesh Strainer: Optional but highly recommended. Straining the puree removes any remaining seeds and fibrous bits, resulting in a silky-smooth sorbet.
- Large Bowl: For mixing the puree with the simple syrup.
- 9×5-Inch Loaf Pan or Shallow Freezer-Safe Container: A shallow container helps the sorbet freeze faster and more evenly. A metal loaf pan works great because it conducts cold quickly.
- Fork or Spoon: For breaking up the frozen mixture during the freezing process. This is the “no-churn” secret.
- Measuring Cups and Spoons: For accuracy.
Budget-Friendly Options: If you don’t have a high-speed blender, a standard blender or even an immersion blender will work—just blend a little longer. No loaf pan? Use any shallow baking dish or even a large freezer-safe bowl. The key is to have a wide surface area for even freezing.
Personal Note: I’ve made this sorbet in everything from a Vitamix to a $20 blender from a discount store. The texture is always great, but the straining step becomes more important if your blender isn’t super powerful. A little extra effort there goes a long way.
Preparation Method
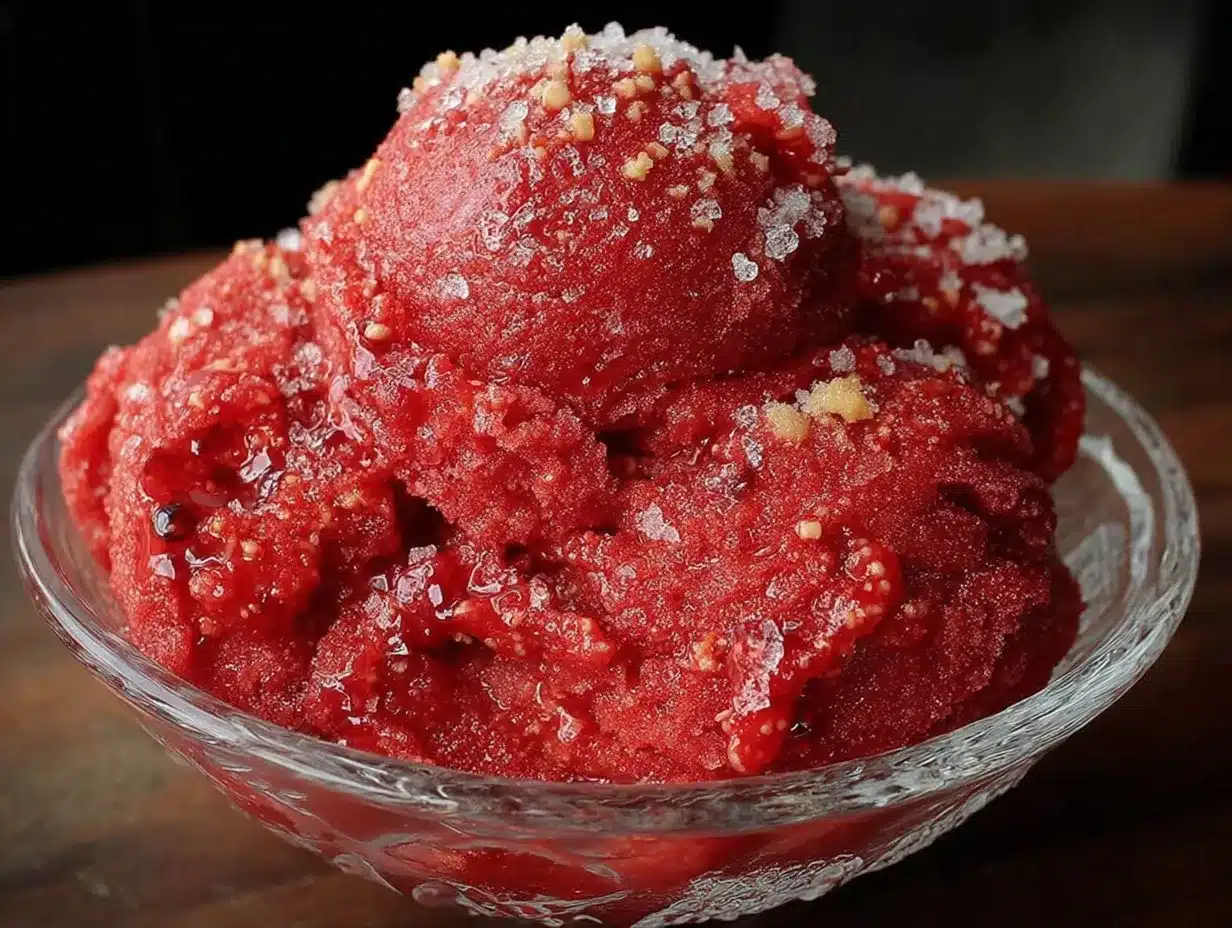
This Easy No-Churn Watermelon Sorbet comes together in just a few simple steps. The hardest part is waiting for it to freeze!
- Make the Simple Syrup: In a small saucepan, combine the 1/2 cup of granulated sugar and 1/4 cup of water. Place over medium heat and stir occasionally until the sugar is completely dissolved and the mixture is clear, about 2-3 minutes. Do not let it boil vigorously. Remove from heat and let the syrup cool completely. (You can speed this up by placing the saucepan in a bowl of ice water.)
- Prepare the Watermelon: Cut your watermelon into roughly 1-inch cubes. You’ll need about 6 cups. Remove any seeds you see (if using seeded watermelon). The cubes don’t need to be perfect—they’re going to get blended anyway.
- Blend the Watermelon: Working in batches if needed, add the watermelon cubes to your blender. Blend on high until completely smooth, about 30-60 seconds. You should have a vibrant pink liquid.
- Strain the Puree (Optional but Recommended): Place a fine-mesh strainer over a large bowl. Pour the watermelon puree through the strainer, using a spatula to press the liquid through. You’ll be left with a small amount of foam and fibrous pulp in the strainer. Discard the pulp. This step makes the sorbet incredibly smooth.
- Combine the Ingredients: To the strained watermelon puree, add the cooled simple syrup, 2 tablespoons of fresh lemon juice, and a pinch of salt. Whisk or stir until everything is well combined. Taste the mixture. It should be very sweet—remember, freezing dulls sweetness, so you want it a bit sweeter than you think is necessary. Adjust with a little more lemon juice or sugar if needed.
- Freeze the Mixture: Pour the mixture into your loaf pan or shallow freezer-safe container. Place it in the freezer, uncovered, for about 1 hour.
- The “No-Churn” Secret: After 1 hour, the edges of the mixture should be starting to freeze. Take a fork and vigorously scrape and stir the mixture, breaking up any ice crystals that have formed. This is your “churning” step. Return the pan to the freezer.
- Repeat the Process: Every 30-45 minutes for the next 2-3 hours, take the pan out and give the mixture a good stir with your fork. You’ll notice it getting thicker and more slushy with each stir. This step is crucial for a creamy, scoopable texture. After 3-4 total hours of freezing (including the stirring time), the sorbet should be firm but not rock-hard.
- Final Freeze: Once the sorbet is thick and smooth, cover the pan with plastic wrap or a lid and let it freeze for at least 4 more hours, or preferably overnight. The longer it freezes, the firmer it will become.
Sensory Cues: When you first blend the watermelon, it should smell incredibly fresh and sweet. The puree will be a beautiful, vibrant pink. As you stir it during freezing, you’ll see it transform from a liquid into a slushy, then into a thick, creamy sorbet. The final texture should be smooth and scoopable, not icy or hard.
Personal Tip for Efficiency: I like to set a timer on my phone for the stirring intervals so I don’t forget. It’s easy to get distracted, and if you forget to stir, you’ll end up with a block of ice. Trust me, I’ve done it.
Cooking Tips & Techniques
After making this sorbet more times than I can count (and a few failures along the way), I’ve learned a few things that make a big difference.
The Biggest Mistake: Not stirring the sorbet during the freezing process. I know it’s tempting to just pour it in the pan and forget about it, but that’s a guaranteed way to get an icy, rock-hard block. The stirring breaks up the ice crystals and incorporates air, which is what gives the sorbet that creamy, scoopable texture. It’s the same principle as churning in an ice cream maker, just done by hand.
My Personal Failure: The first time I made this, I used a watermelon that wasn’t quite ripe. The sorbet was watery and bland. I tried to fix it by adding more sugar, but it just tasted like sweet water. Lesson learned: always taste your watermelon before you blend it. If it’s not sweet and flavorful on its own, your sorbet won’t be either.
Timing and Multitasking: The active prep time is only about 15 minutes. The rest is inactive freezing time. I usually make the simple syrup and blend the watermelon while I’m cleaning up after dinner. Then I just set my timer and stir it while I’m watching TV or doing other things. It’s super low-effort.
Consistency Tips: If your sorbet is too hard after freezing overnight, let it sit on the counter for 5-10 minutes before scooping. If it’s too soft, pop it back in the freezer for another hour. The texture will vary slightly depending on the water content of your watermelon and the temperature of your freezer.
Pro Tip: For an even smoother texture, you can add a tablespoon of corn syrup or a teaspoon of vodka to the mixture. Both help lower the freezing point and prevent large ice crystals from forming. I don’t always do this, but it’s a good trick to know.
Variations & Adaptations
This Easy No-Churn Watermelon Sorbet is incredibly versatile. Here are a few ways to change it up:
- Spicy Watermelon Sorbet: Add a pinch of cayenne pepper or a small, seeded jalapeño to the blender with the watermelon. The heat pairs beautifully with the sweet, cold sorbet. It’s a grown-up twist that’s surprisingly addictive.
- Watermelon Mint Sorbet: Add a handful of fresh mint leaves to the blender. The mint brightens the flavor and adds a refreshing, cooling sensation. I love this version on a hot afternoon.
- Watermelon Basil Sorbet: For a more savory take, add a few fresh basil leaves to the blender. The basil adds an unexpected, almost peppery note that’s fantastic with the watermelon. It’s a great way to use up leftover basil from your garden.
- Boozy Watermelon Sorbet: Add 2-3 tablespoons of vodka, tequila, or white rum to the mixture before freezing. The alcohol won’t freeze solid, so the sorbet will be softer and easier to scoop. Plus, it’s perfect for a Labor Day cocktail-inspired dessert. Just be mindful if serving to kids.
- Vegan and Dairy-Free: This recipe is already naturally vegan and dairy-free, so no changes needed! It’s a great option for anyone with dietary restrictions.
Personal Variation: My favorite variation is the Watermelon Mint. I grow mint in my garden every summer, and there’s nothing better than combining it with fresh watermelon. The first time I made it, I added way too much mint and it tasted like toothpaste. Now I use about 10-12 leaves, and it’s perfect. A little goes a long way.
Serving & Storage Suggestions
This sorbet is best served cold, straight from the freezer. Here’s how to make it shine:
- Serving Temperature: Let the sorbet sit at room temperature for about 5 minutes before scooping. This softens it just enough for perfect, smooth scoops.
- Presentation: Scoop into chilled bowls or glasses. Garnish with a small sprig of fresh mint, a thin slice of lime, or a tiny wedge of fresh watermelon. For a fun Labor Day presentation, serve it in hollowed-out watermelon rind “bowls” or in small mason jars.
- Complementary Dishes: This sorbet is a fantastic palate cleanser between courses or a light dessert after a heavy meal. It pairs beautifully with creamy caramel apple cream cheese dip for a sweet and tangy contrast, or alongside a slice of fresh peach upside-down cake for a double-fruit dessert. For a savory pairing, try it after a meal of crispy smash burger sliders—the cold, sweet sorbet is the perfect finish.
- Storage: Store the sorbet in an airtight container in the freezer for up to 2 weeks. Press a piece of plastic wrap directly onto the surface of the sorbet before sealing the container to prevent ice crystals from forming.
- Reheating (Softening): If the sorbet becomes too hard, let it sit at room temperature for 10-15 minutes, then give it a good stir with a fork to break it up before serving.
- Flavor Development: The sorbet is best within the first 3-4 days of freezing. After that, the flavor may start to fade slightly, and the texture can become a bit icier. But honestly, it rarely lasts that long in my house.
Nutritional Information & Benefits
This sorbet is a lighter dessert option, especially compared to ice cream or heavy cakes. Here’s a rough estimate per serving (about 1/2 cup):
| Nutrient | Amount per Serving |
|---|---|
| Calories | ~120-150 |
| Total Fat | 0g |
| Carbohydrates | ~30-35g |
| Sugar | ~25-30g |
| Fiber | ~1g |
| Protein | ~1g |
| Vitamin C | ~20% of Daily Value |
| Vitamin A | ~10% of Daily Value |
Easy No-Churn Watermelon Sorbet: Best Labor Day Dessert
This Easy No-Churn Watermelon Sorbet is a refreshing, dairy-free dessert made with just 4 ingredients and no ice cream maker. It’s the perfect light and sweet treat for Labor Day or any hot summer day.
- Prep Time: 15 minutes
- Cook Time: 5 minutes
- Total Time: 4 hours 20 minutes (includes freezing time)
- Yield: 6 servings 1x
- Category: Dessert
- Cuisine: American
Ingredients
- 6 cups cubed and seeded watermelon (about 1 medium watermelon)
- 1/2 cup granulated sugar
- 1/4 cup water
- 2 tablespoons fresh lemon juice
- 1/8 teaspoon salt
Instructions
- Make the simple syrup: In a small saucepan, combine the sugar and water. Place over medium heat and stir occasionally until the sugar is completely dissolved and the mixture is clear, about 2-3 minutes. Do not let it boil vigorously. Remove from heat and let the syrup cool completely.
- Prepare the watermelon: Cut the watermelon into roughly 1-inch cubes. Remove any seeds if using seeded watermelon.
- Blend the watermelon: Working in batches if needed, add the watermelon cubes to a blender. Blend on high until completely smooth, about 30-60 seconds.
- Strain the puree (optional but recommended): Place a fine-mesh strainer over a large bowl. Pour the watermelon puree through the strainer, using a spatula to press the liquid through. Discard the pulp.
- Combine the ingredients: To the strained watermelon puree, add the cooled simple syrup, lemon juice, and salt. Whisk or stir until well combined. Taste and adjust sweetness or lemon juice if needed.
- Freeze the mixture: Pour the mixture into a 9×5-inch loaf pan or shallow freezer-safe container. Place it in the freezer, uncovered, for about 1 hour.
- The ‘no-churn’ secret: After 1 hour, the edges should be starting to freeze. Take a fork and vigorously scrape and stir the mixture, breaking up any ice crystals. Return the pan to the freezer.
- Repeat the process: Every 30-45 minutes for the next 2-3 hours, take the pan out and give the mixture a good stir with a fork. The mixture will get thicker and more slushy with each stir.
- Final freeze: Once the sorbet is thick and smooth, cover the pan with plastic wrap or a lid and let it freeze for at least 4 more hours, or preferably overnight.
Notes
For a smoother texture, you can add 1 tablespoon of corn syrup or 1 teaspoon of vodka to the mixture before freezing. If the sorbet becomes too hard after freezing, let it sit at room temperature for 5-10 minutes before scooping. For best results, use a ripe, sweet watermelon.
Nutrition
- Serving Size: 1/2 cup
- Calories: 135
- Sugar: 28
- Sodium: 75
- Carbohydrates: 33
- Fiber: 1
- Protein: 1
Keywords: watermelon sorbet, no-churn sorbet, easy sorbet, dairy-free dessert, vegan dessert, Labor Day dessert, summer dessert


