Pulled the last block of cream cheese from the fridge, staring at a pile of bell peppers on the counter, when I realized I had exactly zero dinner plans and a family that was about to start circling like hungry sharks. It was one of those nights where takeout felt too heavy and cooking felt too complicated — you know the kind. I had leftover rotisserie chicken from earlier in the week, a bottle of buffalo sauce that was dangerously close to its expiration date, and that block of cream cheese begging to be used.
So I just started throwing things together. Shredded the chicken, softened the cream cheese in the microwave (honestly, who has time to wait for room temperature?), dumped in some buffalo sauce, and before I knew it, I was scooping this gorgeous, creamy, spicy filling into hollowed-out bell peppers. Twenty minutes later, we were sitting down to dinner and my husband actually paused mid-bite to ask, “Wait, what did you put in these?”
That’s how these creamy buffalo chicken stuffed bell peppers were born — not from a fancy test kitchen or a carefully planned recipe development session, but from the chaotic, beautiful mess of a Tuesday night when you just need to feed your people something good. And let me tell you, they’ve become a regular in our dinner rotation ever since.
These peppers are everything you want from a meal — they’re hearty without being heavy, spicy without being overwhelming, and they come together fast enough that you won’t feel like you’ve spent your whole evening in the kitchen. Plus, they’re naturally low-carb and keto-friendly, which means you can enjoy that creamy, buffalo flavor without any guilt.
Why You’ll Love This Recipe
I’ve tested this recipe more times than I can count — for busy weeknights, for meal prep Sundays, even for a small gathering where I needed something that looked impressive but took minimal effort. Every single time, these creamy buffalo chicken stuffed bell peppers deliver.
- Quick & Easy : From start to finish, you’re looking at about 30 minutes of active time. The oven does most of the work, and you just have to assemble everything. Perfect for those nights when you walk through the door at 5:45 and need dinner on the table by 6:15.
- Simple Ingredients : Cream cheese, chicken, buffalo sauce, cheese, and bell peppers. That’s basically it. No weird ingredients you’ll use once and never touch again.
- Perfect for Meal Prep : These reheat beautifully, which makes them an absolute lifesaver for lunch prep. Make a batch on Sunday, and you’ve got lunches sorted for the next three days.
- Keto & Low-Carb Friendly : With minimal carbs from the bell peppers and plenty of fat from the cream cheese and cheddar, these fit perfectly into a keto lifestyle. You won’t even miss the rice or pasta.
- Crowd-Pleaser : I’ve served these to picky eaters, to spice-averse friends, and to buffalo sauce fanatics — everyone loves them. The cream cheese tames the heat just enough that it’s flavorful without being punishing.
What really sets this recipe apart is the texture. The cream cheese creates this incredibly luscious, velvety filling that coats every shred of chicken. It’s not dry, not crumbly, not boring — it’s the kind of filling you want to eat straight from the bowl with a spoon (and yes, I may have done that more than once).
This is the recipe I turn to when I want something that feels indulgent but actually fits into my goals. It’s comfort food that works for you, not against you.
What Ingredients You Will Need
This recipe uses simple, wholesome ingredients that come together to create something truly special. Most of these are pantry staples or regular fridge items, so you probably already have everything you need.
- Bell peppers (4 large) — Any color works, but I prefer red, orange, or yellow for their sweetness. Green peppers are more bitter, which can clash with the buffalo sauce. Look for peppers that are squat and wide rather than tall and narrow — they’ll hold more filling and stand up better in the baking dish.
- Cooked chicken (3 cups, shredded) — Rotisserie chicken is my go-to here because it’s already seasoned and perfectly cooked. But you can use leftover grilled chicken, poached chicken breasts, or even canned chicken in a pinch. Just make sure it’s well-drained if using canned.
- Cream cheese (8 ounces, softened) — Full-fat cream cheese gives the best texture and flavor. I’ve tried this with reduced-fat cream cheese, and it works, but the filling isn’t as rich and luxurious. Let it sit out for about 30 minutes before you start, or microwave it for 15-20 seconds if you’re in a rush like me.
- Buffalo sauce (½ cup) — Frank’s RedHot is my personal favorite for that classic buffalo wing flavor. You can use any brand you like, just be aware that different brands have different heat levels. Start with less if you’re sensitive to spice.
- Shredded cheddar cheese (1 cup) — Sharp cheddar adds a nice tang that complements the buffalo sauce beautifully. You can use a Mexican blend, Monterey Jack, or even pepper jack for extra heat. Freshly shredded melts better than pre-shredded (which has anti-caking agents), but pre-shredded works in a pinch.
- Ranch dressing mix (1 tablespoon) — This is my secret ingredient. A little ranch seasoning powder adds that classic buffalo-ranch flavor without needing to buy a bottle of dressing. You can use a packet of dry ranch mix or make your own with dried dill, parsley, garlic powder, and onion powder.
- Green onions (3-4, sliced) — For garnish and a fresh, mild onion flavor that cuts through the richness.
- Salt and black pepper — To taste. Go easy on the salt since the buffalo sauce and cheese both add saltiness.
Optional add-ins: Crumbled blue cheese for that authentic buffalo wing experience, cooked bacon bits for extra smokiness, or a tablespoon of hot honey if you want a sweet-heat combo.
Equipment Needed
Nothing fancy here — you probably have everything in your kitchen already.
- Large mixing bowl — For combining the filling. Any medium-to-large bowl will work.
- Baking dish (9×13 inch) — A standard casserole dish works perfectly. You can also use a smaller dish if you’re making fewer peppers, just make sure they fit snugly so they don’t tip over.
- Sharp knife — For cutting the tops off the peppers and removing the seeds. A serrated knife actually works really well here.
- Cutting board — Preferably one with a juice groove to catch any pepper juices.
- Measuring cups and spoons — For the buffalo sauce, cream cheese, and seasonings.
- Small spoon or spatula — For scooping the filling into the peppers.
- Fork or two forks — For shredding the chicken.
If you don’t have a 9×13 baking dish, you can use a cast-iron skillet or even a rimmed baking sheet. Just make sure the peppers are stable and won’t roll around. I’ve also made these in a muffin tin before — the peppers fit perfectly in the cups and stand up straight every time!
Preparation Method
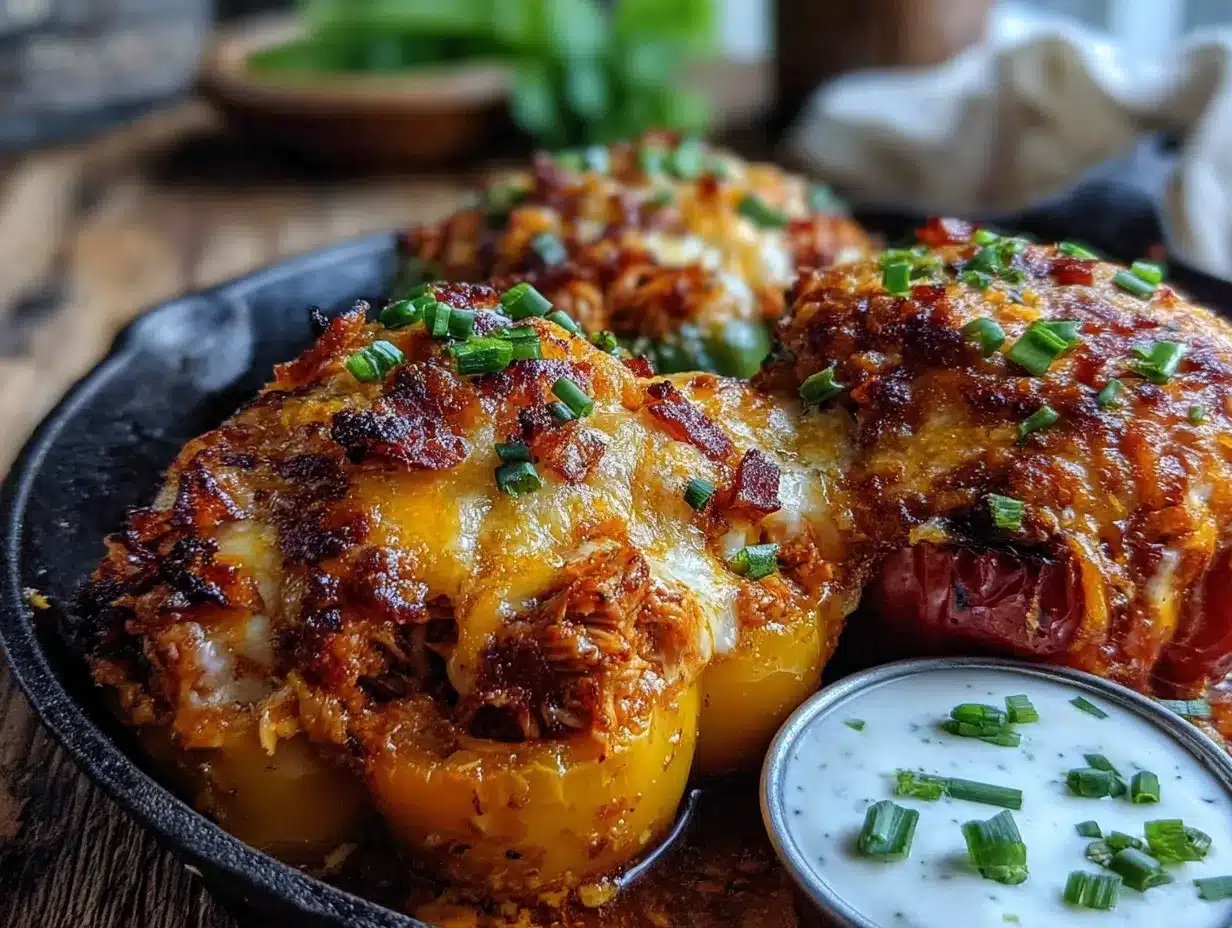
Let me walk you through this step by step. Trust me, it’s easier than you think.
- Preheat your oven to 375°F (190°C). This gives it time to come to temperature while you prep everything. If your oven runs hot, you can do 350°F — just add a few extra minutes to the cooking time.
- Prepare the bell peppers. Cut the tops off each pepper about ½ inch from the stem. Remove the seeds and white membranes from inside. If the peppers don’t sit flat, trim a tiny slice from the bottom — just enough so they stand up straight without creating a hole. Place them upright in your baking dish.
- Make the filling. In your large bowl, combine the softened cream cheese, buffalo sauce, ranch seasoning, and half of the shredded cheddar. Mix until everything is smooth and well combined. Don’t worry if it looks a little lumpy at first — keep stirring and it’ll come together.
- Add the chicken. Fold in the shredded chicken until it’s completely coated in that creamy, spicy mixture. Taste it here and add salt and pepper if needed. The filling should be thick and scoopable, not runny. If it seems too thick, add a tablespoon of milk or chicken broth.
- Stuff the peppers. Divide the filling evenly among the four peppers. Pack it in gently but firmly — you want them full without being so tight that they burst. Mound the filling slightly on top if there’s extra.
- Top with cheese. Sprinkle the remaining shredded cheddar over the tops of each pepper. Be generous here — that golden, bubbly cheese crust is what makes these irresistible.
- Bake. Place the dish in the preheated oven and bake for 20-25 minutes. The peppers should be tender but still hold their shape, and the cheese should be melted and starting to brown in spots. If you want extra color on top, switch the oven to broil for the last 2 minutes — just watch closely so it doesn’t burn.
- Rest and garnish. Let the peppers sit for 5 minutes before serving. This lets the filling set up a bit so it doesn’t spill everywhere when you cut into them. Sprinkle with sliced green onions right before serving.
Visual cues: The peppers should look slightly wrinkled and softened but still vibrant in color. When you poke one with a fork, it should slide in easily but the pepper shouldn’t collapse. The cheese should be fully melted with golden-brown spots — that’s where the flavor lives.
Pro tip: If your peppers are particularly large or thick-walled, you might need an extra 5 minutes of baking time. If they’re thin-walled and delicate, check them at 18 minutes. Every pepper is a little different, just like every oven.
Cooking Tips & Techniques
I’ve made these creamy buffalo chicken stuffed bell peppers at least a dozen times now, and I’ve learned a few things the hard way so you don’t have to.
Don’t overcook the peppers. The first time I made these, I left them in the oven for 35 minutes because I got distracted folding laundry. The peppers came out so soft they practically collapsed when I tried to pick them up. You want them tender but with some structural integrity — think al dente pasta, not mushy vegetables. Twenty to twenty-five minutes at 375°F is the sweet spot.
Room temperature cream cheese is non-negotiable. I know, I know, you’re busy and you forgot to take it out of the fridge. But cold cream cheese will leave lumpy pockets in your filling, and nobody wants a cold, chalky surprise in their otherwise perfect stuffed pepper. If you’re in a rush, cut the cream cheese into small cubes and microwave it in 10-second bursts, stirring between each, until it’s soft but not melted.
Season your chicken. If you’re using plain poached or grilled chicken, don’t forget to season it. A pinch of garlic powder, onion powder, and a little salt goes a long way. Rotisserie chicken is already seasoned, so you can skip this step if you go that route.
Make extra filling. Seriously. Double the filling recipe and use the extra for lettuce wraps the next day, or stuff it into mushrooms for a quick appetizer. The filling keeps well in the fridge for up to 4 days, and it’s amazing on a salad with some blue cheese dressing.
Watch your heat level. Buffalo sauces vary wildly in spiciness. Frank’s is pretty mild, but some boutique brands will light you up. If you’re serving kids or spice-sensitive guests, start with ⅓ cup of buffalo sauce and taste before adding more. You can always add heat, but you can’t take it away.
Variations & Adaptations
One of the things I love most about this recipe is how flexible it is. Here are some ways I’ve adapted it over the years.
Keto-Friendly Version : This recipe is already naturally low-carb, but if you want to reduce the carbs even further, use mini sweet peppers instead of full-sized bell peppers. You’ll get more peppers per serving with even fewer carbs, and they make perfect little appetizers for game day. Just reduce the baking time to 12-15 minutes since they’re smaller.
Extra Spicy Version : For those of us who like to feel the burn, add a tablespoon of sriracha or your favorite hot sauce to the cream cheese mixture. You can also mix in some diced jalapeños or use pepper jack cheese instead of cheddar. I made this version for a Super Bowl party once, and it was gone in 20 minutes.
Dairy-Free Adaptation : Use dairy-free cream cheese (Kite Hill makes a great one) and your favorite vegan shredded cheese. The texture will be slightly less creamy, but the flavor is still fantastic. I’ve tested this with my dairy-sensitive sister-in-law, and she couldn’t tell the difference.
Chicken Swap : Don’t have chicken? Use shredded pork, ground turkey, or even canned tuna (drained well). I once made these with leftover Thanksgiving turkey, and they were honestly better than the original. The smoky turkey flavor paired perfectly with the buffalo sauce.
Stovetop Method : If you don’t want to turn on the oven, you can cook these on the stovetop. Place the stuffed peppers in a deep skillet with about ½ inch of chicken broth, cover, and simmer for 20-25 minutes. The broth keeps everything moist, and the peppers steam to perfection. Top with cheese, cover for another 2 minutes to melt, and you’re done.
Air Fryer Option : For crispy edges and faster cooking, air fry at 350°F for 12-15 minutes. The tops get beautifully browned and slightly crispy, which adds a nice textural contrast to the creamy filling.
Serving & Storage Suggestions
These creamy buffalo chicken stuffed bell peppers are incredibly versatile when it comes to serving.
Serving temperature: Serve them hot, right out of the oven. The cheese should be stretchy and the filling should be piping hot. Let them rest for exactly 5 minutes — any longer and the filling starts to set up and get less creamy.
What to serve with them: A simple side salad with ranch or blue cheese dressing is the perfect companion. The cool, creamy dressing balances the spicy buffalo filling beautifully. You can also serve them with cauliflower rice, roasted broccoli, or even a side of celery and carrot sticks for that classic buffalo wing experience. If you’re not watching carbs, a crusty piece of bread to soak up any filling that escapes is never a bad idea.
Storage: These keep beautifully in the refrigerator for up to 4 days. Store them in an airtight container, and they’ll stay fresh and delicious. The flavors actually meld together even more overnight, so leftovers might taste even better than the original.
Freezing: You can freeze these either before or after baking. To freeze before baking, assemble the peppers completely but don’t bake them. Wrap each pepper tightly in plastic wrap, then place in a freezer bag. They’ll keep for up to 3 months. When you’re ready to cook, thaw in the refrigerator overnight and bake as directed, adding 5-10 minutes since you’re starting from cold.
Reheating: The best way to reheat is in the oven at 350°F for 10-15 minutes. The microwave works in a pinch (2-3 minutes), but the peppers will be softer and the cheese won’t be as melty. If you’re reheating from frozen, bake at 350°F for 25-30 minutes, covered with foil for the first 15 minutes.
Flavor development: These peppers actually get better after a day in the fridge. The buffalo sauce and ranch seasoning have time to really penetrate the chicken and peppers. I’ve been known to make a double batch just so I have leftovers for lunch the next day.
Nutritional Information & Benefits
Here’s the approximate nutritional breakdown for one stuffed pepper (based on using full-fat cream cheese and cheddar):
- Calories: 420-450
- Protein: 32g
- Fat: 28g
- Carbohydrates: 8g (net carbs: 6g)
- Fiber: 2g
- Sugar: 4g
These numbers make this recipe an excellent choice for anyone following a keto or low-carb lifestyle. The high protein content keeps you full and satisfied, while the healthy fats from the cream cheese and cheddar provide steady energy without the blood sugar spikes you’d get from carb-heavy meals.
Health benefits of key ingredients:
- Bell peppers are packed with vitamin C — actually more than oranges gram for gram. They’re also rich in vitamin A, vitamin B6, and antioxidants that support eye health and immune function.
- Chicken provides lean protein that supports muscle repair and keeps you feeling full between meals.
- Cream cheese contains calcium and vitamin A, plus it adds that satisfying richness that keeps you from feeling deprived on a low-carb diet.
Dietary considerations: This recipe is naturally gluten-free, low-carb, and keto-friendly. It contains dairy (cream cheese and cheddar) and is not suitable for vegan or dairy-free diets without modifications. If you’re watching sodium, look for low-sodium buffalo sauce and go easy on the added salt.
I love that this recipe lets me enjoy something that tastes indulgent while still aligning with my health goals. It’s the kind of meal that makes you feel good going down and good afterward — no guilt, no regret, just satisfaction.
Conclusion
These creamy buffalo chicken stuffed bell peppers have become a staple in my kitchen for good reason. They’re quick enough for a chaotic Tuesday, impressive enough for company, and flexible enough to adapt to whatever you have on hand. The combination of tender peppers, spicy-savory filling, and melted cheese is pure comfort food magic.
I hope you give these a try and make them your own. Maybe you’ll add extra spice, or swap in turkey, or top them with blue cheese crumbles — that’s the beauty of a recipe like this. It’s a starting point, not a rulebook.
When you make them, I’d love to hear how they turned out! Drop a comment below and let me know what variations you tried, or tag me in your photos if you share them online. And if you’re looking for more easy, delicious dinners, check out this creamy marry me chicken tortellini or these crispy smash burger sliders — they’re both weeknight heroes in their own right.
Until next time, happy cooking — and don’t forget to taste the filling before you stuff the peppers. You deserve it.
Frequently Asked Questions
Can I use ground chicken instead of shredded chicken?
Absolutely! Brown 1 pound of ground chicken in a skillet, drain any excess fat, and mix it into the cream cheese mixture. The texture will be different — more crumbly than shredded — but the flavor is just as good. Just make sure to season the ground chicken well with salt, pepper, and garlic powder while it cooks.
How do I keep the peppers from getting too soft?
The key is not to overcook them. Stick to the 20-25 minute baking time at 375°F, and check them early if your peppers are on the smaller side. You can also blanch the peppers in boiling water for 2 minutes before stuffing them — this softens them slightly before baking, so they need less time in the oven.
Can I make this recipe ahead of time?
Yes! You can assemble the peppers up to 24 hours in advance and keep them covered in the refrigerator. When you’re ready to bake, just pop them in the oven and add 5-10 minutes to the baking time since you’re starting from cold. This makes them perfect for meal prep or for when you’re hosting and want to minimize day-of work.
What if I don’t have ranch seasoning?
No problem! You can leave it out, or make your own with a simple mix of dried dill, dried parsley, garlic powder, onion powder, and a pinch of black pepper. Or, just use 2 tablespoons of bottled ranch dressing instead — it’ll add a little extra moisture to the filling, which isn’t a bad thing.
Can I use different colored peppers?
Absolutely! While I prefer red, orange, or yellow peppers for their sweetness, you can use any color you like. Green peppers will give a more savory, slightly bitter flavor that some people really enjoy. Just keep in mind that green peppers are typically firmer and might need an extra 2-3 minutes of baking time.
PrintCreamy Buffalo Chicken Stuffed Bell Peppers – Easy Keto Dinner

These creamy buffalo chicken stuffed bell peppers are a quick, easy, and keto-friendly dinner made with simple ingredients like cream cheese, shredded chicken, buffalo sauce, and bell peppers. Perfect for busy weeknights or meal prep, they deliver a luscious, spicy-savory filling that everyone loves.
- Prep Time: 15 minutes
- Cook Time: 25 minutes
- Total Time: 40 minutes
- Yield: 4 servings 1x
- Category: Main Course
- Cuisine: American
Ingredients
- 4 large bell peppers (red, orange, or yellow)
- 3 cups cooked chicken, shredded (e.g., rotisserie chicken)
- 8 ounces cream cheese, softened
- ½ cup buffalo sauce (e.g., Frank’s RedHot)
- 1 cup shredded cheddar cheese
- 1 tablespoon ranch dressing mix
- 3–4 green onions, sliced (for garnish)
- Salt and black pepper to taste
Instructions
- Preheat oven to 375°F (190°C).
- Prepare the bell peppers: Cut tops off about ½ inch from stem, remove seeds and membranes. Trim a tiny slice from bottom if needed so they stand upright. Place upright in a 9×13-inch baking dish.
- Make the filling: In a large bowl, combine softened cream cheese, buffalo sauce, ranch seasoning, and half of the shredded cheddar. Mix until smooth.
- Add the chicken: Fold in shredded chicken until completely coated. Season with salt and pepper to taste. If too thick, add a tablespoon of milk or chicken broth.
- Stuff the peppers: Divide filling evenly among the four peppers, packing gently but firmly. Mound slightly on top if extra.
- Top with cheese: Sprinkle remaining shredded cheddar over the tops.
- Bake: Place dish in oven and bake for 20-25 minutes, until peppers are tender and cheese is melted and starting to brown. For extra color, broil last 2 minutes.
- Rest and garnish: Let peppers sit for 5 minutes before serving. Sprinkle with sliced green onions.
Notes
For best texture, use room temperature cream cheese. If peppers are large, add 5 minutes baking time. For extra heat, add sriracha or diced jalapeños. Leftovers keep in fridge up to 4 days; reheat in oven at 350°F for 10-15 minutes.
Nutrition
- Serving Size: 1 stuffed pepper
- Calories: 435
- Sugar: 4
- Sodium: 980
- Fat: 28
- Saturated Fat: 14
- Carbohydrates: 8
- Fiber: 2
- Protein: 32
Keywords: buffalo chicken stuffed peppers, keto dinner, low-carb stuffed peppers, creamy buffalo chicken, easy weeknight dinner, meal prep


