My partner took one bite of these Crispy Sheet Pan Cheeseburger Sliders and said, “You’ve outdone yourself this time,” without me even asking for feedback. I was busy setting up the game day spread, distracted by the usual chaos, but that simple compliment hit differently. The sliders were crisp, juicy, and perfectly melty, and watching him go back for seconds — and then thirds — was the quiet proof I needed that this recipe works like a charm. Honestly, it was one of those moments where you realize you’ve created something that turns a casual snack into a mini celebration on a plate.
It all started when I wanted a fuss-free, crowd-friendly snack that didn’t involve standing over the stove for hours or flipping patties one by one. There’s something oddly satisfying about a sheet pan meal, right? You throw everything on one tray, pop it in the oven, and let the magic happen. The smell of seared beef mingling with melted cheddar and toasted buns filled the kitchen — a little salty, a little smoky, and so inviting it pulled everyone in from the living room. The crispy edges of the sliders? Just the kind of texture that makes you close your eyes and savor that first bite.
Watching my partner’s reaction reminded me why I keep coming back to these sliders whenever there’s a game day party or casual get-together. It’s not just comfort food; it’s that perfect balance of crispy and tender, simple yet satisfying. And the best part? You can make a big batch fast and still feel like you nailed it. That easy crowd-pleaser vibe is honestly hard to beat.
So yeah, while I was busy focusing on the game, the sliders were quietly stealing the show — and that’s the kind of recipe you want in your back pocket. It’s the kind of food that’s unpretentious but memorable, the kind that makes you smile without saying much. And that’s why this Crispy Sheet Pan Cheeseburger Sliders recipe has stuck around in my rotation — it’s reliably good in the most delicious way.
Why You’ll Love This Recipe
After testing this Crispy Sheet Pan Cheeseburger Sliders recipe several times (because, you know, quality control is important), I can honestly say it’s a game day winner for many reasons. It’s the kind of recipe that feels effortless but delivers on all fronts — crispy, juicy, cheesy, and perfectly portioned for sharing. Here’s why it stands out:
- Quick & Easy: Ready in under 30 minutes, making it perfect for last-minute game day parties or sudden snack cravings.
- Simple Ingredients: You probably already have most of these in your kitchen — no specialty stores required.
- Perfect for Game Day: These sliders are made for crowd-pleasing, finger-friendly snacking while cheering on your team.
- Crowd-Pleaser: Kids and adults alike keep coming back for more, which is always a good sign.
- Unbelievably Delicious: The combination of crispy edges on the buns and juicy beef topped with melted cheddar is next-level comfort food.
What makes this recipe different is the sheet pan technique that crisps up the bottom of the buns while cooking the patties right on top — no soggy bottoms here! I also add a special seasoning blend that’s just the right balance of savory and slightly smoky, which I developed after a few rounds of fine-tuning. Plus, layering the cheese on the patties before baking helps it melt perfectly without getting rubbery.
This recipe isn’t just a quick fix; it’s the kind of game day snack that makes you pause and appreciate the simple joy of a well-made cheeseburger in mini form. It’s comfort food reimagined for a crowd, and honestly, it’s the one dish I’m always excited to bring to any party. If you’re into easy, tasty dishes like these sliders, you might also enjoy the cozy BBQ pulled pork sliders that I make for other get-togethers!
What Ingredients You Will Need
This recipe uses straightforward, wholesome ingredients to deliver bold flavor and satisfying texture without fuss. Most of these are pantry staples or common fridge finds, which means you don’t have to make a special trip to the store. Here’s what you’ll need, grouped by function:
- For the Sliders:
- 1 ½ pounds (680g) ground beef (80/20 blend recommended for juiciness)
- 1 teaspoon garlic powder (adds subtle depth)
- 1 teaspoon smoked paprika (for a hint of smokiness)
- 1 teaspoon onion powder
- Salt and freshly ground black pepper, to taste
- 12 slider buns (soft, preferably brioche or potato buns for that tender crumb)
- Butter, melted (about 3 tablespoons for toasting buns)
- 12 slices sharp cheddar cheese (feel free to swap with pepper jack for a spicy twist)
- For the Toppings:
- Dill pickle slices (for that classic cheeseburger snap)
- Fresh lettuce leaves, washed and dried
- Thinly sliced red onion
- Ketchup and mustard, for serving
I usually pick a good-quality ground beef from trusted local sources, and I find that using brioche buns really adds a touch of richness without overpowering the beef. If you’re gluten-free, swapping the buns for gluten-free slider rolls works well, though I recommend toasting them lightly to keep them from getting too crumbly. For a dairy-free version, use vegan cheese slices or simply omit the cheese altogether — the sliders still taste amazing.
If you want a seasonal twist, try adding some sautéed mushrooms or caramelized onions on top — they complement the savory beef perfectly. For a fresher bite, swap traditional iceberg lettuce with peppery arugula or baby spinach.
Equipment Needed
The beauty of this recipe is in its simplicity, and you don’t need fancy gadgets to pull it off. Here’s what you’ll need:
- Sheet Pan: A rimmed baking sheet (about 18×13 inches) works best. I prefer non-stick or lined with parchment paper for easy cleanup.
- Mixing Bowl: To combine the beef and seasonings evenly.
- Spatula or Spoon: For mixing and spreading the beef mixture on the buns.
- Pastry Brush: Ideal for brushing melted butter on the buns, but a spoon works fine too.
- Oven Mitts: Safety first when handling that hot sheet pan!
If you don’t have a rimmed sheet pan, a large roasting pan or even a pizza stone with an oven-safe tray can work as alternatives. Just be sure to keep an eye on cooking times, as heat distribution might vary. I once tried using a baking dish, but the edges didn’t crisp up as well — so sticking to a flat sheet pan is my recommendation.
Preparation Method
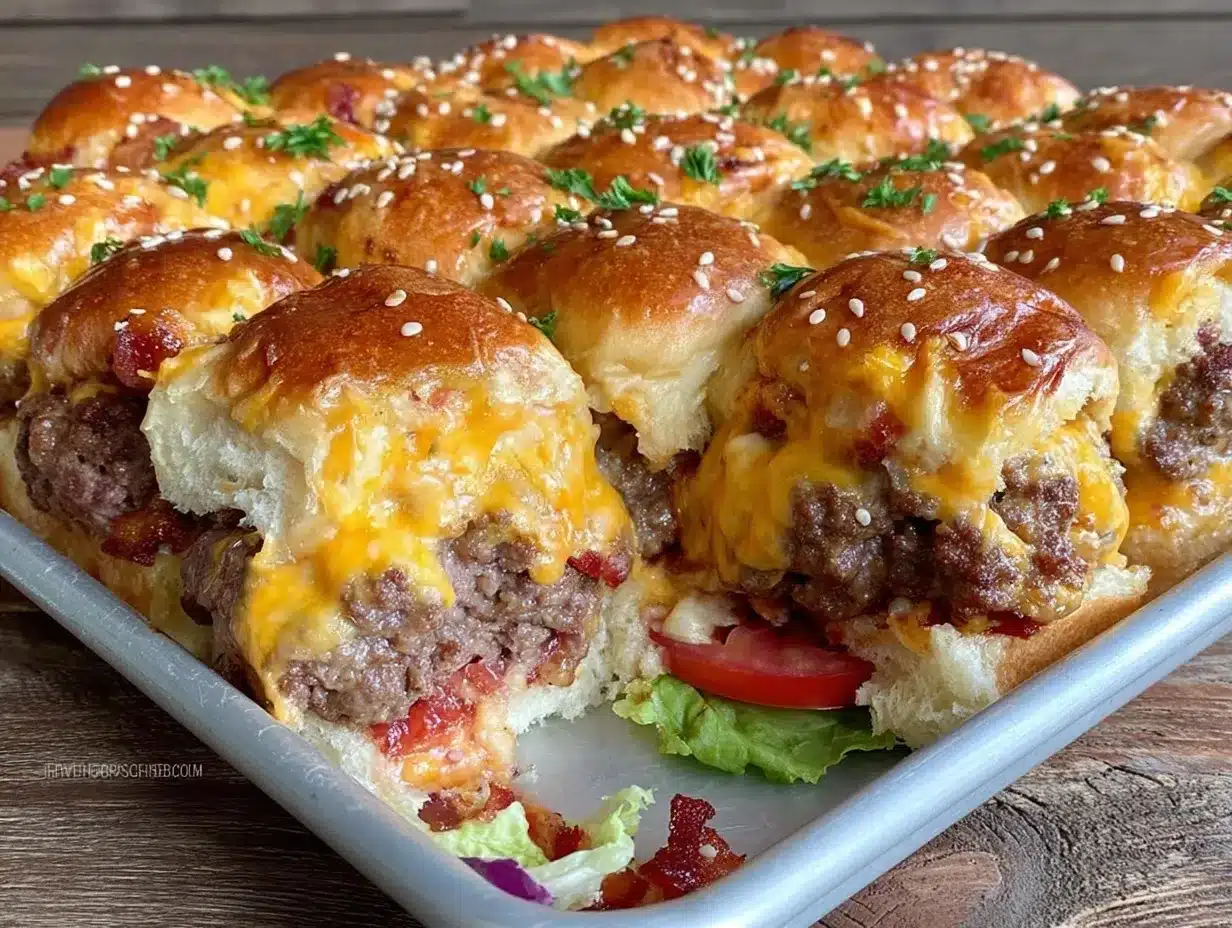
- Preheat your oven to 400°F (200°C). This temperature crisps the buns perfectly while cooking the beef thoroughly.
- Mix the beef and seasonings: In a large bowl, combine 1 ½ pounds (680g) ground beef with garlic powder, smoked paprika, onion powder, salt, and pepper. Mix gently — you don’t want to overwork the meat or it’ll get tough.
- Prepare the buns: Slice the slider buns in half horizontally. Place the bottom halves on your sheet pan, spaced evenly.
- Form the patties: Divide the seasoned beef evenly into 12 portions. Shape each into small patties slightly larger than the bun bottoms (they’ll shrink as they cook). Place each patty directly on top of the buns on the sheet pan. This method lets the beef juices soak into the bread, adding flavor and moisture.
- Add cheese: Place a slice of cheddar cheese on each patty to melt while baking.
- Toast the tops: Brush the top halves of the buns with melted butter and arrange them on the sheet pan, cut side up, around the patties. This helps the buns get golden and crispy.
- Bake: Pop the sheet pan in the oven for 15-18 minutes. The beef should reach an internal temperature of 160°F (71°C), and the cheese will be gooey and melted. The buns will have crispy edges but stay soft inside.
- Assemble the sliders: Remove the sheet pan from the oven. Add dill pickle slices, lettuce, and red onion on the bottom buns. Top with the buttered tops of the buns.
- Serve immediately: Offer ketchup and mustard on the side or drizzle lightly over the sliders.
Pro tip: Keep an eye on the buns in the last few minutes of baking. If they’re browning too fast, tent the sheet pan loosely with foil. Also, if you want extra crispiness on the patties, broil for the last 1-2 minutes but watch closely so nothing burns.
Cooking Tips & Techniques
Getting that perfect crispy bottom on these cheeseburger sliders is all about the sheet pan setup and timing. Here are some lessons I learned the hard way:
- Don’t overmix the beef: It’s tempting to combine everything thoroughly, but overworking your meat leads to dense, dry patties. Mix just enough to evenly distribute spices.
- Use a rimmed sheet pan: It catches all those delicious juices without making a mess in your oven.
- Butter the buns generously: This step is key for that toasted, golden crust on top. I once skipped it, and the buns came out soggy and sad.
- Arrange buns and patties carefully: Leaving space between the buns helps air circulate, giving you that crispy edge on all sides.
- Don’t crowd the pan: If you’re making more than 12 sliders, use two sheet pans or bake in batches for even cooking.
- Multitask efficiently: While sliders bake, you can prep quick sides like a fresh salad or make a batch of creamy coleslaw to balance out the richness.
Honestly, the first time I tried these sliders, I underestimated the baking time, and the cheese was barely melted. Now, I set my timer for 18 minutes and check with a meat thermometer to make sure everything is perfect.
Variations & Adaptations
One of the things I love about this recipe is how easy it is to make it your own. Here are some variations I’ve tried or recommend:
- Spicy Kick: Add a pinch of cayenne or chili powder to the beef mixture and swap cheddar for pepper jack cheese. Serve with spicy mayo for an extra punch.
- Vegetarian Version: Use plant-based ground meat alternatives and dairy-free cheese slices. Toast the buns with olive oil instead of butter for a vegan-friendly option.
- Different Cheeses: Swap cheddar for Swiss, provolone, or even blue cheese crumbles for variety. Each brings a unique twist to the classic slider.
- Seasonal Toppings: Try caramelized onions, sautéed mushrooms, or even grilled pineapple slices for a hint of sweetness.
- Cooking Method: If you don’t want to use the oven, you can cook patties on a grill pan and then assemble the sliders separately with toasted buns.
Personally, I once made these sliders with a smoky chipotle seasoning blend and added pickled jalapeños on top. They disappeared fast! For a lighter touch, I sometimes swap the slider buns for lettuce wraps, especially when I’m craving something less carb-heavy.
Serving & Storage Suggestions
These sliders are best served warm, straight from the oven, when the cheese is melty and the buns are still crisp around the edges. I usually arrange them on a large platter with toothpicks for easy grabbing during game day.
They pair wonderfully with classic sides like crispy fries, tangy coleslaw, or even a fresh cucumber salad like my quick tangy pickled cucumber and red onion salad recipe that cuts through the richness nicely.
If you have leftovers (which is rare!), store the sliders in an airtight container in the refrigerator for up to 2 days. To reheat, cover them loosely with foil and warm in a 350°F (175°C) oven for about 10 minutes to bring back the melty cheese and crisp the buns again. Avoid microwaving if you want to keep that crunch.
Flavors tend to meld and deepen slightly after a night in the fridge, so reheated sliders taste surprisingly good too.
Nutritional Information & Benefits
Each slider contains approximately 250-300 calories, depending on your bun and cheese choices. Using 80/20 ground beef strikes a balance between flavor and fat content. The protein-packed beef provides essential amino acids and iron, making these sliders a satisfying snack or meal.
The recipe can be adapted for lower-carb diets by swapping the buns for lettuce wraps or low-carb rolls. For gluten-free diets, gluten-free slider buns work well, just be mindful of the toppings and condiments.
Keep in mind, these sliders contain dairy (cheddar cheese) and gluten (buns), so they’re not suitable if you have allergies to those ingredients without substitutions.
From a wellness perspective, I appreciate that this recipe doesn’t rely on processed ingredients or excessive additives — it’s straightforward, made-from-scratch comfort food that you can feel good about sharing.
Conclusion
If you’re looking for a simple, crowd-friendly game day recipe, these Crispy Sheet Pan Cheeseburger Sliders deliver every time. They’re quick to make, use accessible ingredients, and come out with that perfect crispy-cheesy-meaty combo that makes people smile. What I love most is how easy it is to customize them to your taste — whether you want to add some heat, go vegetarian, or toss in seasonal toppings.
Making these sliders feels like a small win, especially when watching your friends or family enjoy them without fuss. They’re the kind of recipe that keeps me coming back for game day and beyond. If you try them out, I’d love to hear how you make them your own — feel free to share your tweaks or favorite toppings in the comments below!
And if you want even more party-friendly slider ideas, the pulled pork sliders with creamy coleslaw I mentioned earlier are a perfect next try for your get-togethers.
Frequently Asked Questions
How do I keep the slider buns from getting soggy?
Brushing the buns with melted butter and toasting them cut side up on the sheet pan helps create a crispy barrier. Also, avoid piling on too many wet toppings before serving.
Can I make these sliders ahead of time?
You can assemble the sliders up to the baking step and refrigerate for a few hours. Bake just before serving for best texture.
What’s the best ground beef to use?
Choose 80/20 ground beef for a good balance of flavor and juiciness. Leaner beef can dry out the sliders.
Can I freeze leftover sliders?
Yes, wrap them individually in foil and freeze for up to 2 months. Reheat in the oven to restore crispness.
How can I make these sliders vegetarian?
Swap the beef for plant-based ground meat alternatives and use vegan cheese slices. Toast the buns with olive oil instead of butter.
Pin This Recipe!
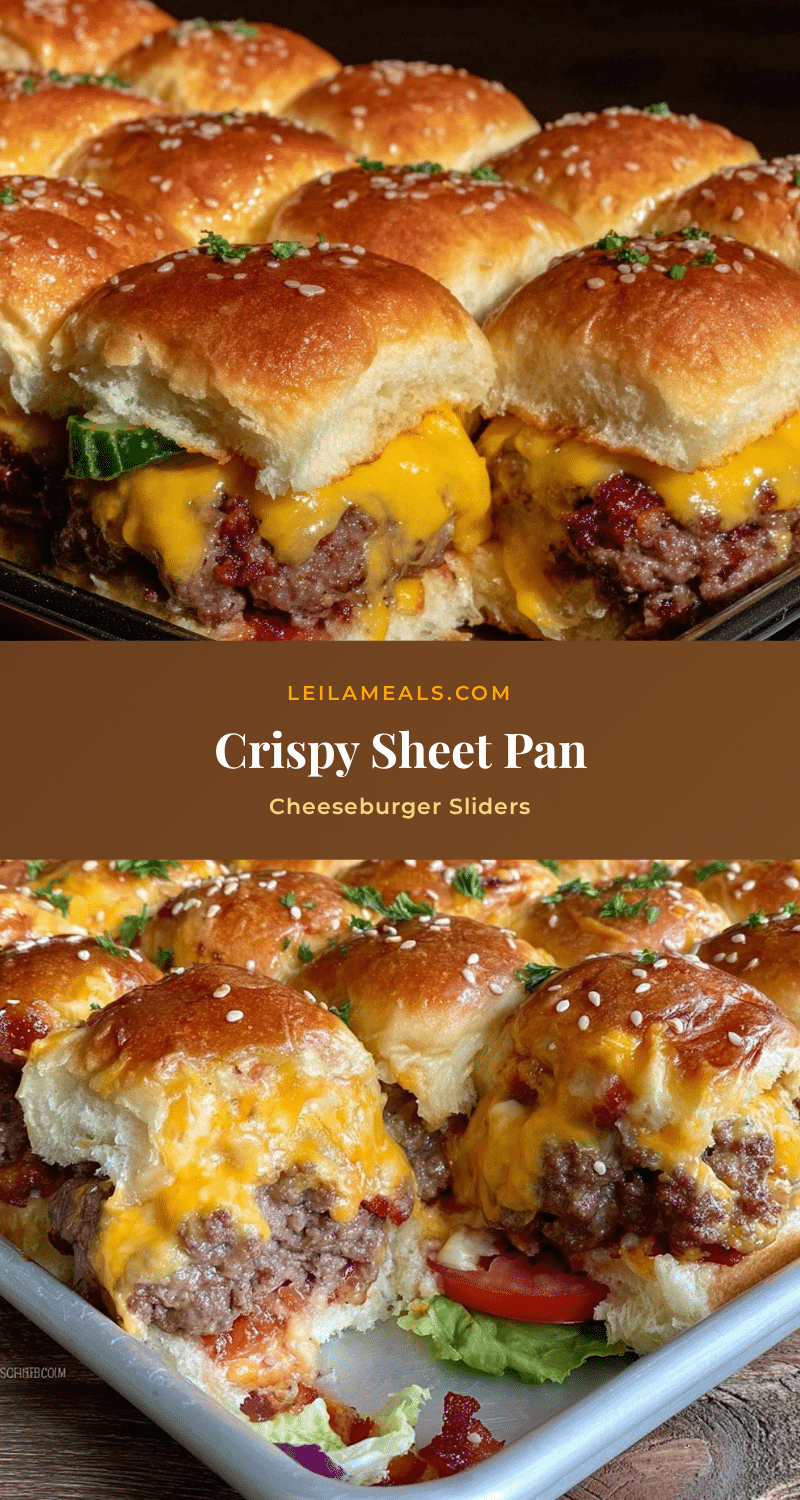
Crispy Sheet Pan Cheeseburger Sliders
These Crispy Sheet Pan Cheeseburger Sliders are a quick, crowd-pleasing game day snack featuring juicy beef patties, melted cheddar, and toasted buns all cooked on one sheet pan for easy preparation and cleanup.
- Prep Time: 10 minutes
- Cook Time: 18 minutes
- Total Time: 28 minutes
- Yield: 12 sliders 1x
- Category: Appetizer
- Cuisine: American
Ingredients
- 1 ½ pounds (680g) ground beef (80/20 blend recommended for juiciness)
- 1 teaspoon garlic powder
- 1 teaspoon smoked paprika
- 1 teaspoon onion powder
- Salt and freshly ground black pepper, to taste
- 12 slider buns (soft, preferably brioche or potato buns)
- 3 tablespoons butter, melted (for toasting buns)
- 12 slices sharp cheddar cheese
- Dill pickle slices
- Fresh lettuce leaves, washed and dried
- Thinly sliced red onion
- Ketchup, for serving
- Mustard, for serving
Instructions
- Preheat your oven to 400°F (200°C).
- In a large bowl, combine ground beef with garlic powder, smoked paprika, onion powder, salt, and pepper. Mix gently to avoid overworking the meat.
- Slice the slider buns in half horizontally. Place the bottom halves on a rimmed sheet pan, spaced evenly.
- Divide the seasoned beef into 12 equal portions and shape each into small patties slightly larger than the bun bottoms. Place each patty directly on top of the buns on the sheet pan.
- Place a slice of cheddar cheese on each patty.
- Brush the top halves of the buns with melted butter and arrange them cut side up around the patties on the sheet pan.
- Bake in the preheated oven for 15-18 minutes until the beef reaches an internal temperature of 160°F (71°C), the cheese is melted, and the buns have crispy edges but remain soft inside.
- Remove the sheet pan from the oven. Add dill pickle slices, lettuce, and red onion on the bottom buns.
- Top with the buttered top halves of the buns.
- Serve immediately with ketchup and mustard on the side or drizzled over the sliders.
Notes
Do not overmix the beef to keep patties tender. Use a rimmed sheet pan to catch juices and prevent mess. Brush buns generously with melted butter for a crispy, golden crust. Arrange buns and patties with space for air circulation to achieve crispy edges. If buns brown too quickly, tent with foil. For extra crispiness, broil for 1-2 minutes at the end but watch closely to avoid burning. Sliders can be assembled ahead and refrigerated before baking. Leftovers store well in the fridge for up to 2 days and reheat best in the oven to maintain crispness.
Nutrition
- Serving Size: 1 slider
- Calories: 275
- Sugar: 3
- Sodium: 450
- Fat: 18
- Saturated Fat: 8
- Carbohydrates: 18
- Fiber: 1
- Protein: 15
Keywords: cheeseburger sliders, sheet pan recipe, game day snacks, easy sliders, crowd-pleaser, quick recipe, crispy sliders


